
Charging Station Management (CPMS)
Monitor and control every charger from one dashboard.
Real-time visibility into every station, remote diagnostics, and OCPP compatibility across hardware brands — issues get fixed before drivers notice.
Key features
Live monitoring
See every port's status — available, charging, faulted, offline — as it happens.
Remote diagnostics
Reset, restart, or troubleshoot a charger without a truck roll.
Multi-brand OCPP
Manage hardware from different manufacturers on one platform.
Company vehicles & MAC AutoCharge
Add company vehicles and pair each one to its MAC address for AutoCharge that's more secure than RFID alone — no risk of a driver charging on the wrong vehicle.
OCPP configuration
See charger uptime and network status, connector status, charging sessions, OCPP logs, firmware, and certificates — plus remote actions, all in one place.
Team members & special pricing
Add members to your team, host guest teams from partner sites, or join another site as a guest team — with member-only pricing separate from the public rate.
How it works
Register
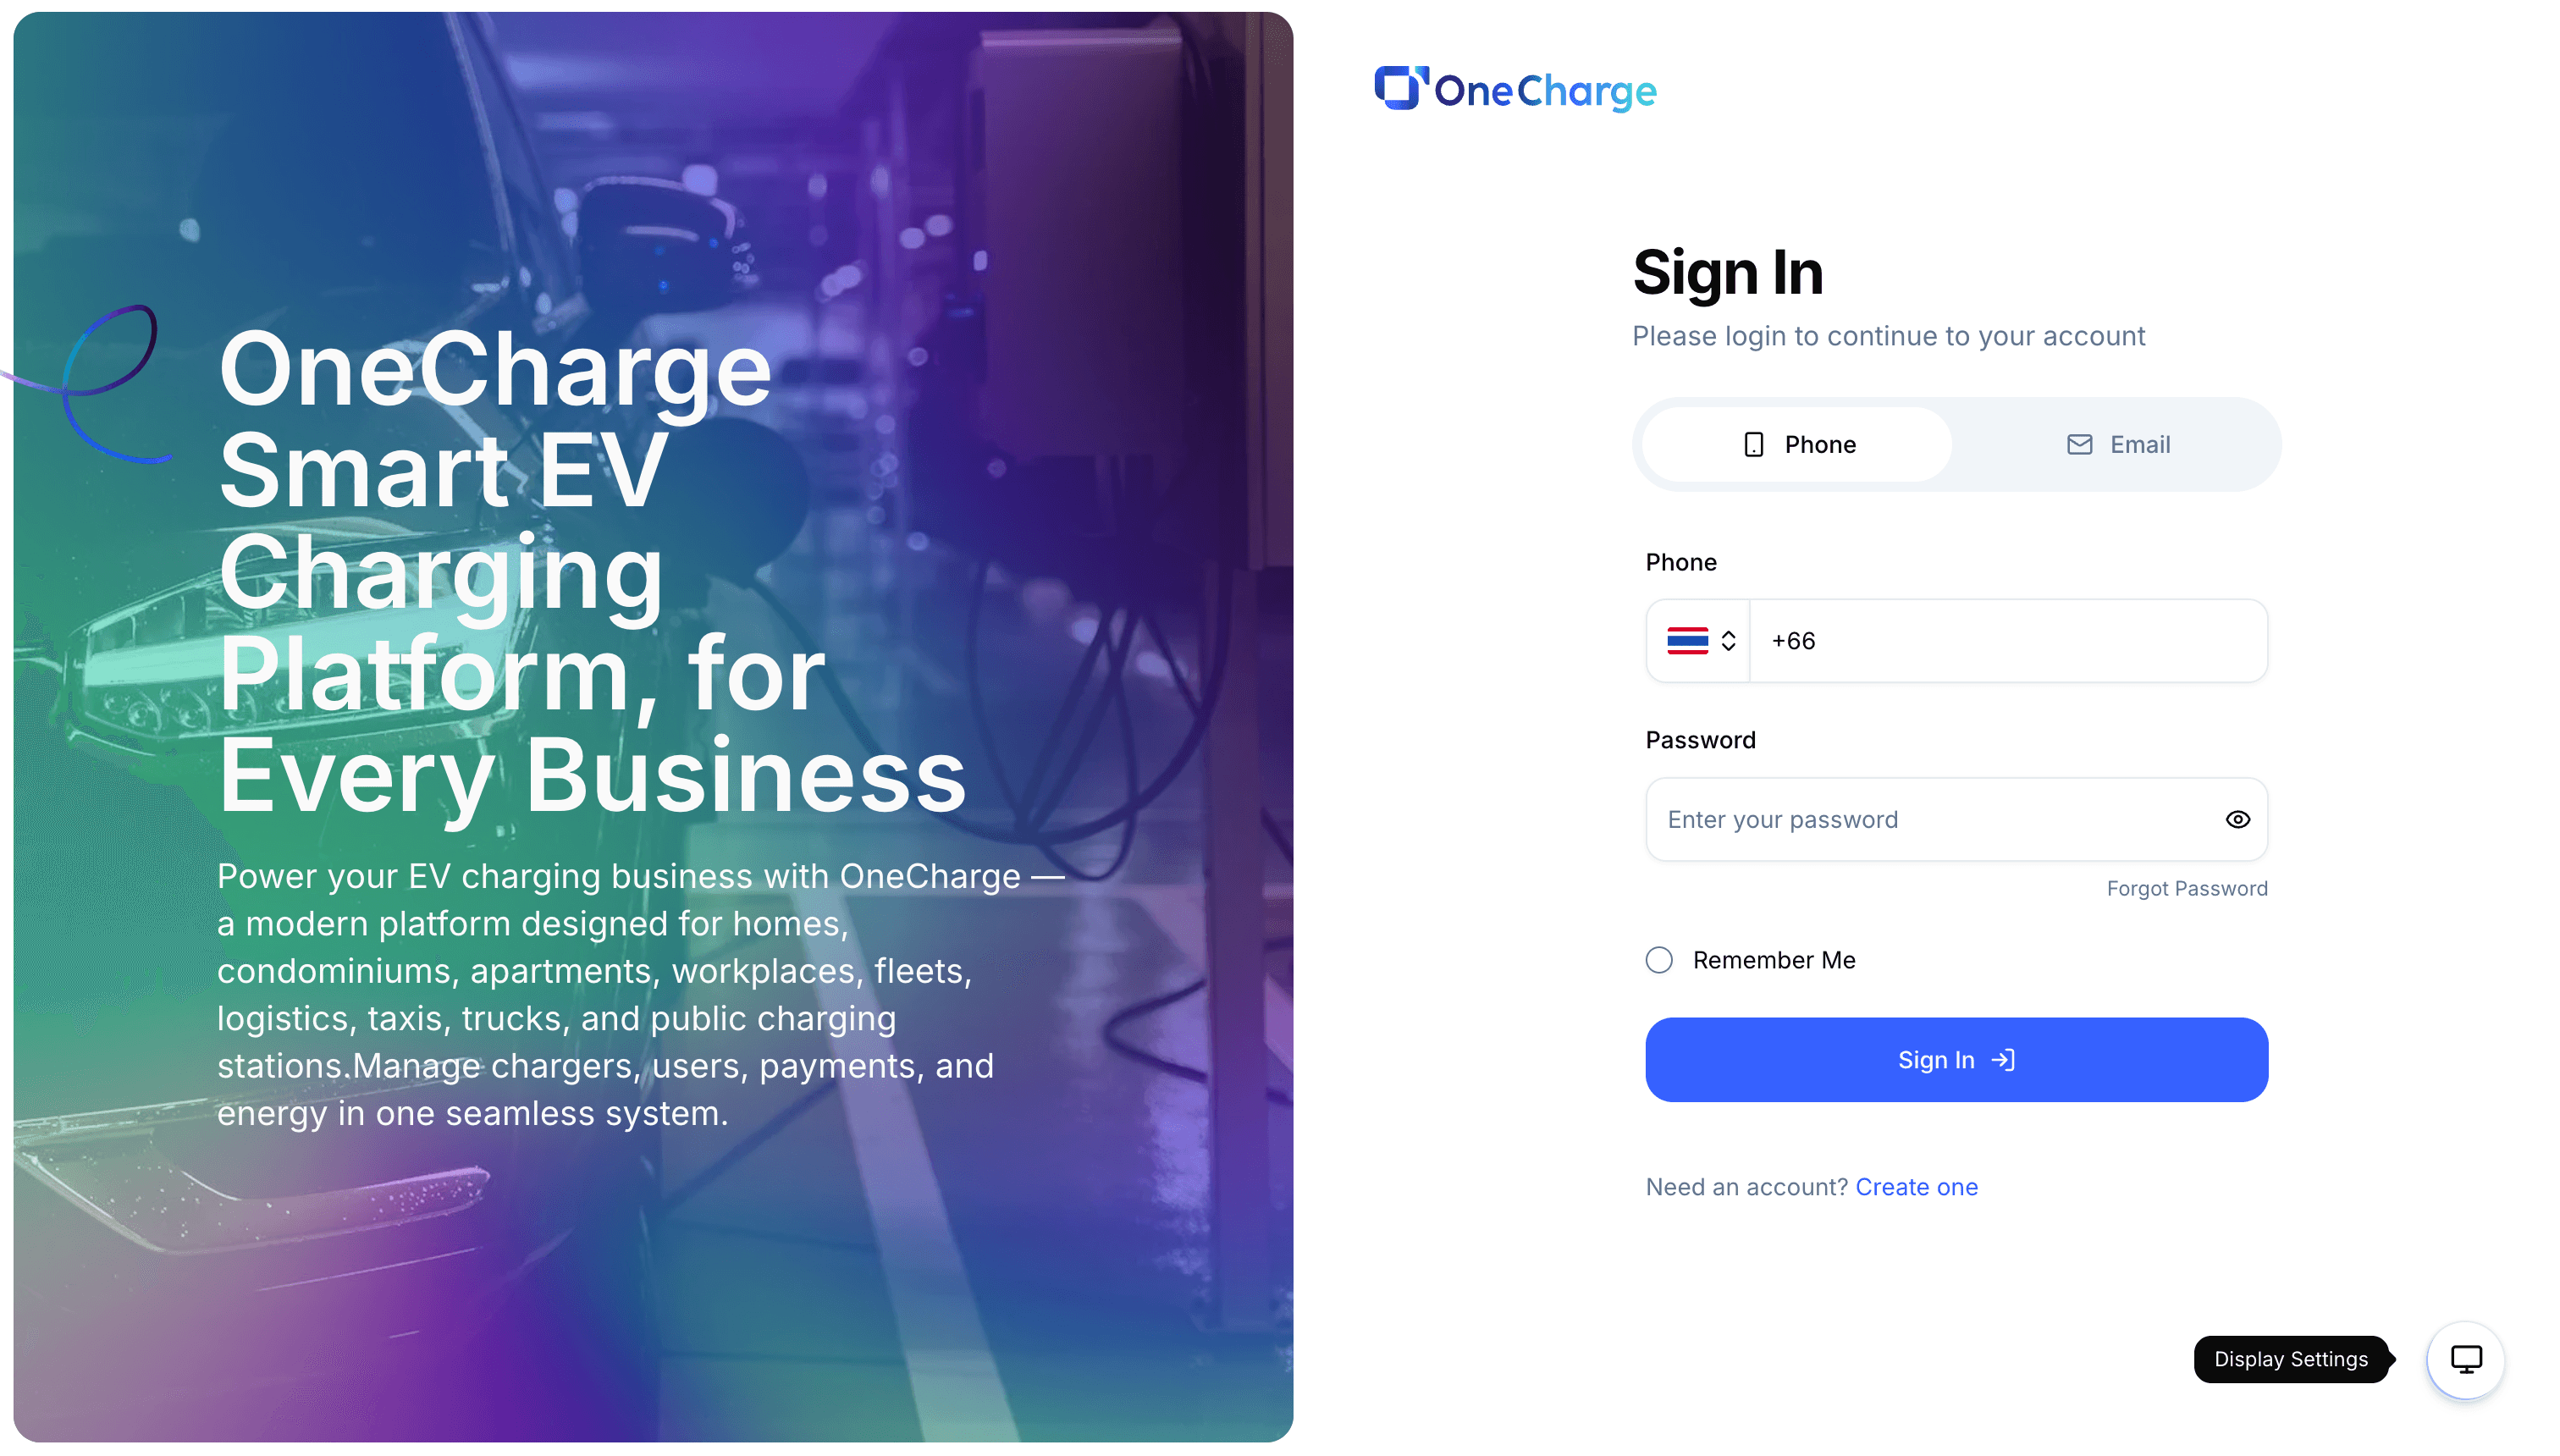
Sign in to the OneCharge dashboard with your phone number or email, or click "Create one" to register a new site-owner account.
Add your stations, chargers and connectors
Add a charging station
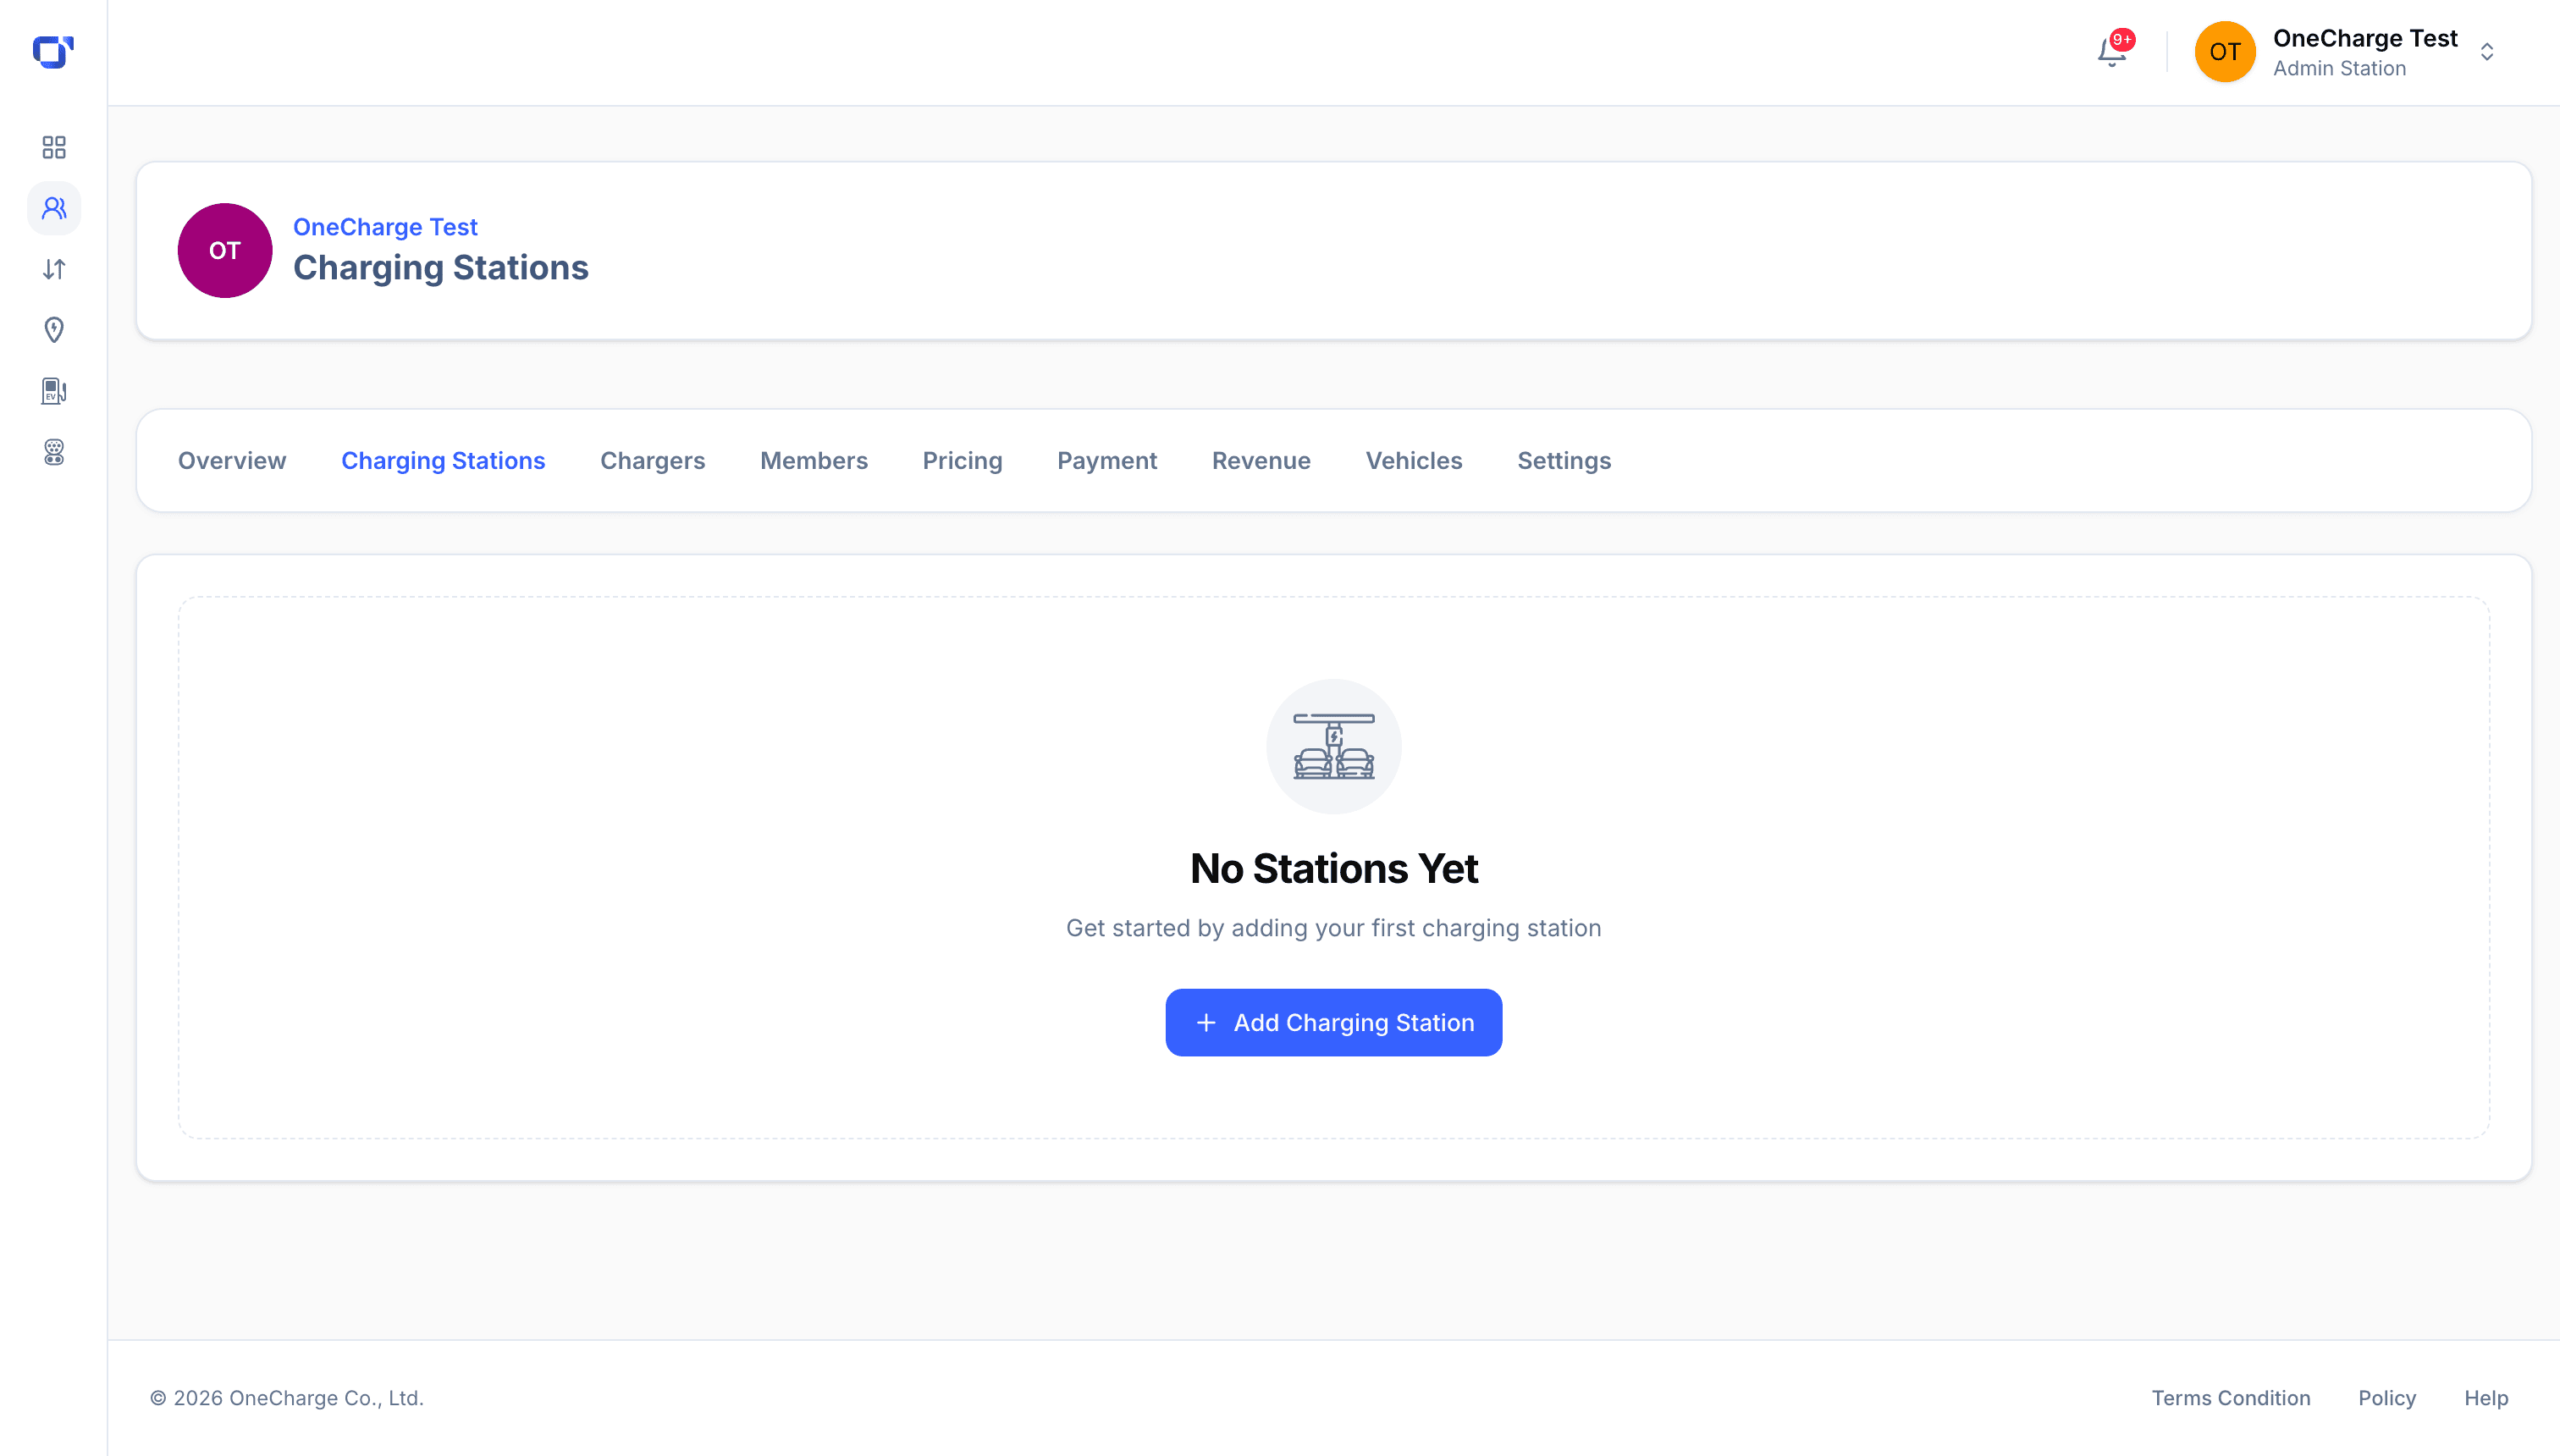
Open the Charging Stations tab and click "Add Charging Station" to add your first location.
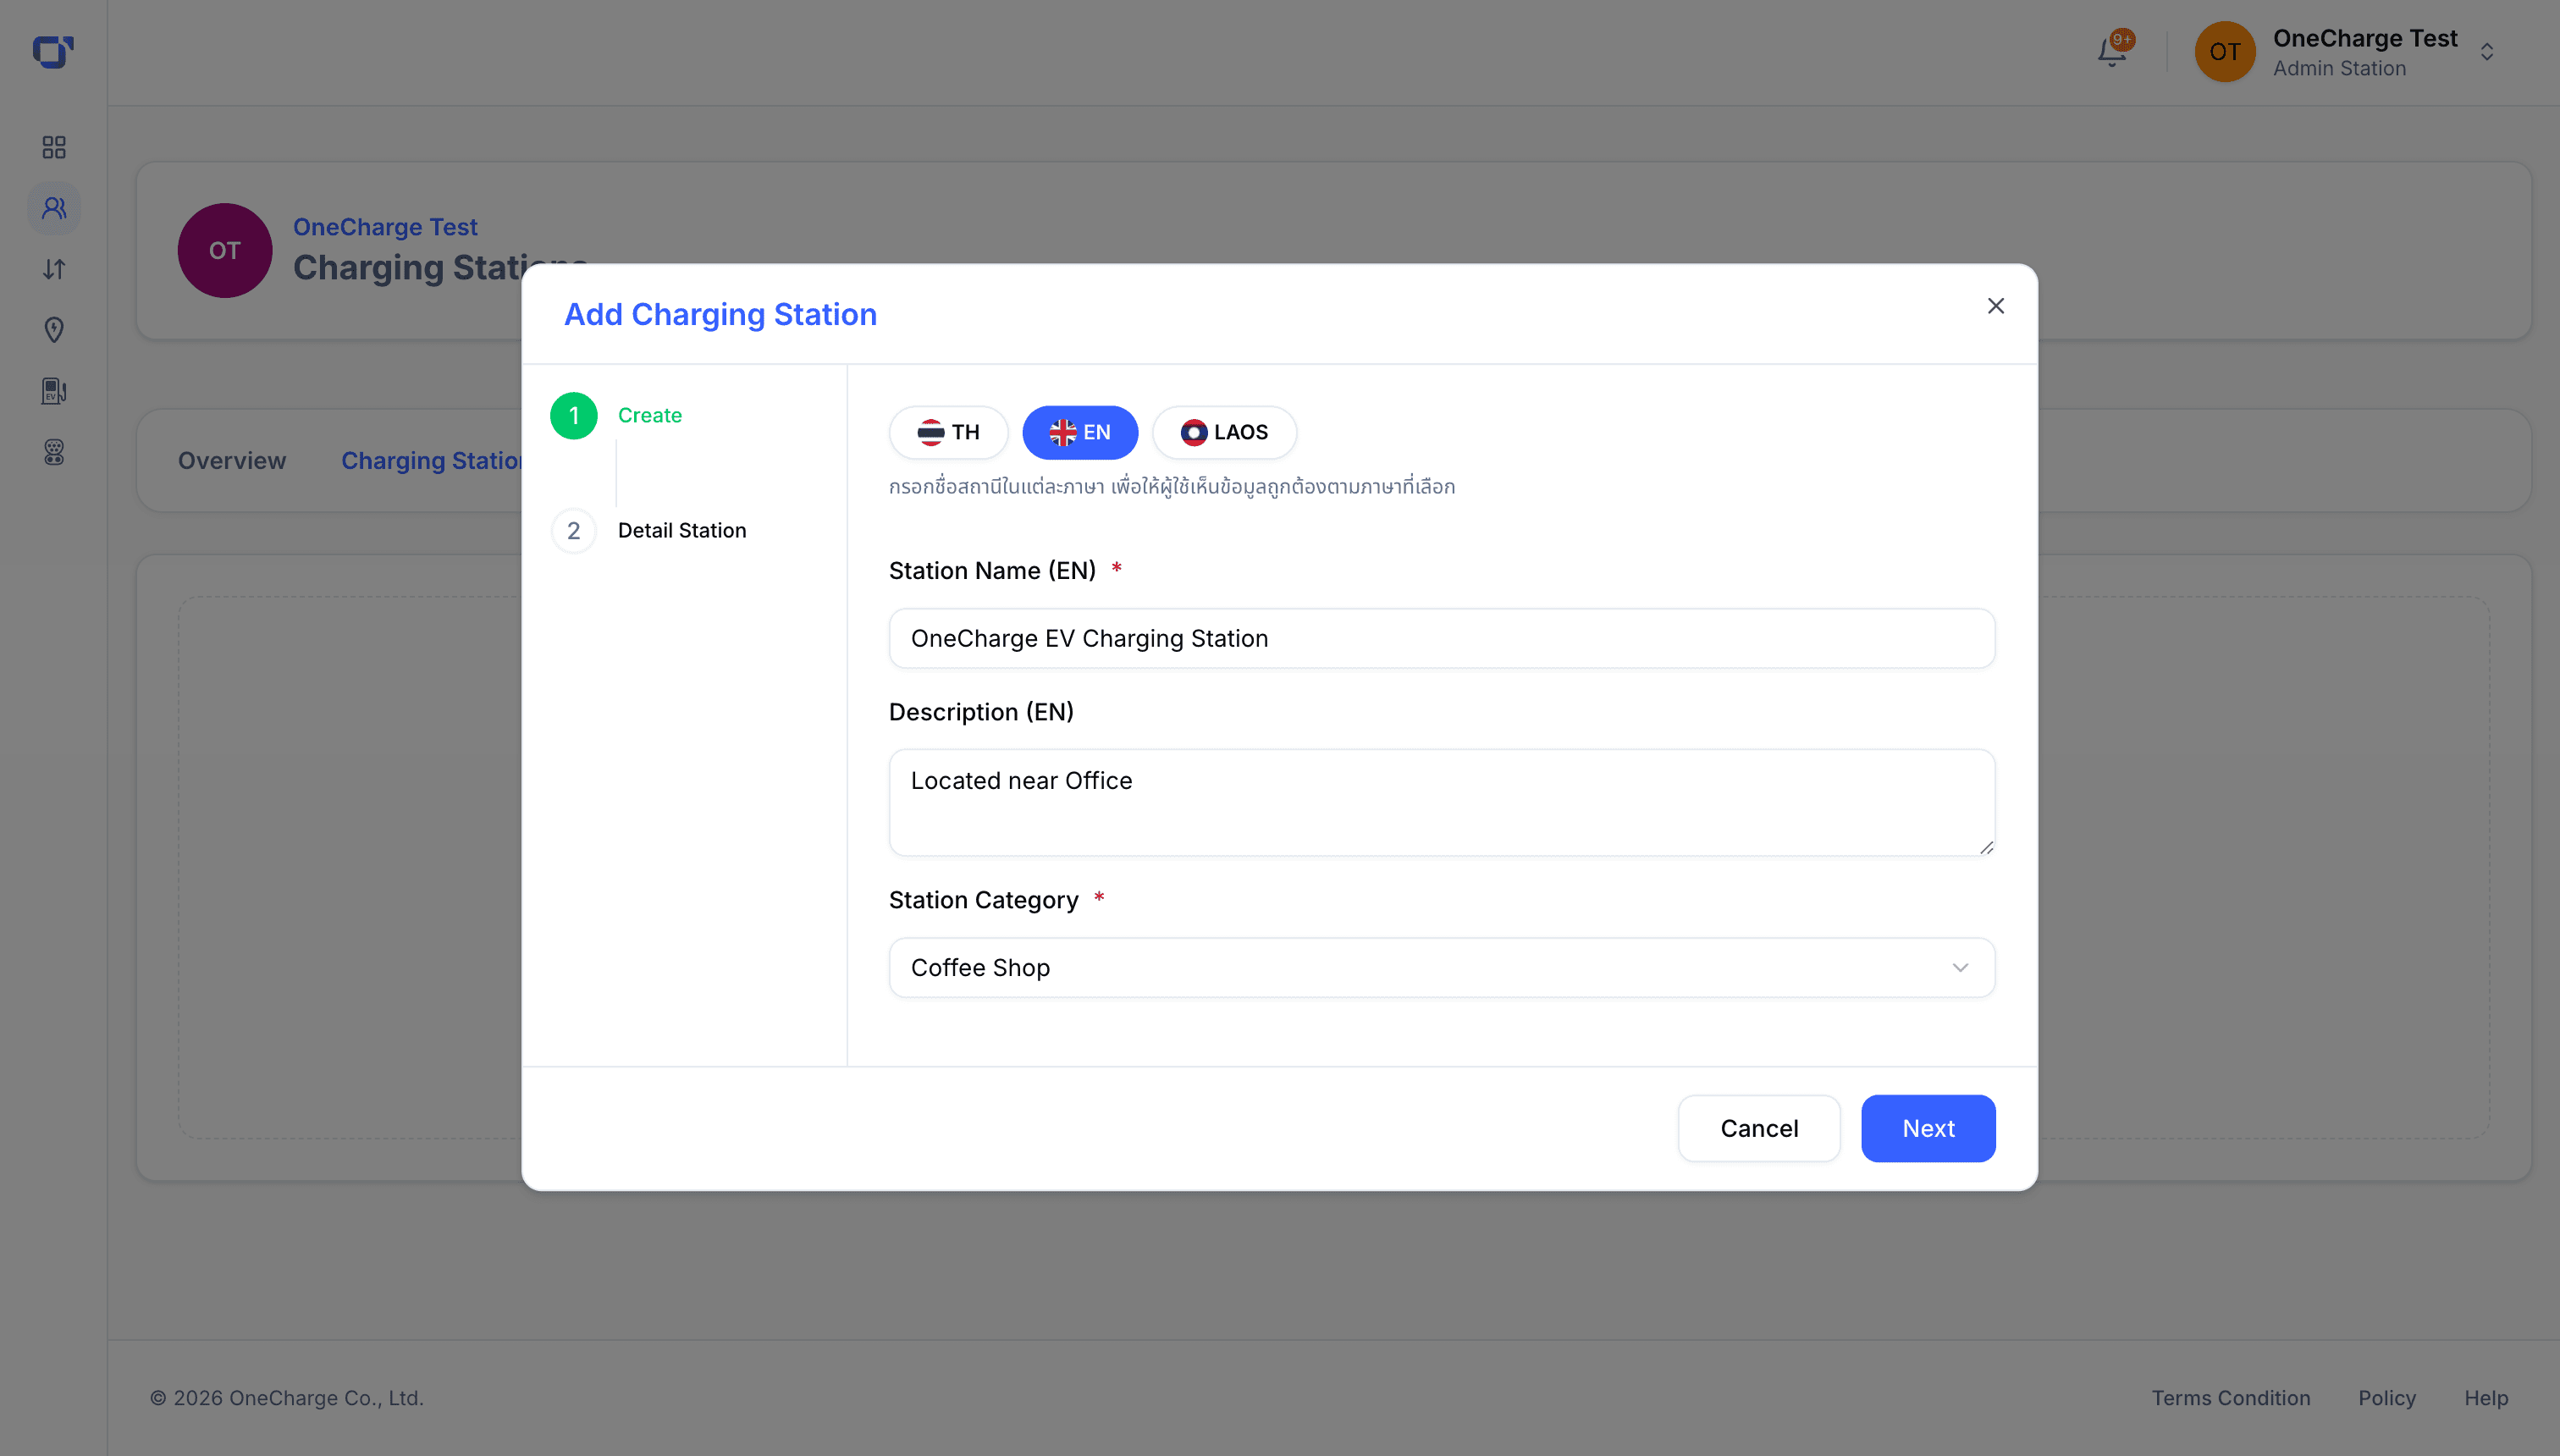
Name the station and add a description per language (Thai/English/Lao), then pick a place category such as "Coffee Shop."
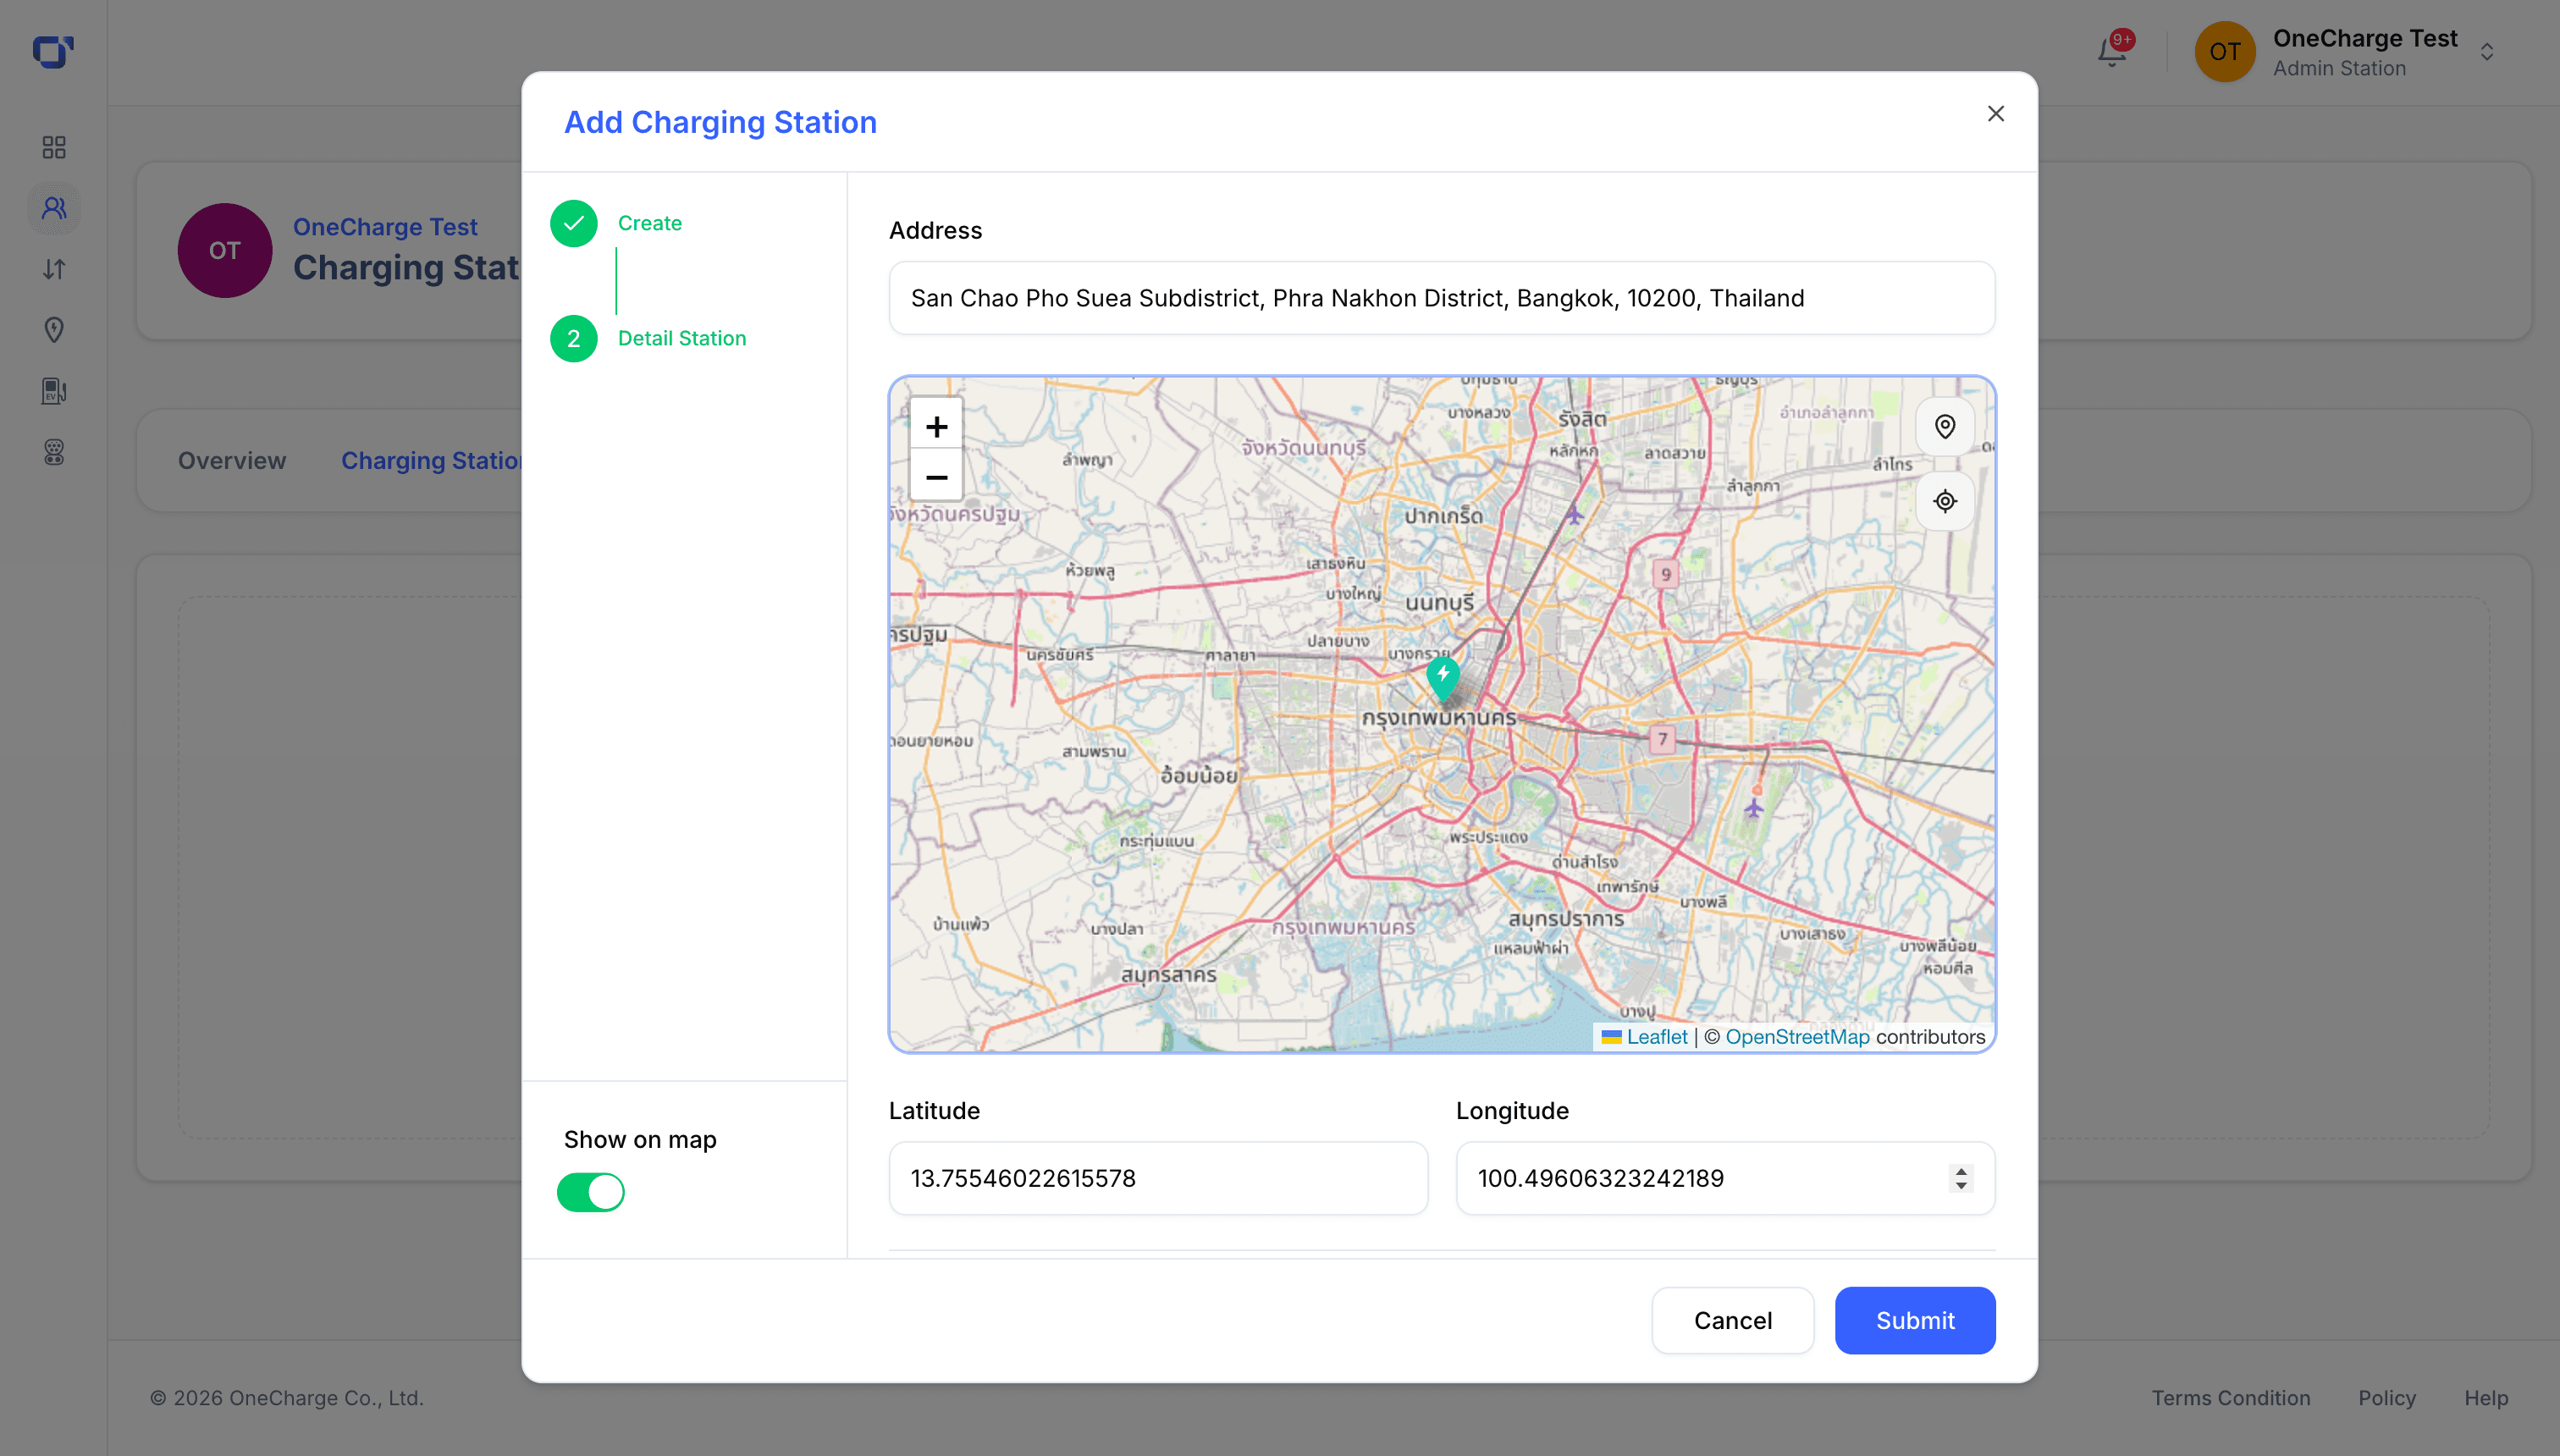
Enter the address or drop a pin on the map — latitude and longitude fill in automatically.
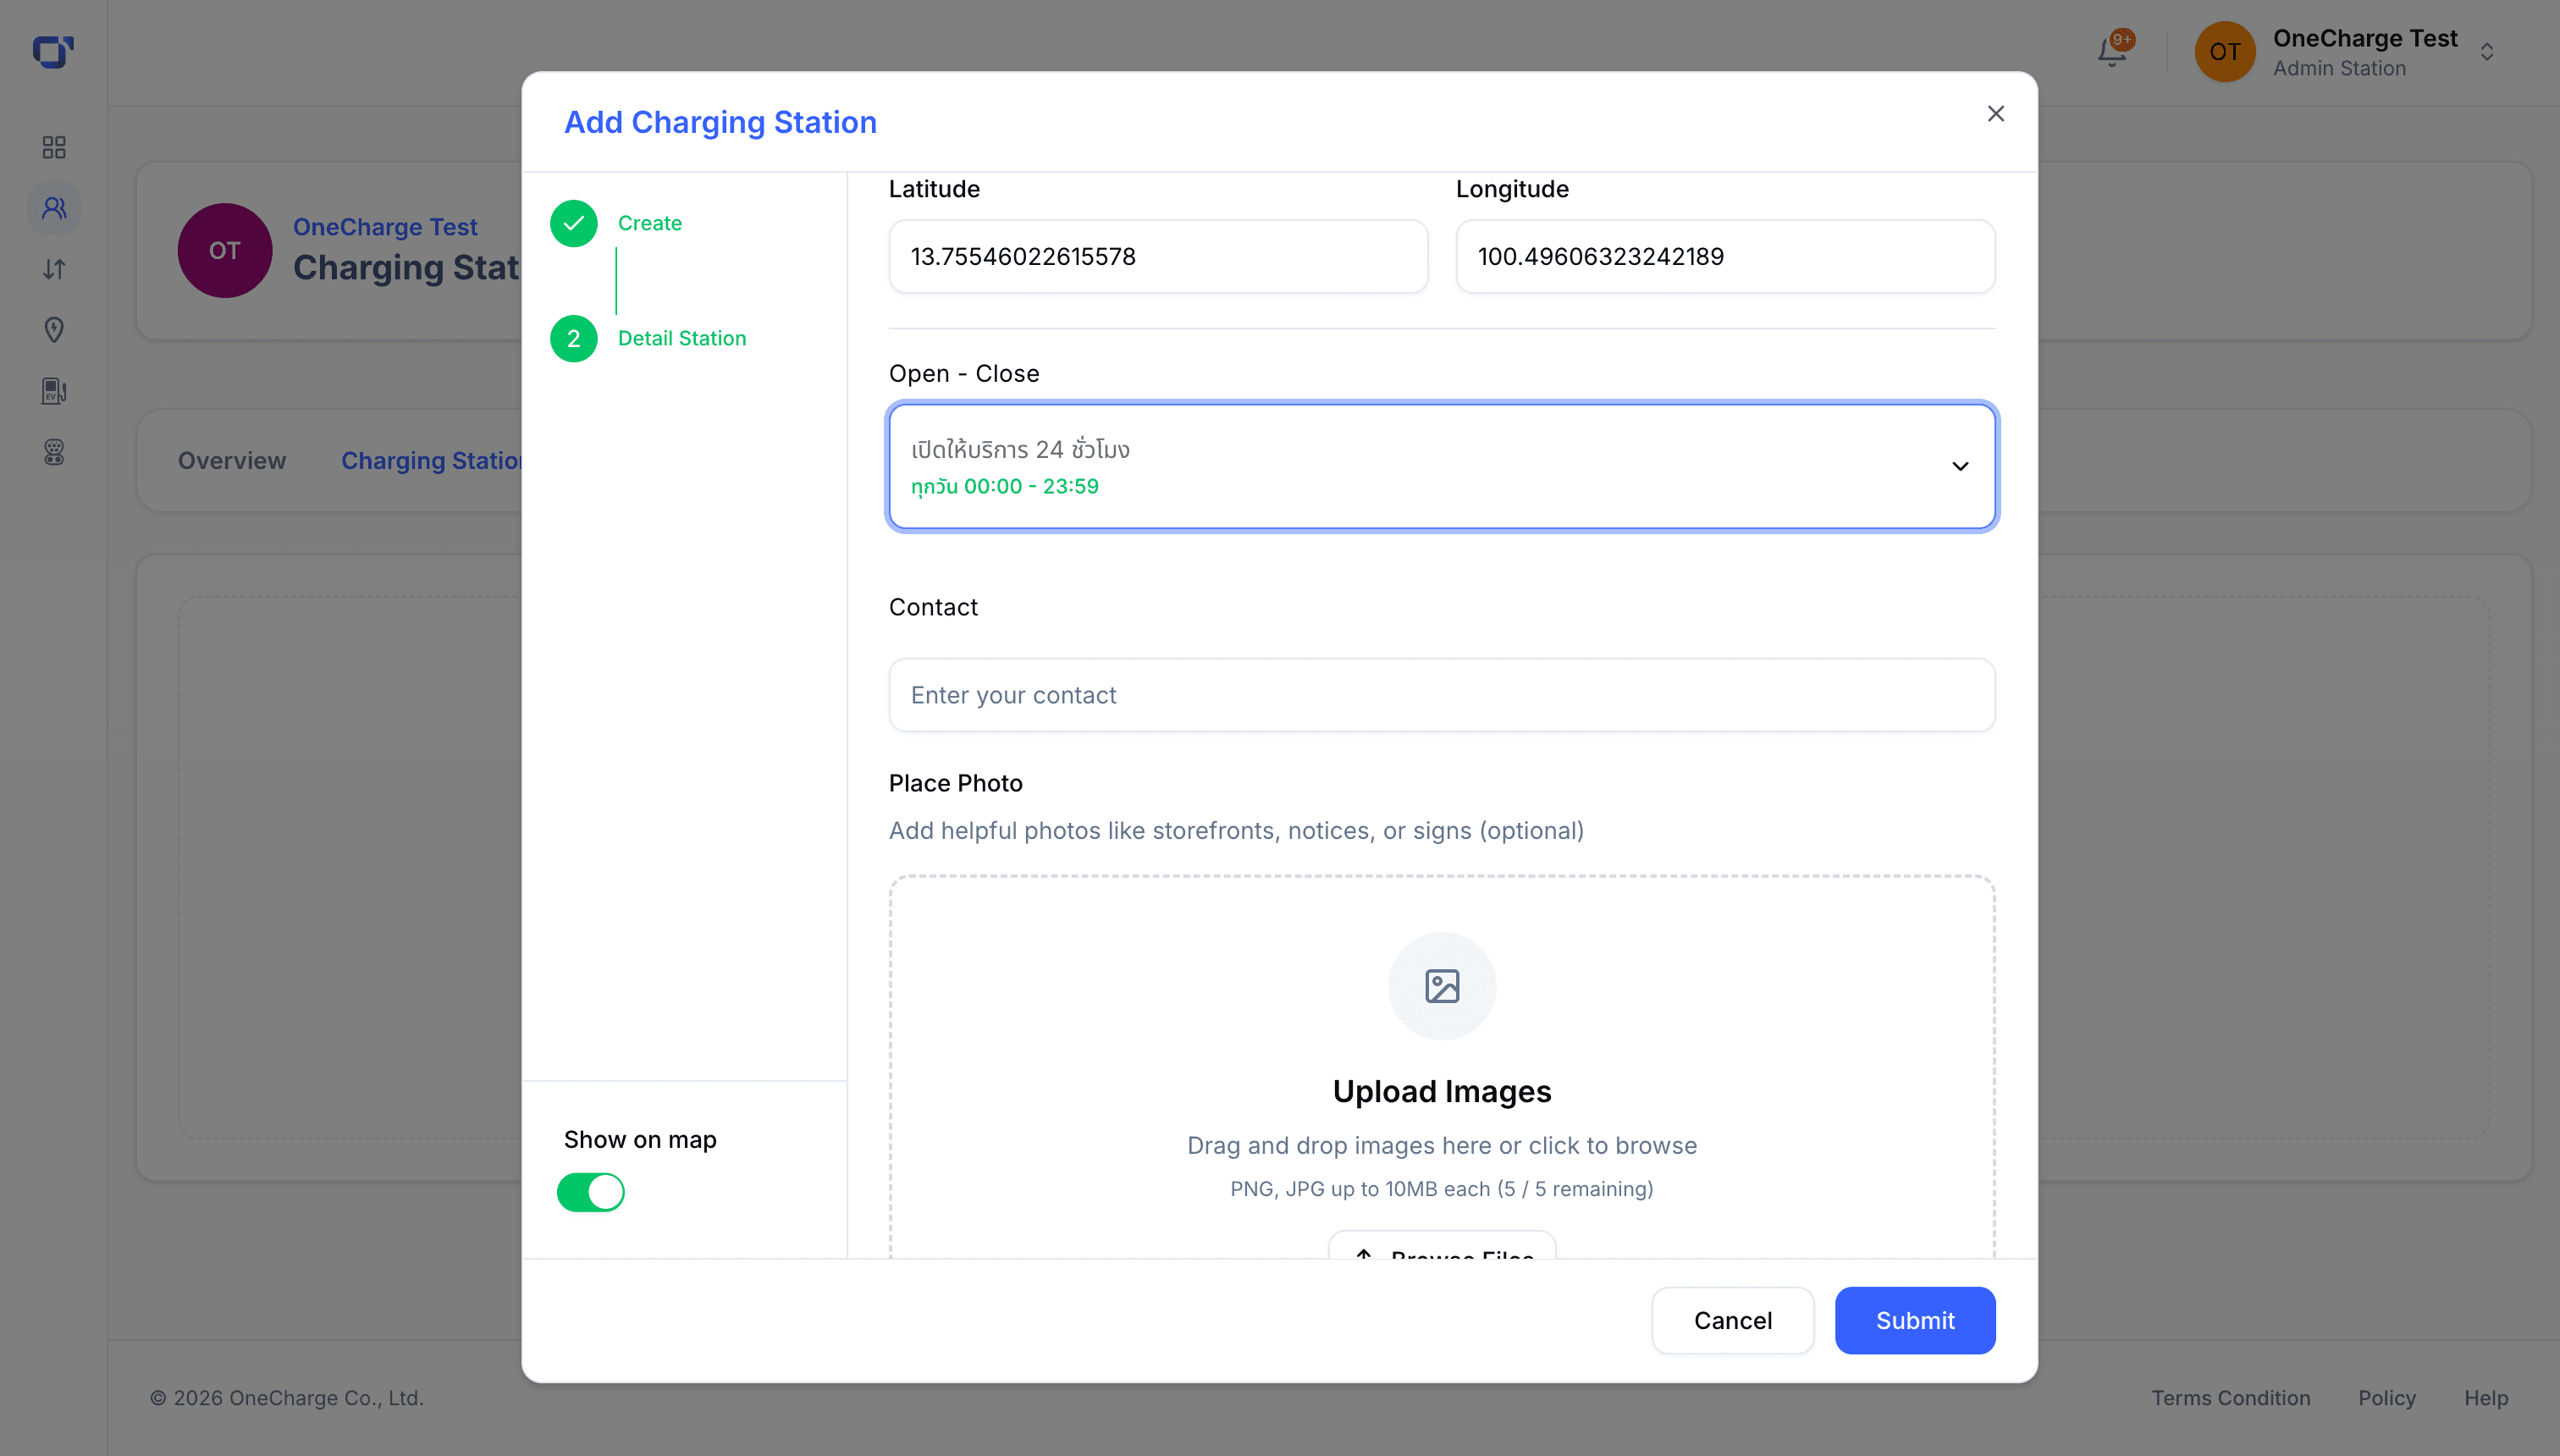
Set opening hours, add a contact channel, and upload photos of the location (optional) so drivers can recognize it.
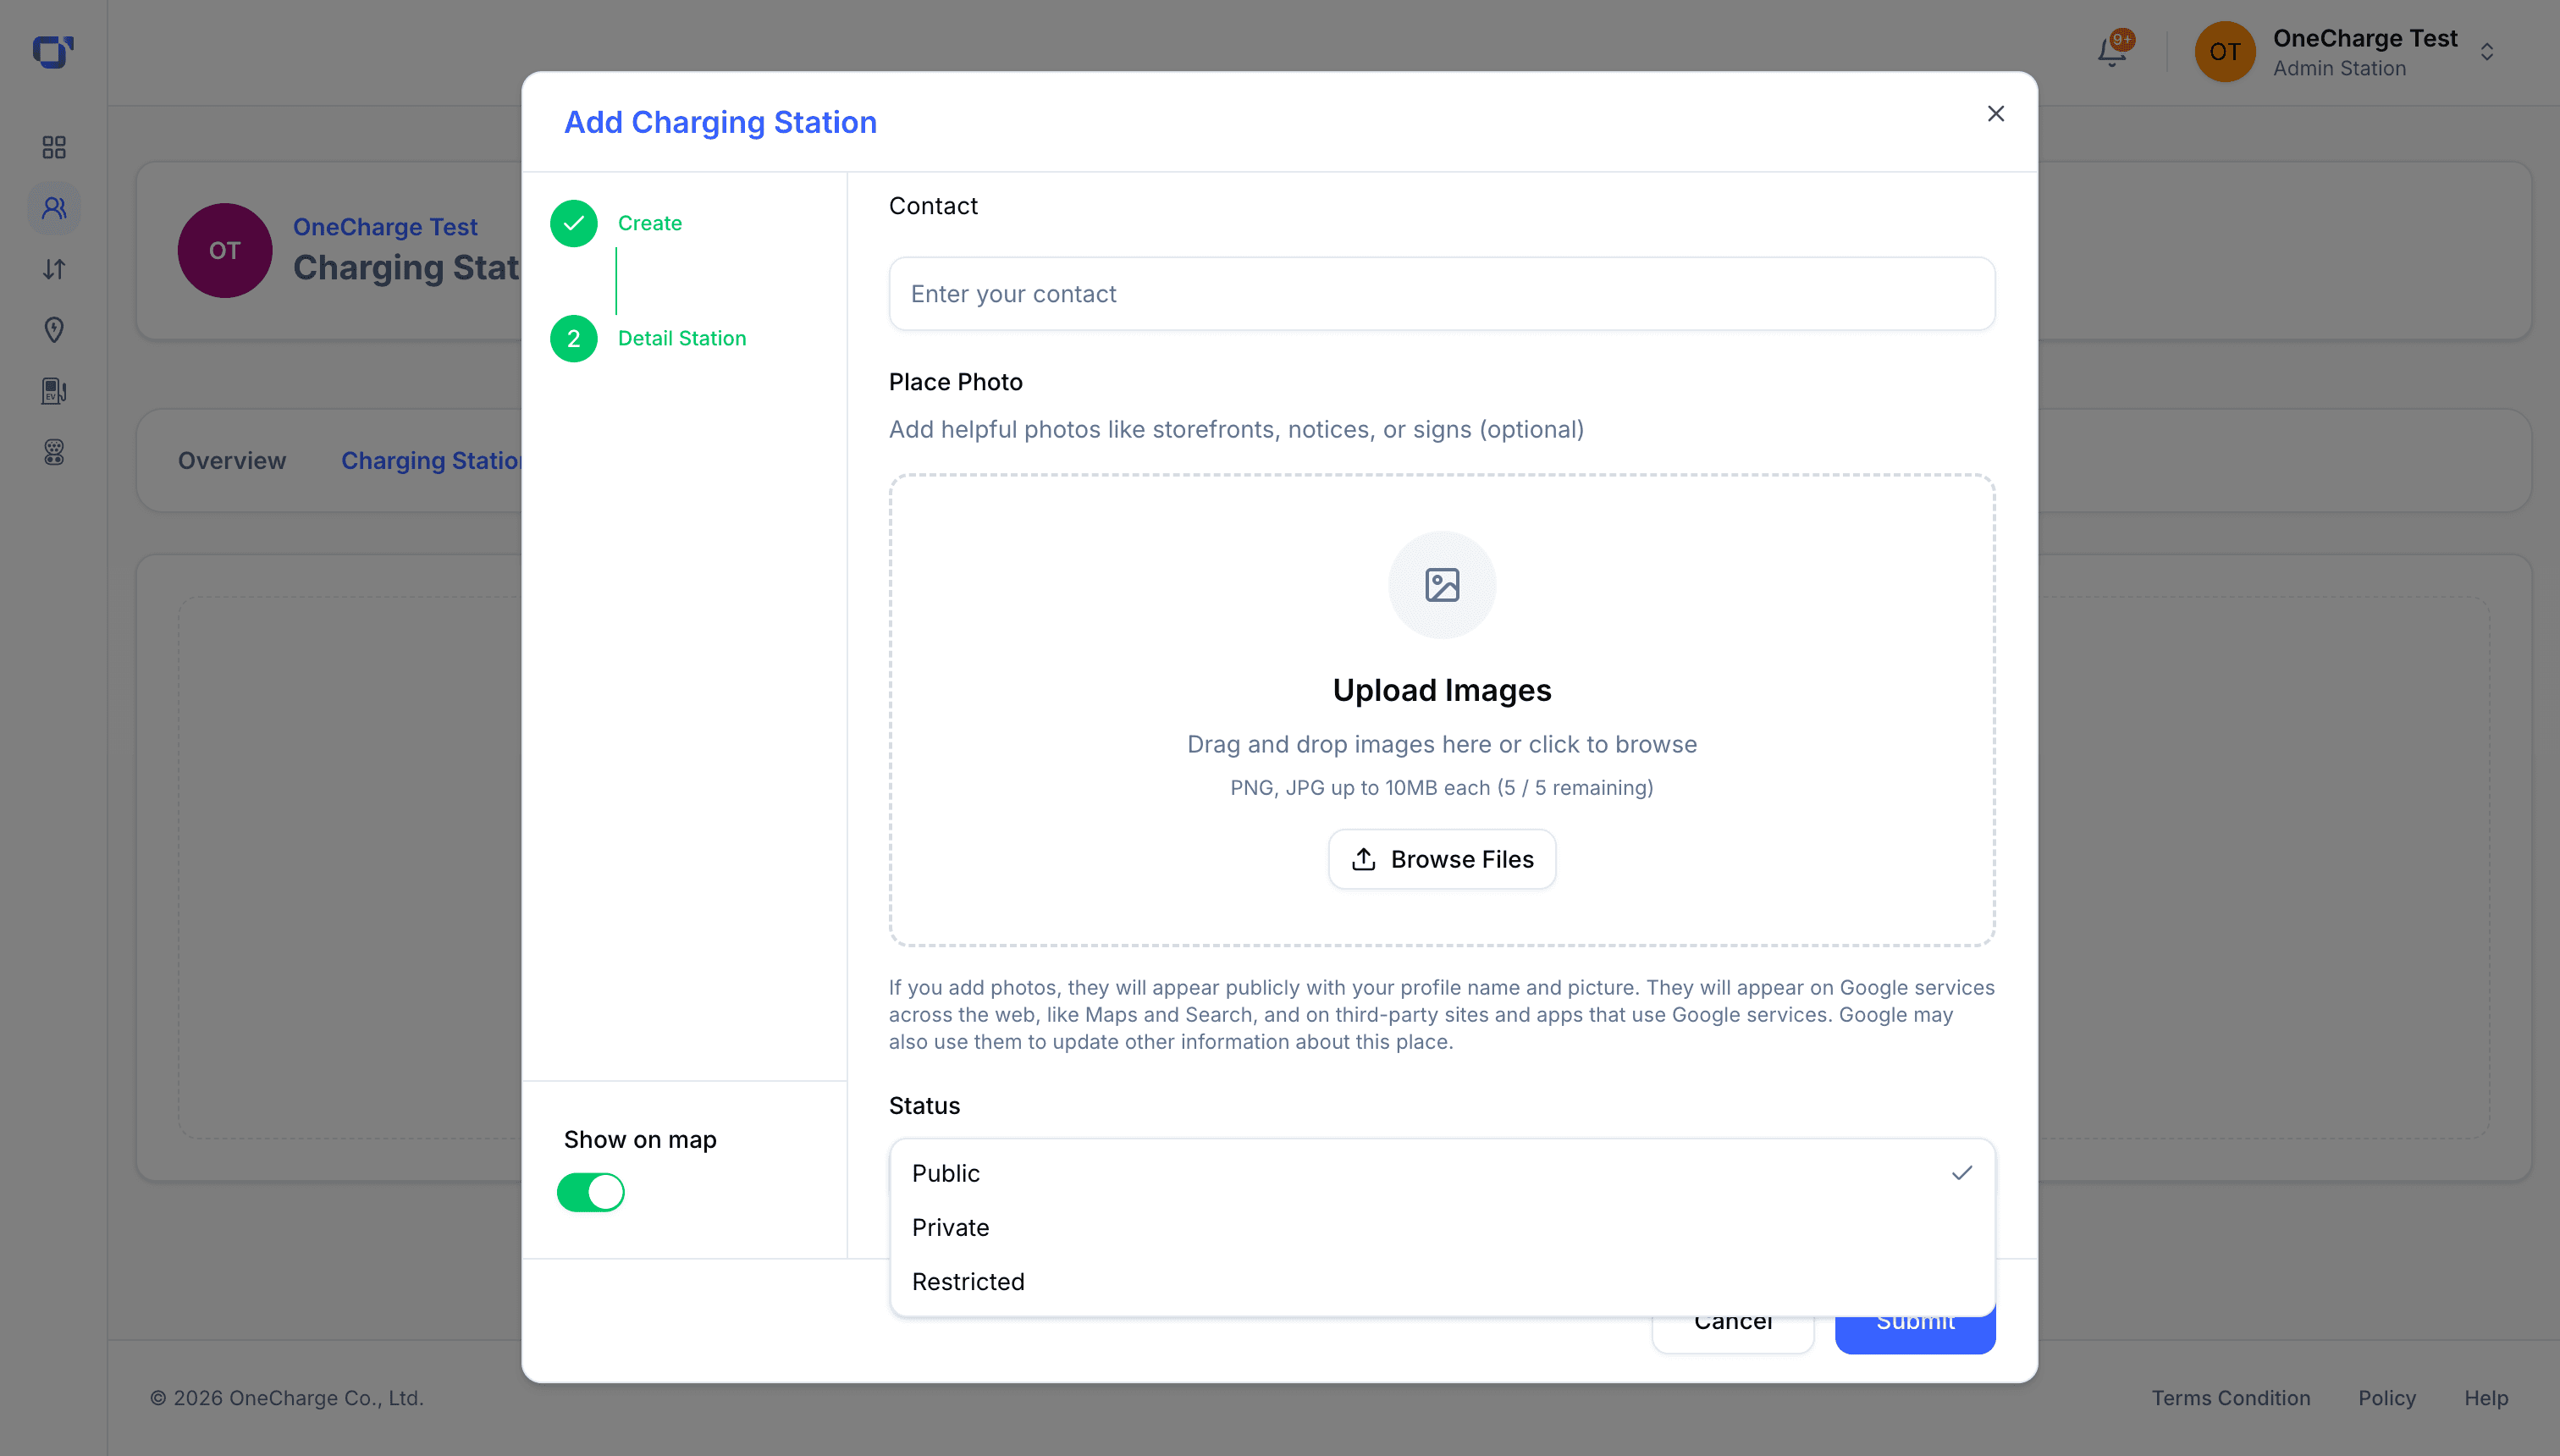
Choose the station's access status: Public for anyone, Private for internal use only, or Restricted for a limited group.
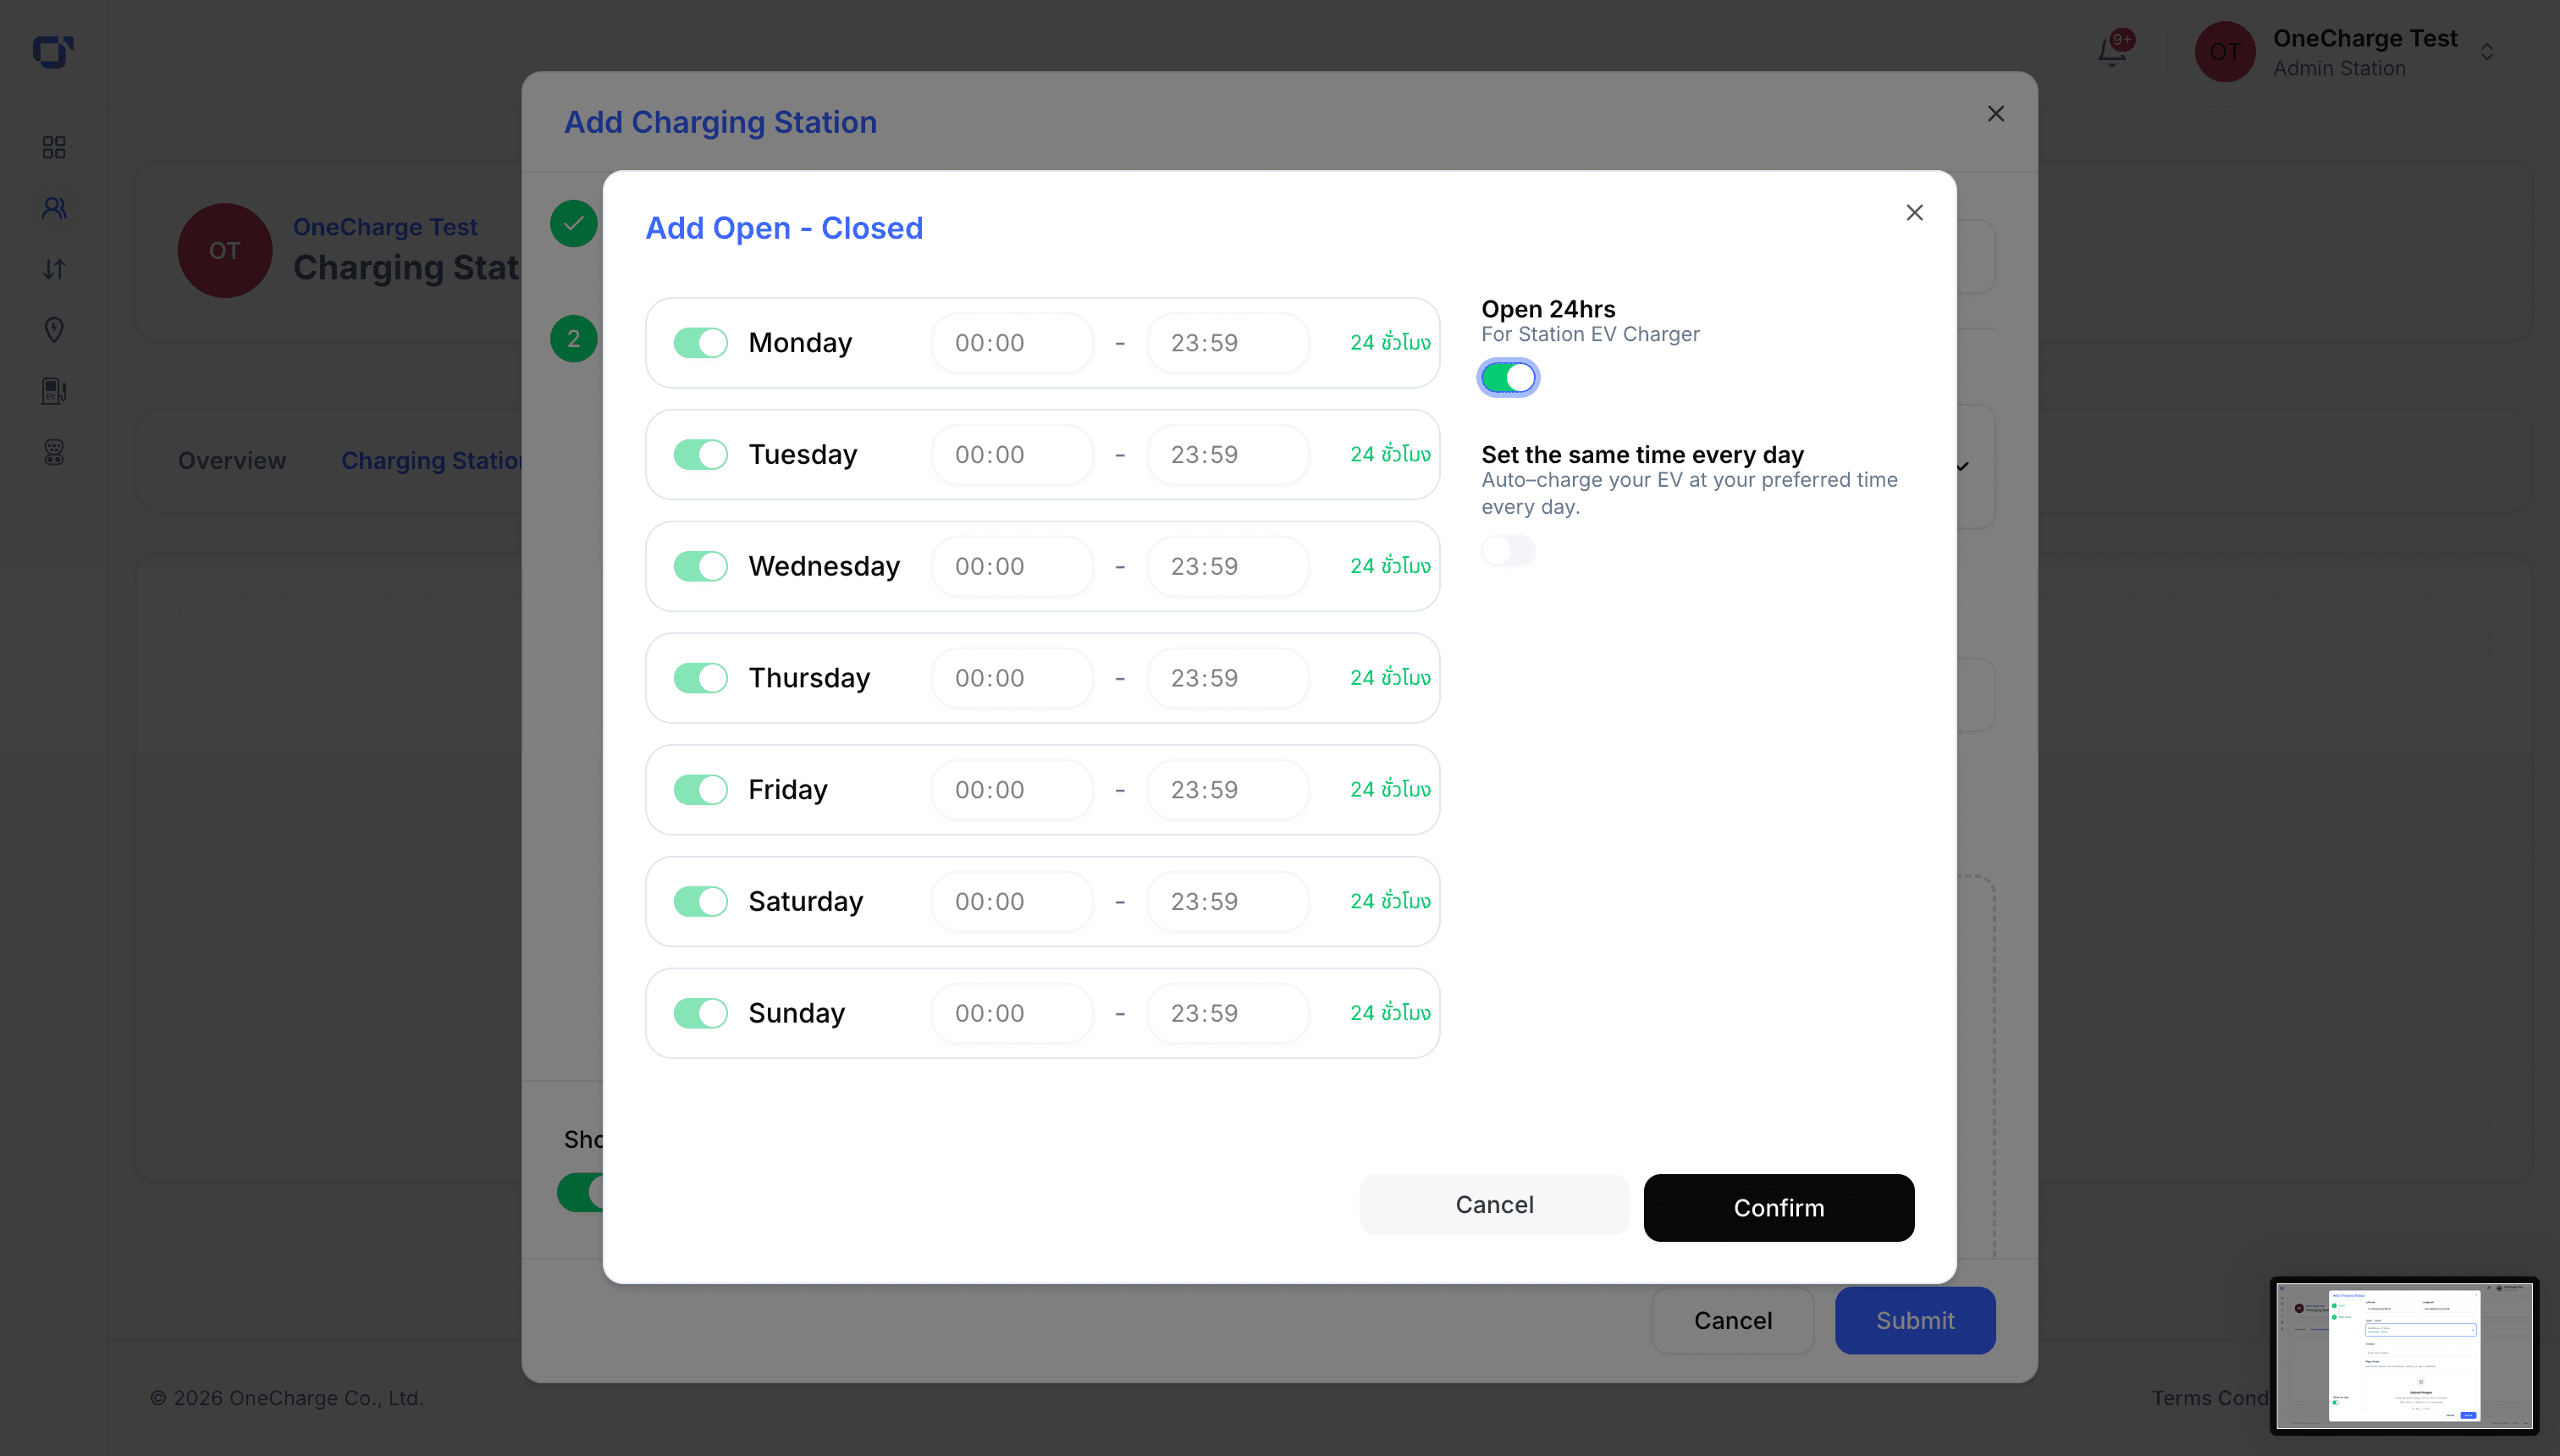
Set opening hours per day of the week, or flip "Open 24hrs" to run round the clock every day in one click.
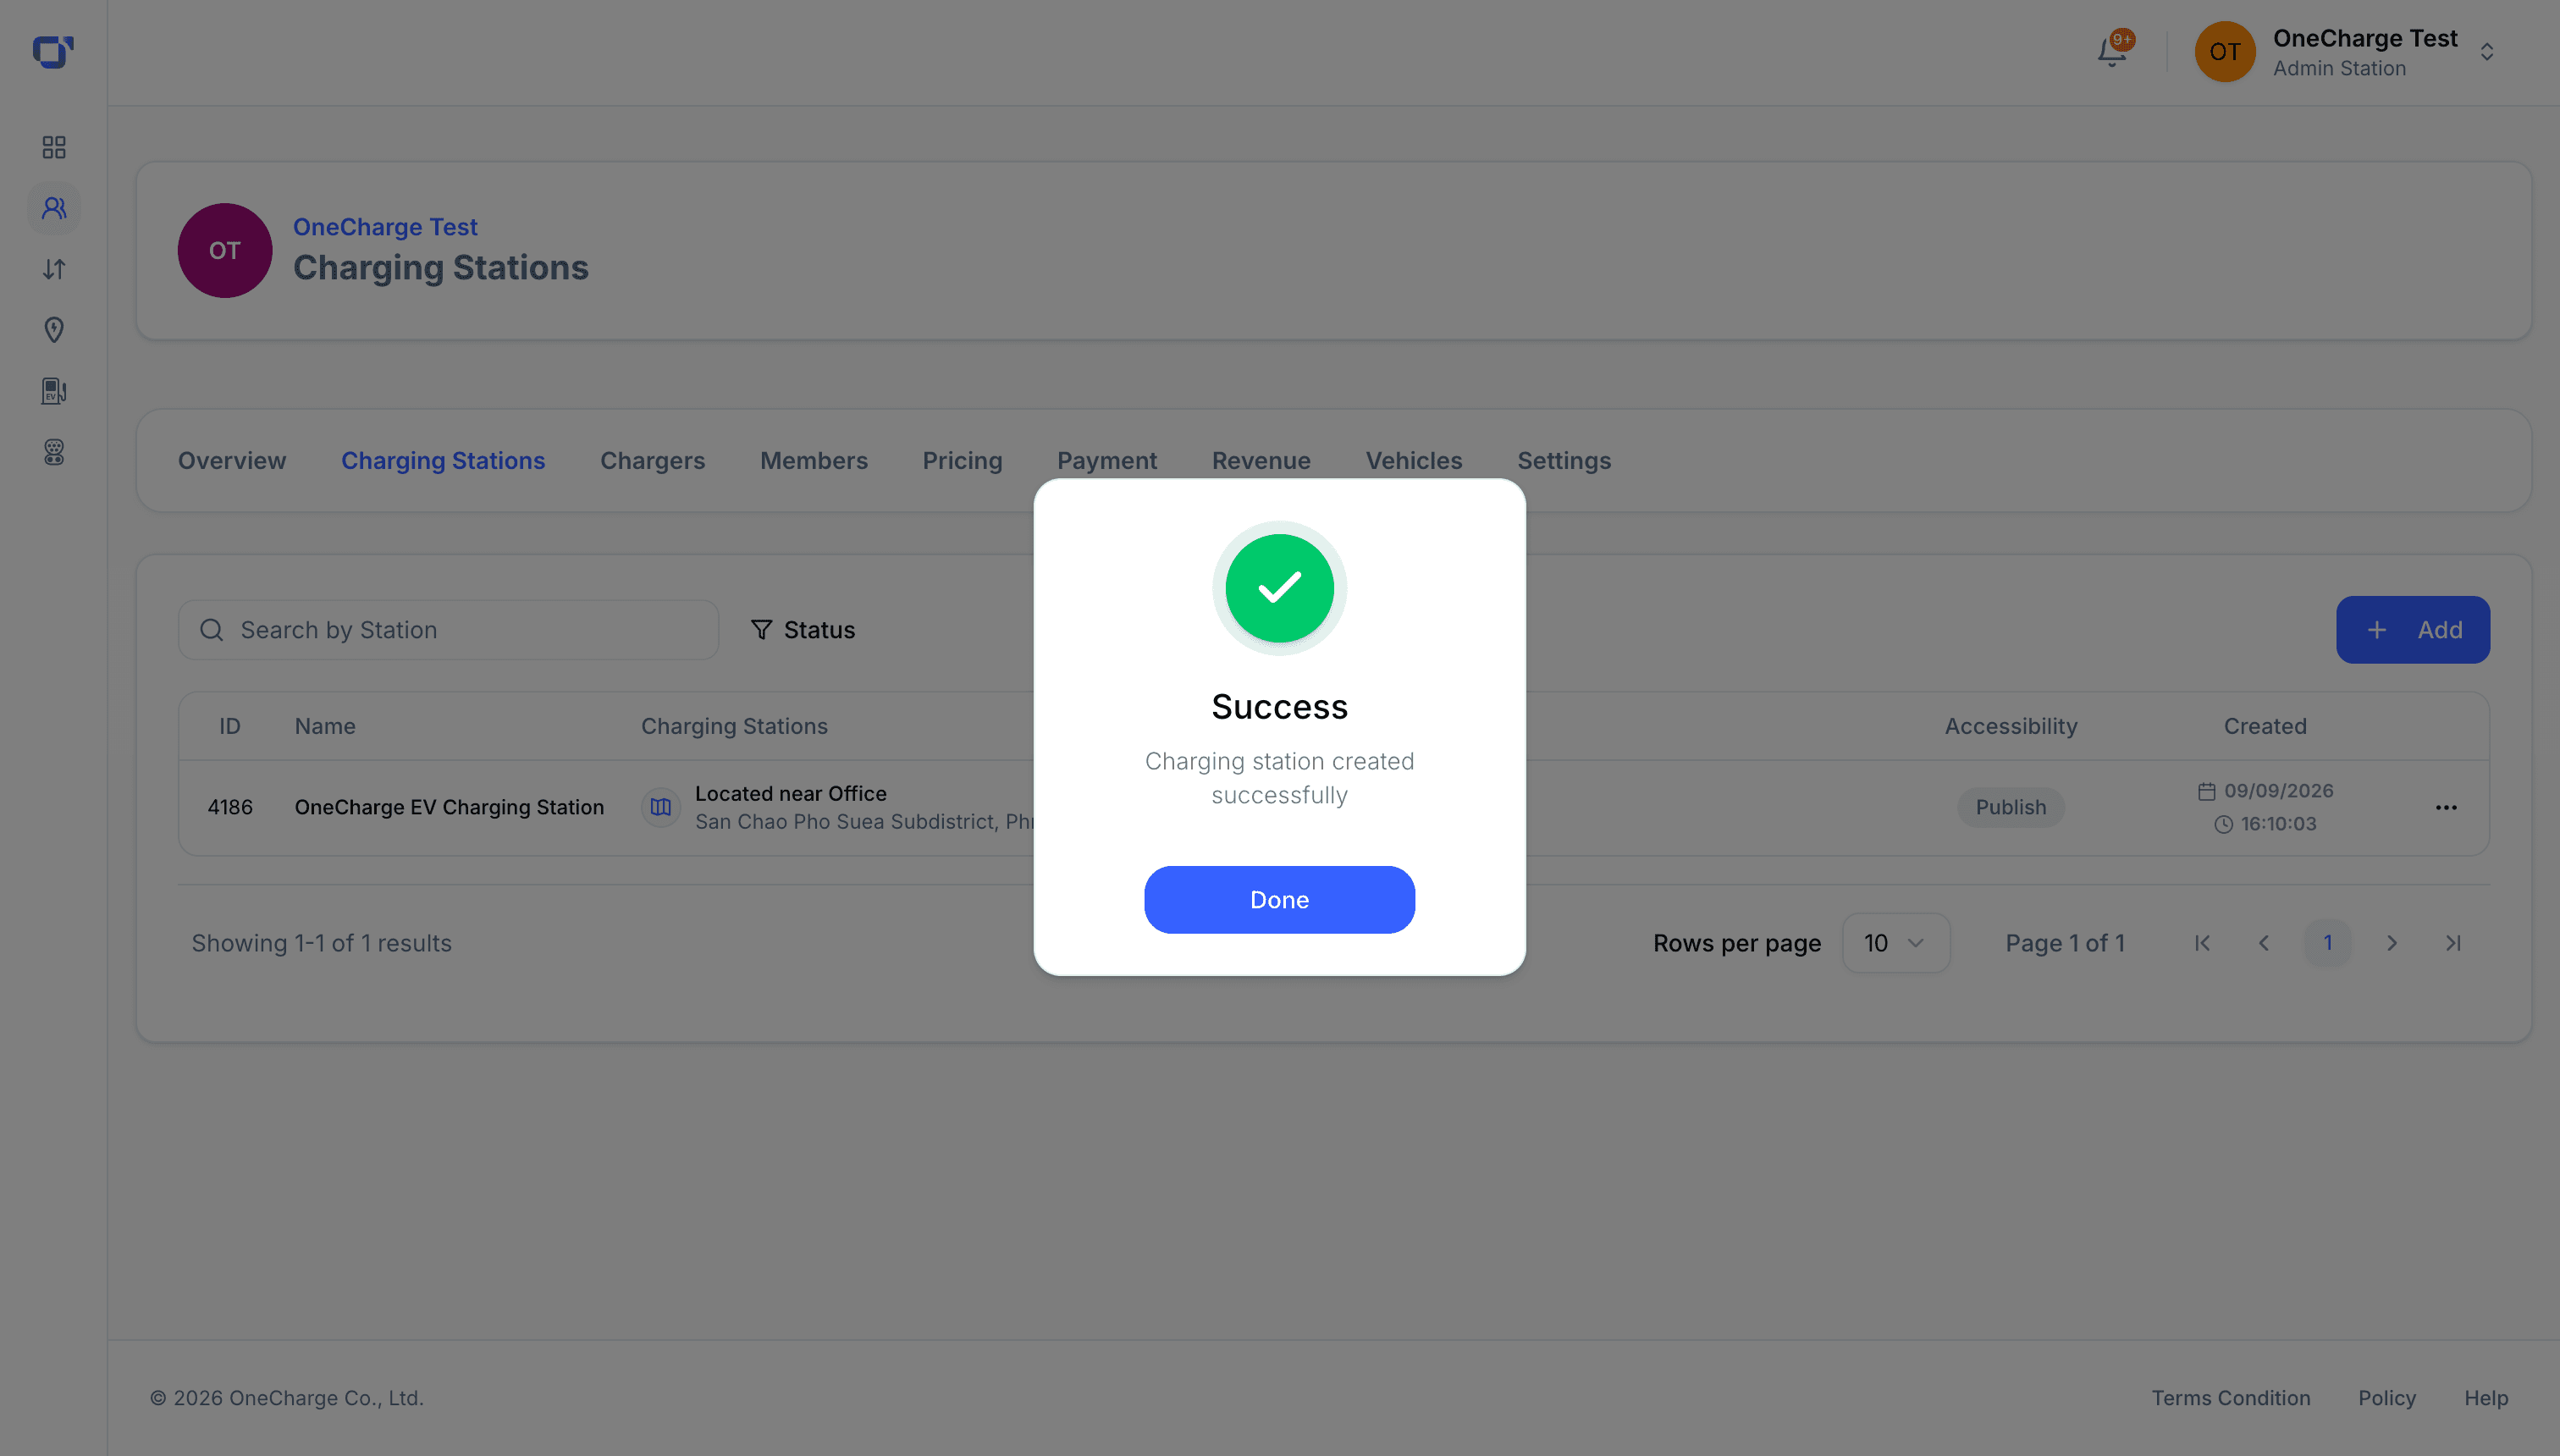
Click Submit — you'll get a success confirmation and the new station appears in your list right away.
Add a charger
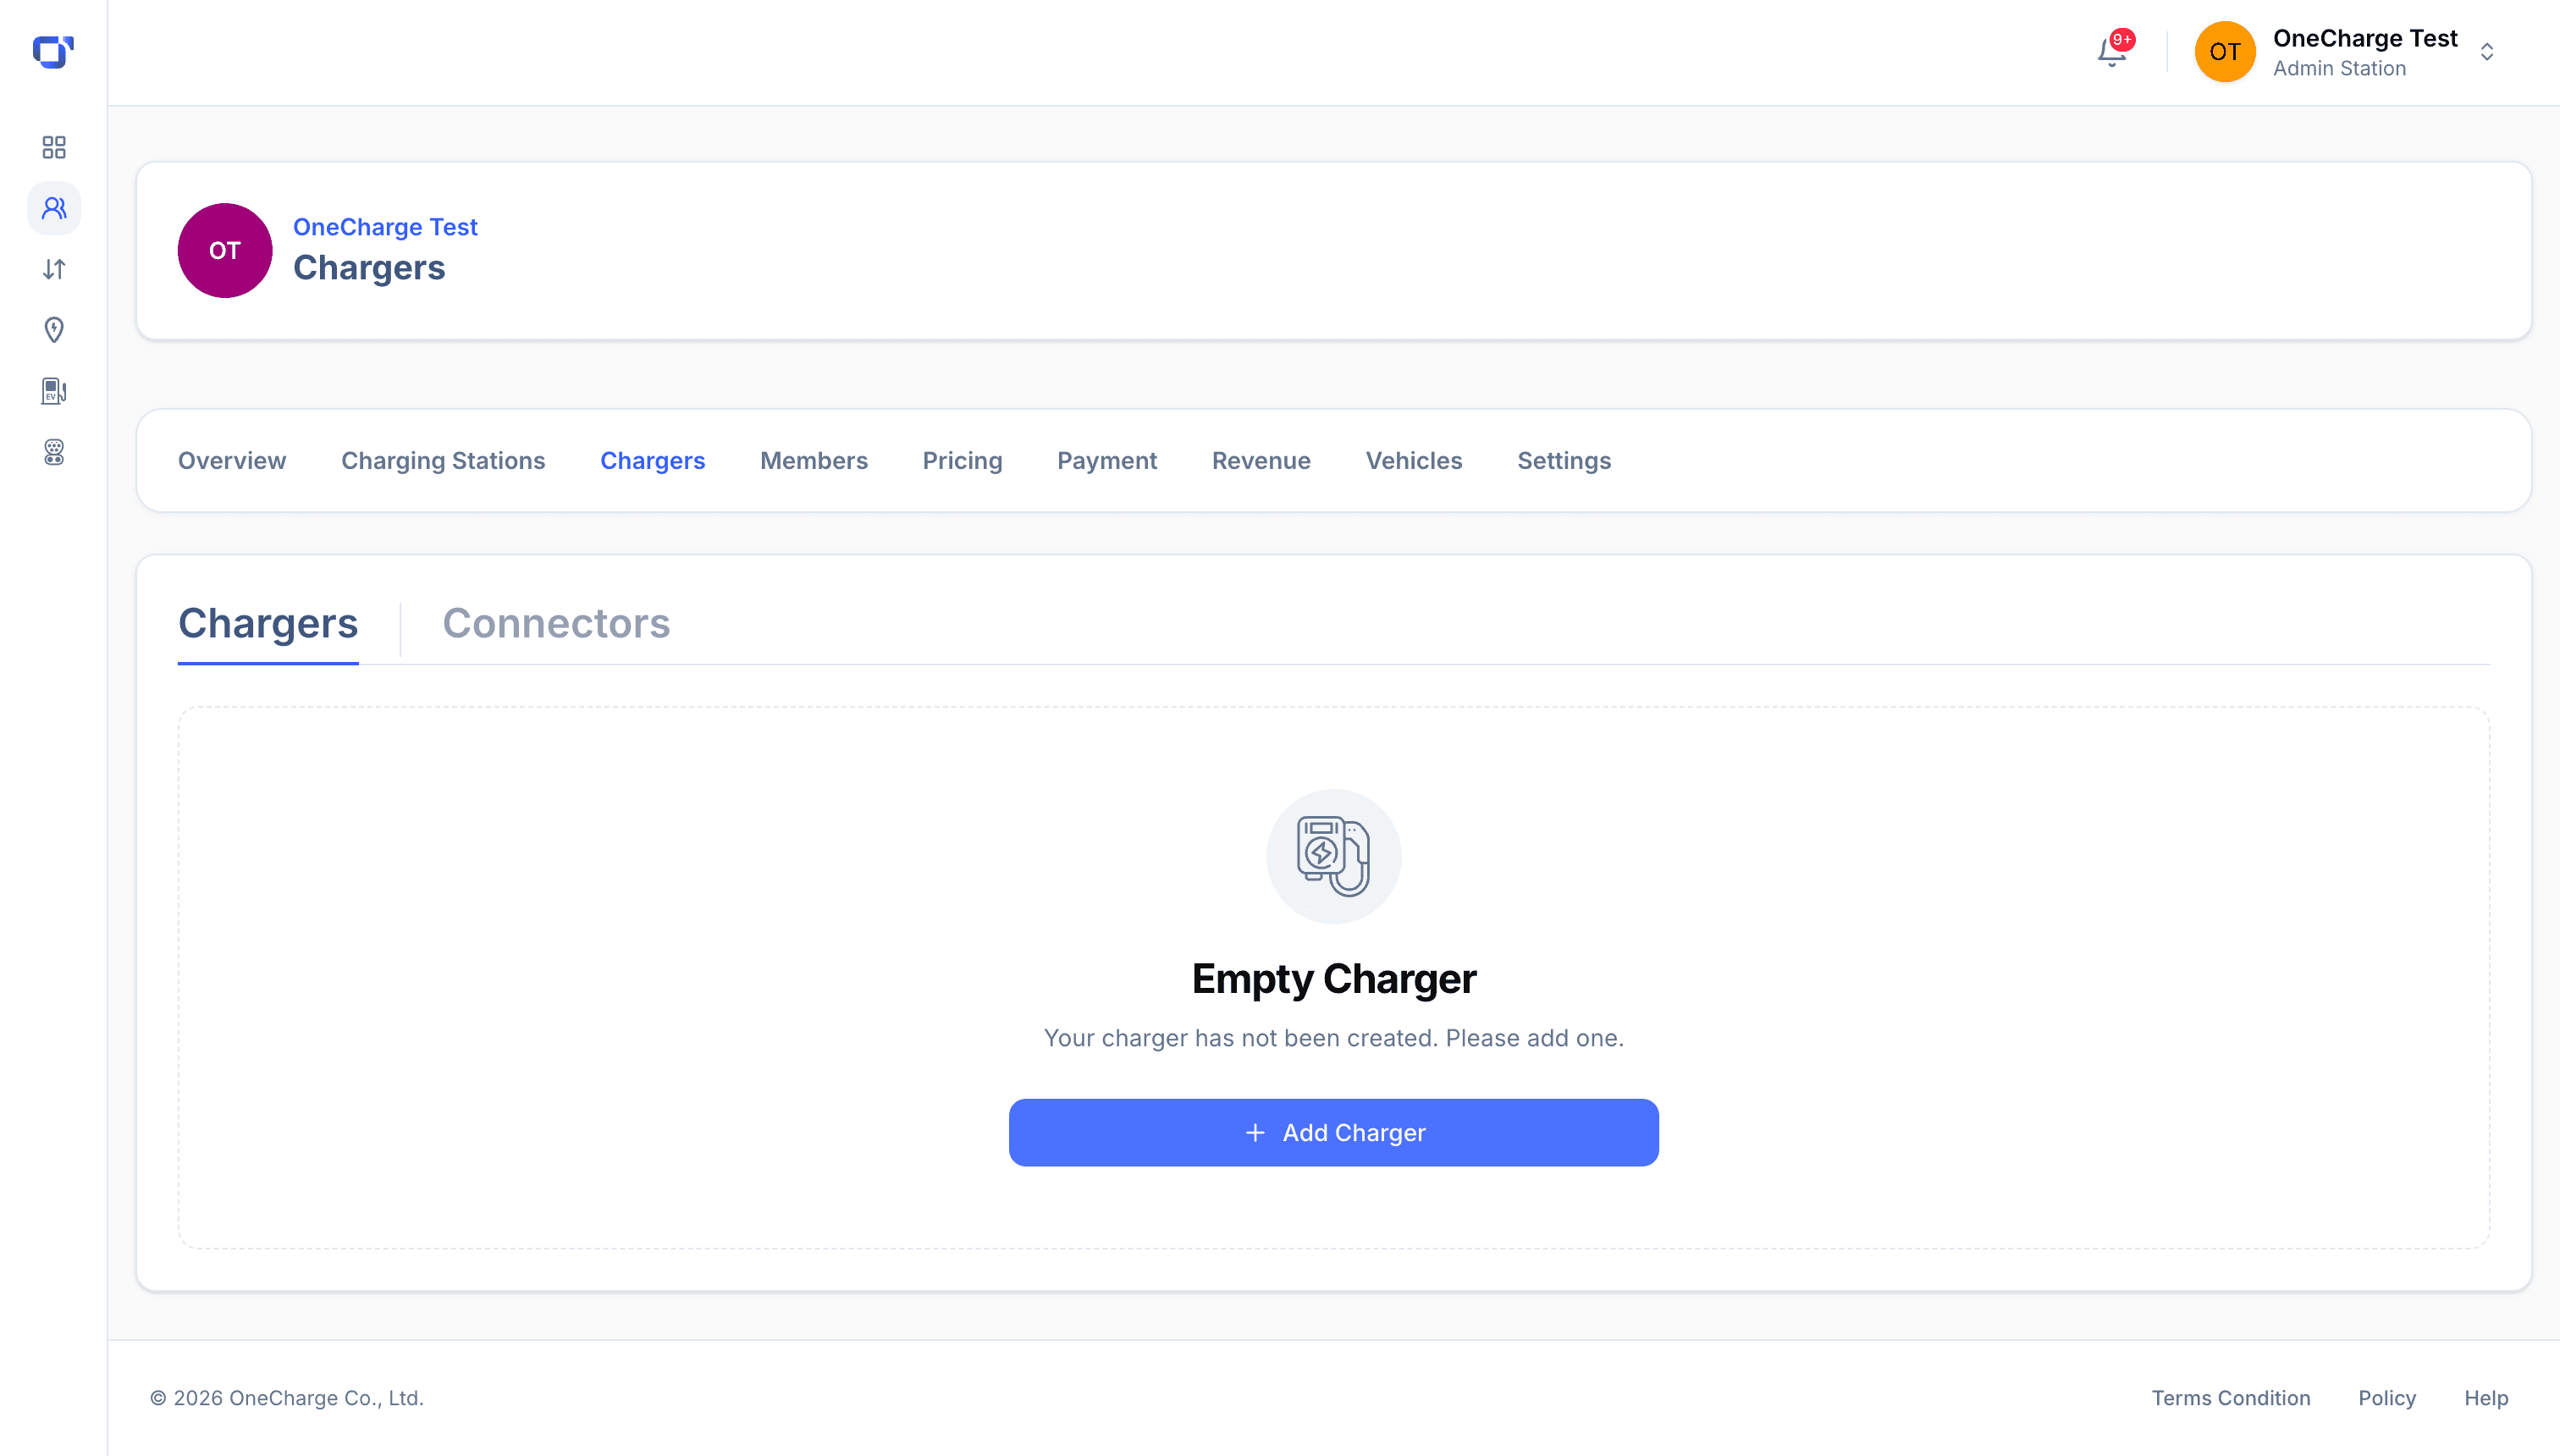
Open the Chargers tab and click "Add Charger" to add a charger to the station you just created.
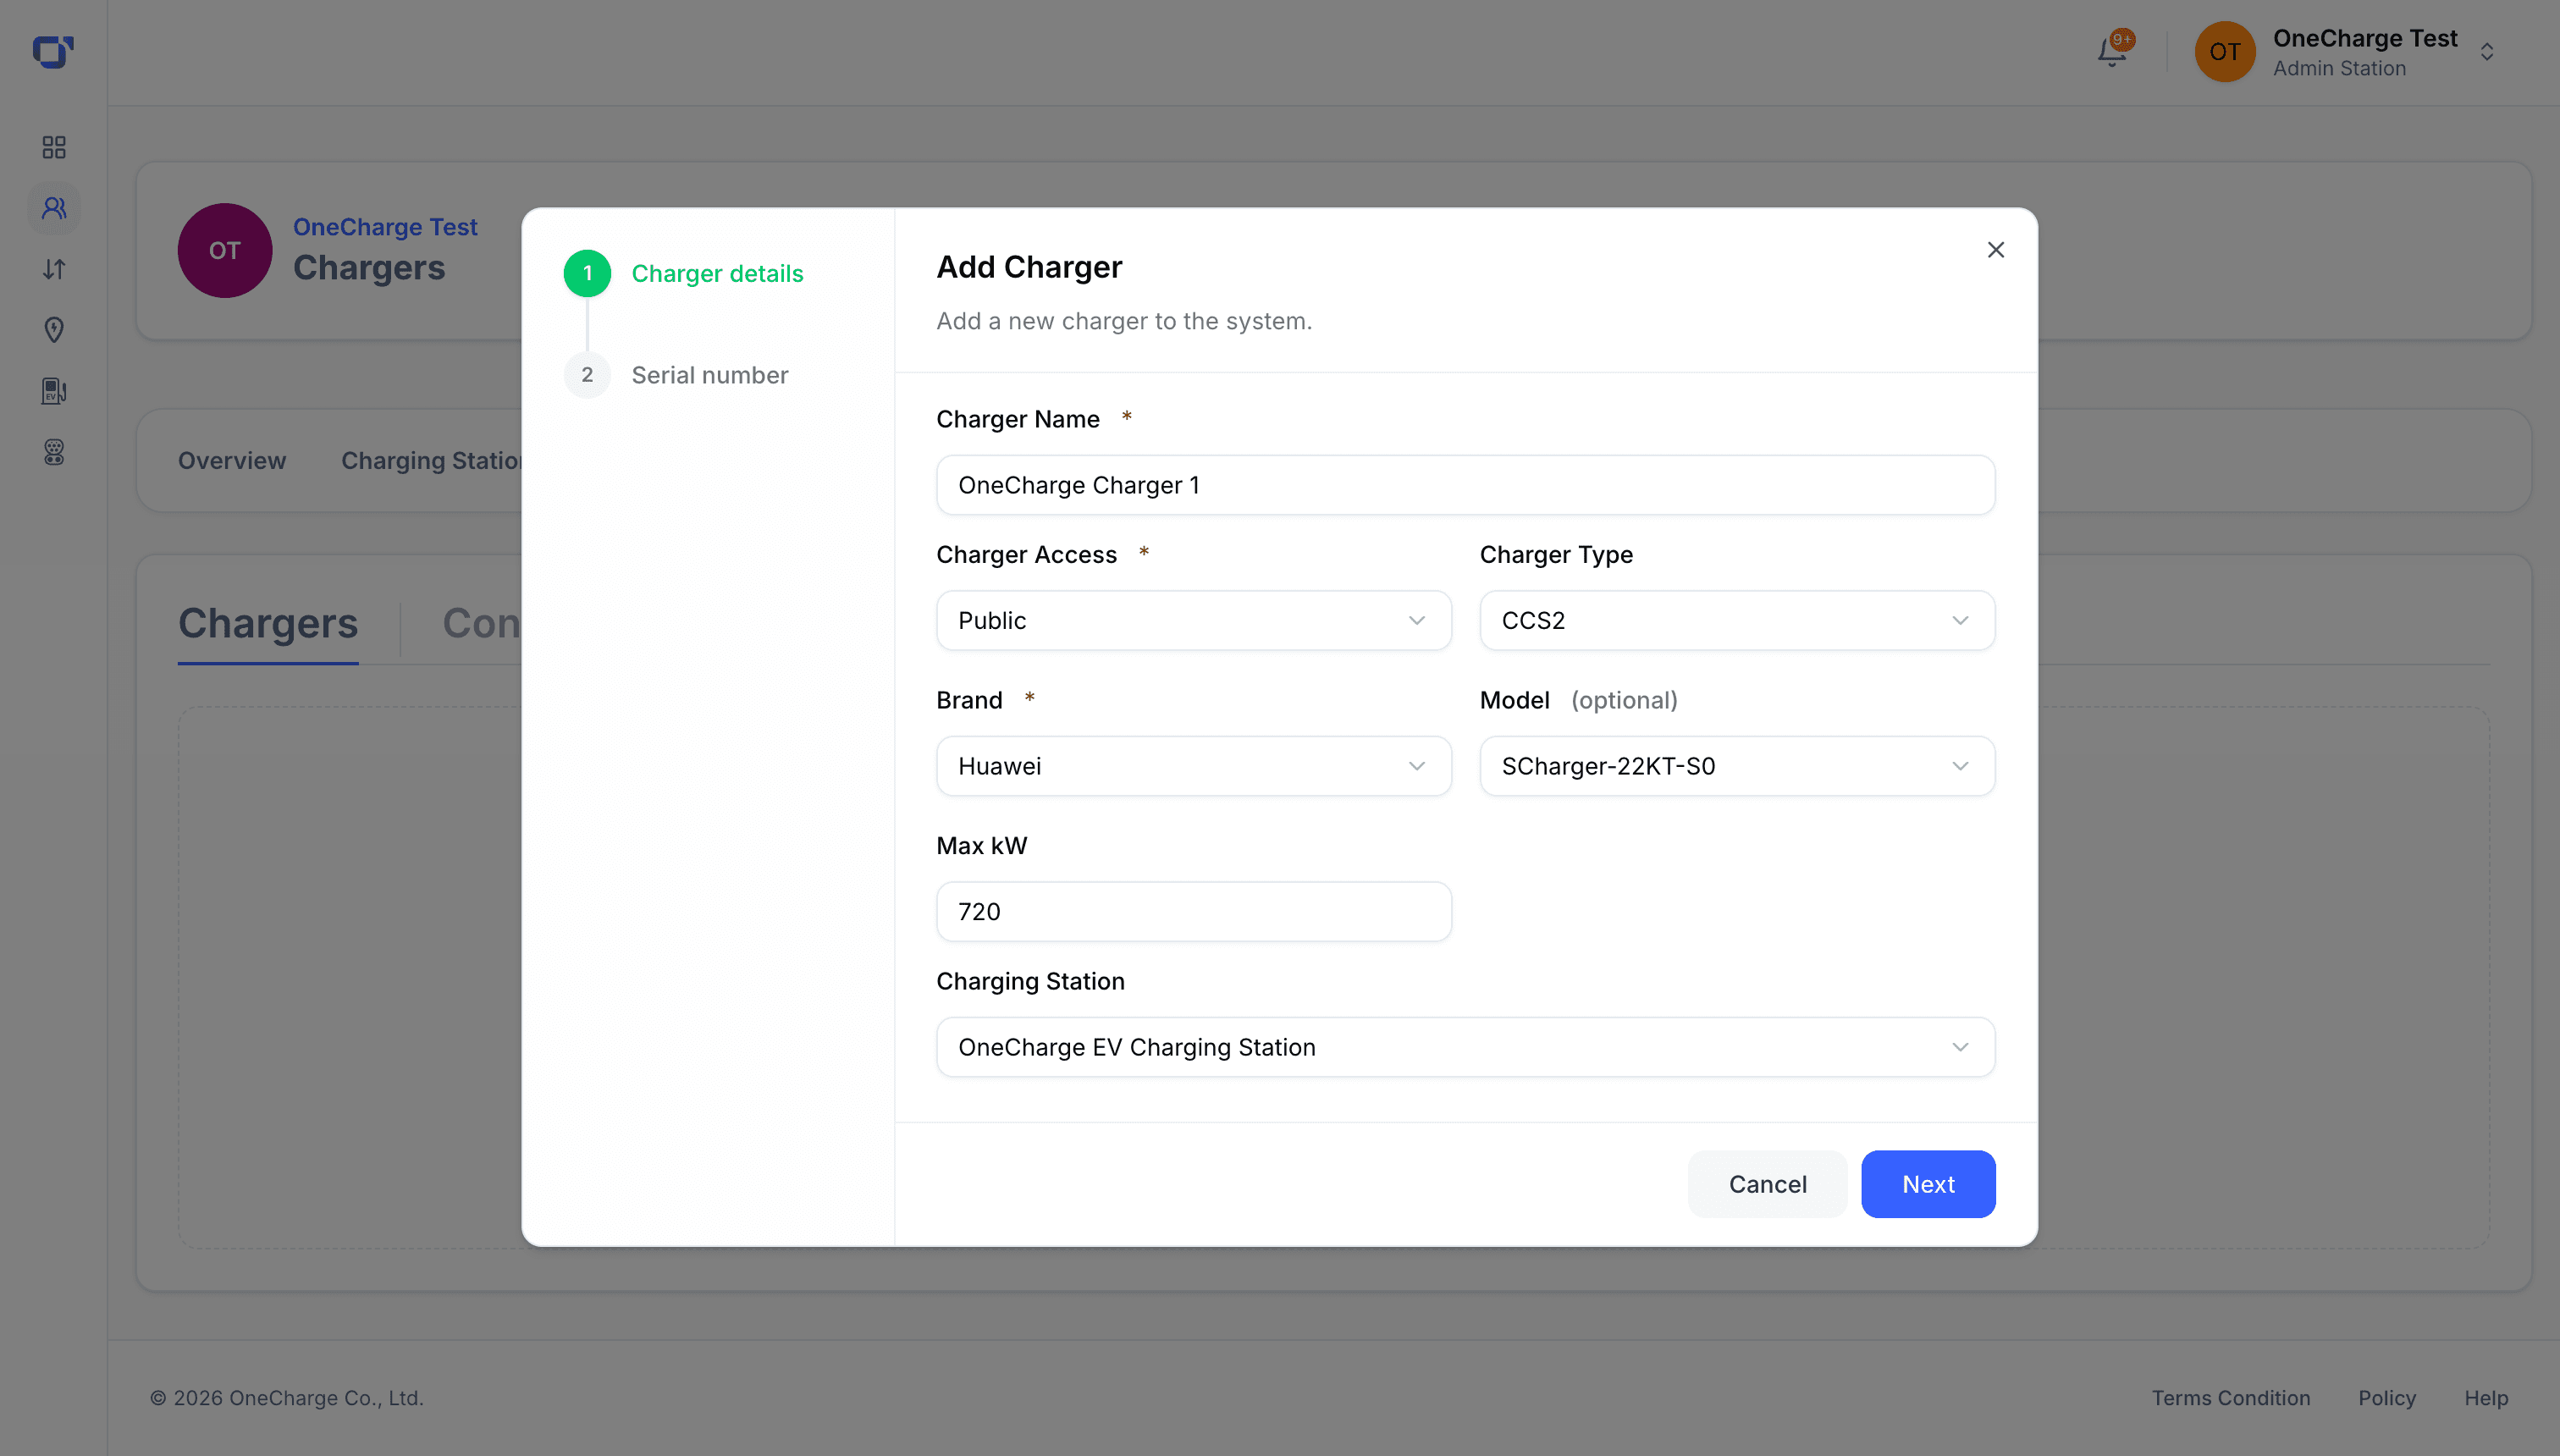
Enter the charger name, access type, connector type, brand, model, max kW, and pick which station it belongs to.
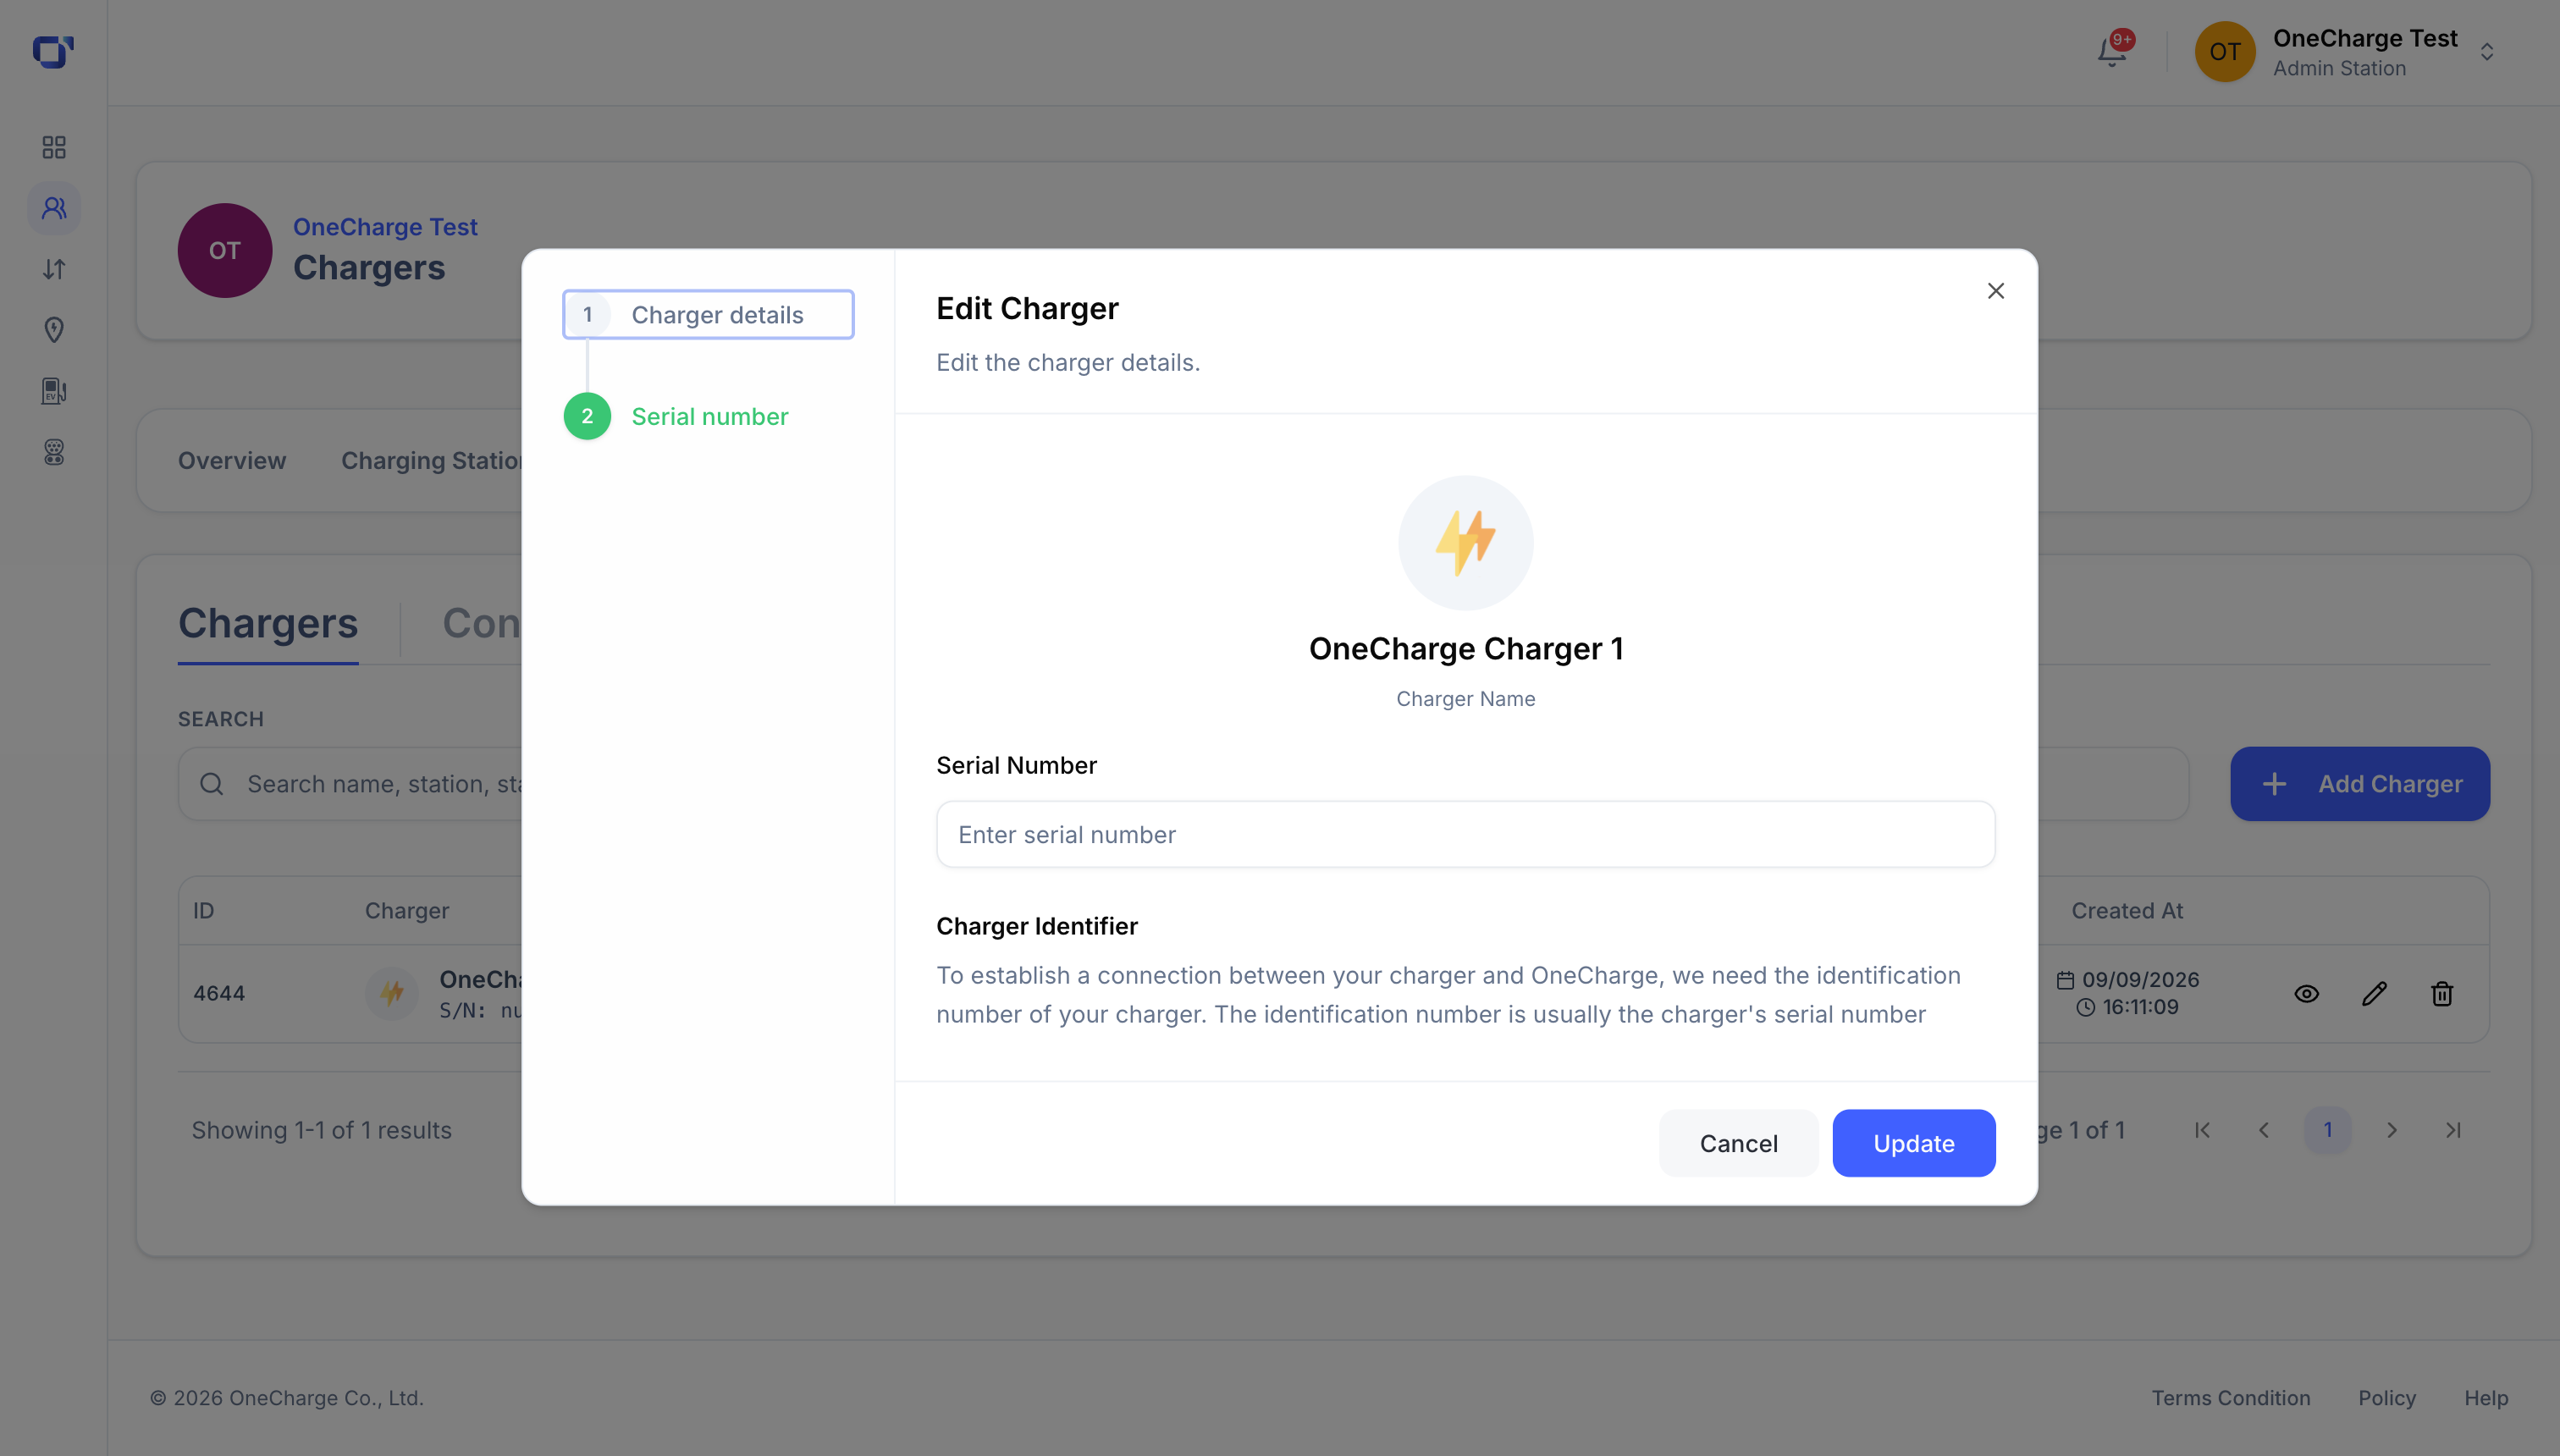
Enter the charger's serial number — the identifier OneCharge uses to connect your physical charger to the system.
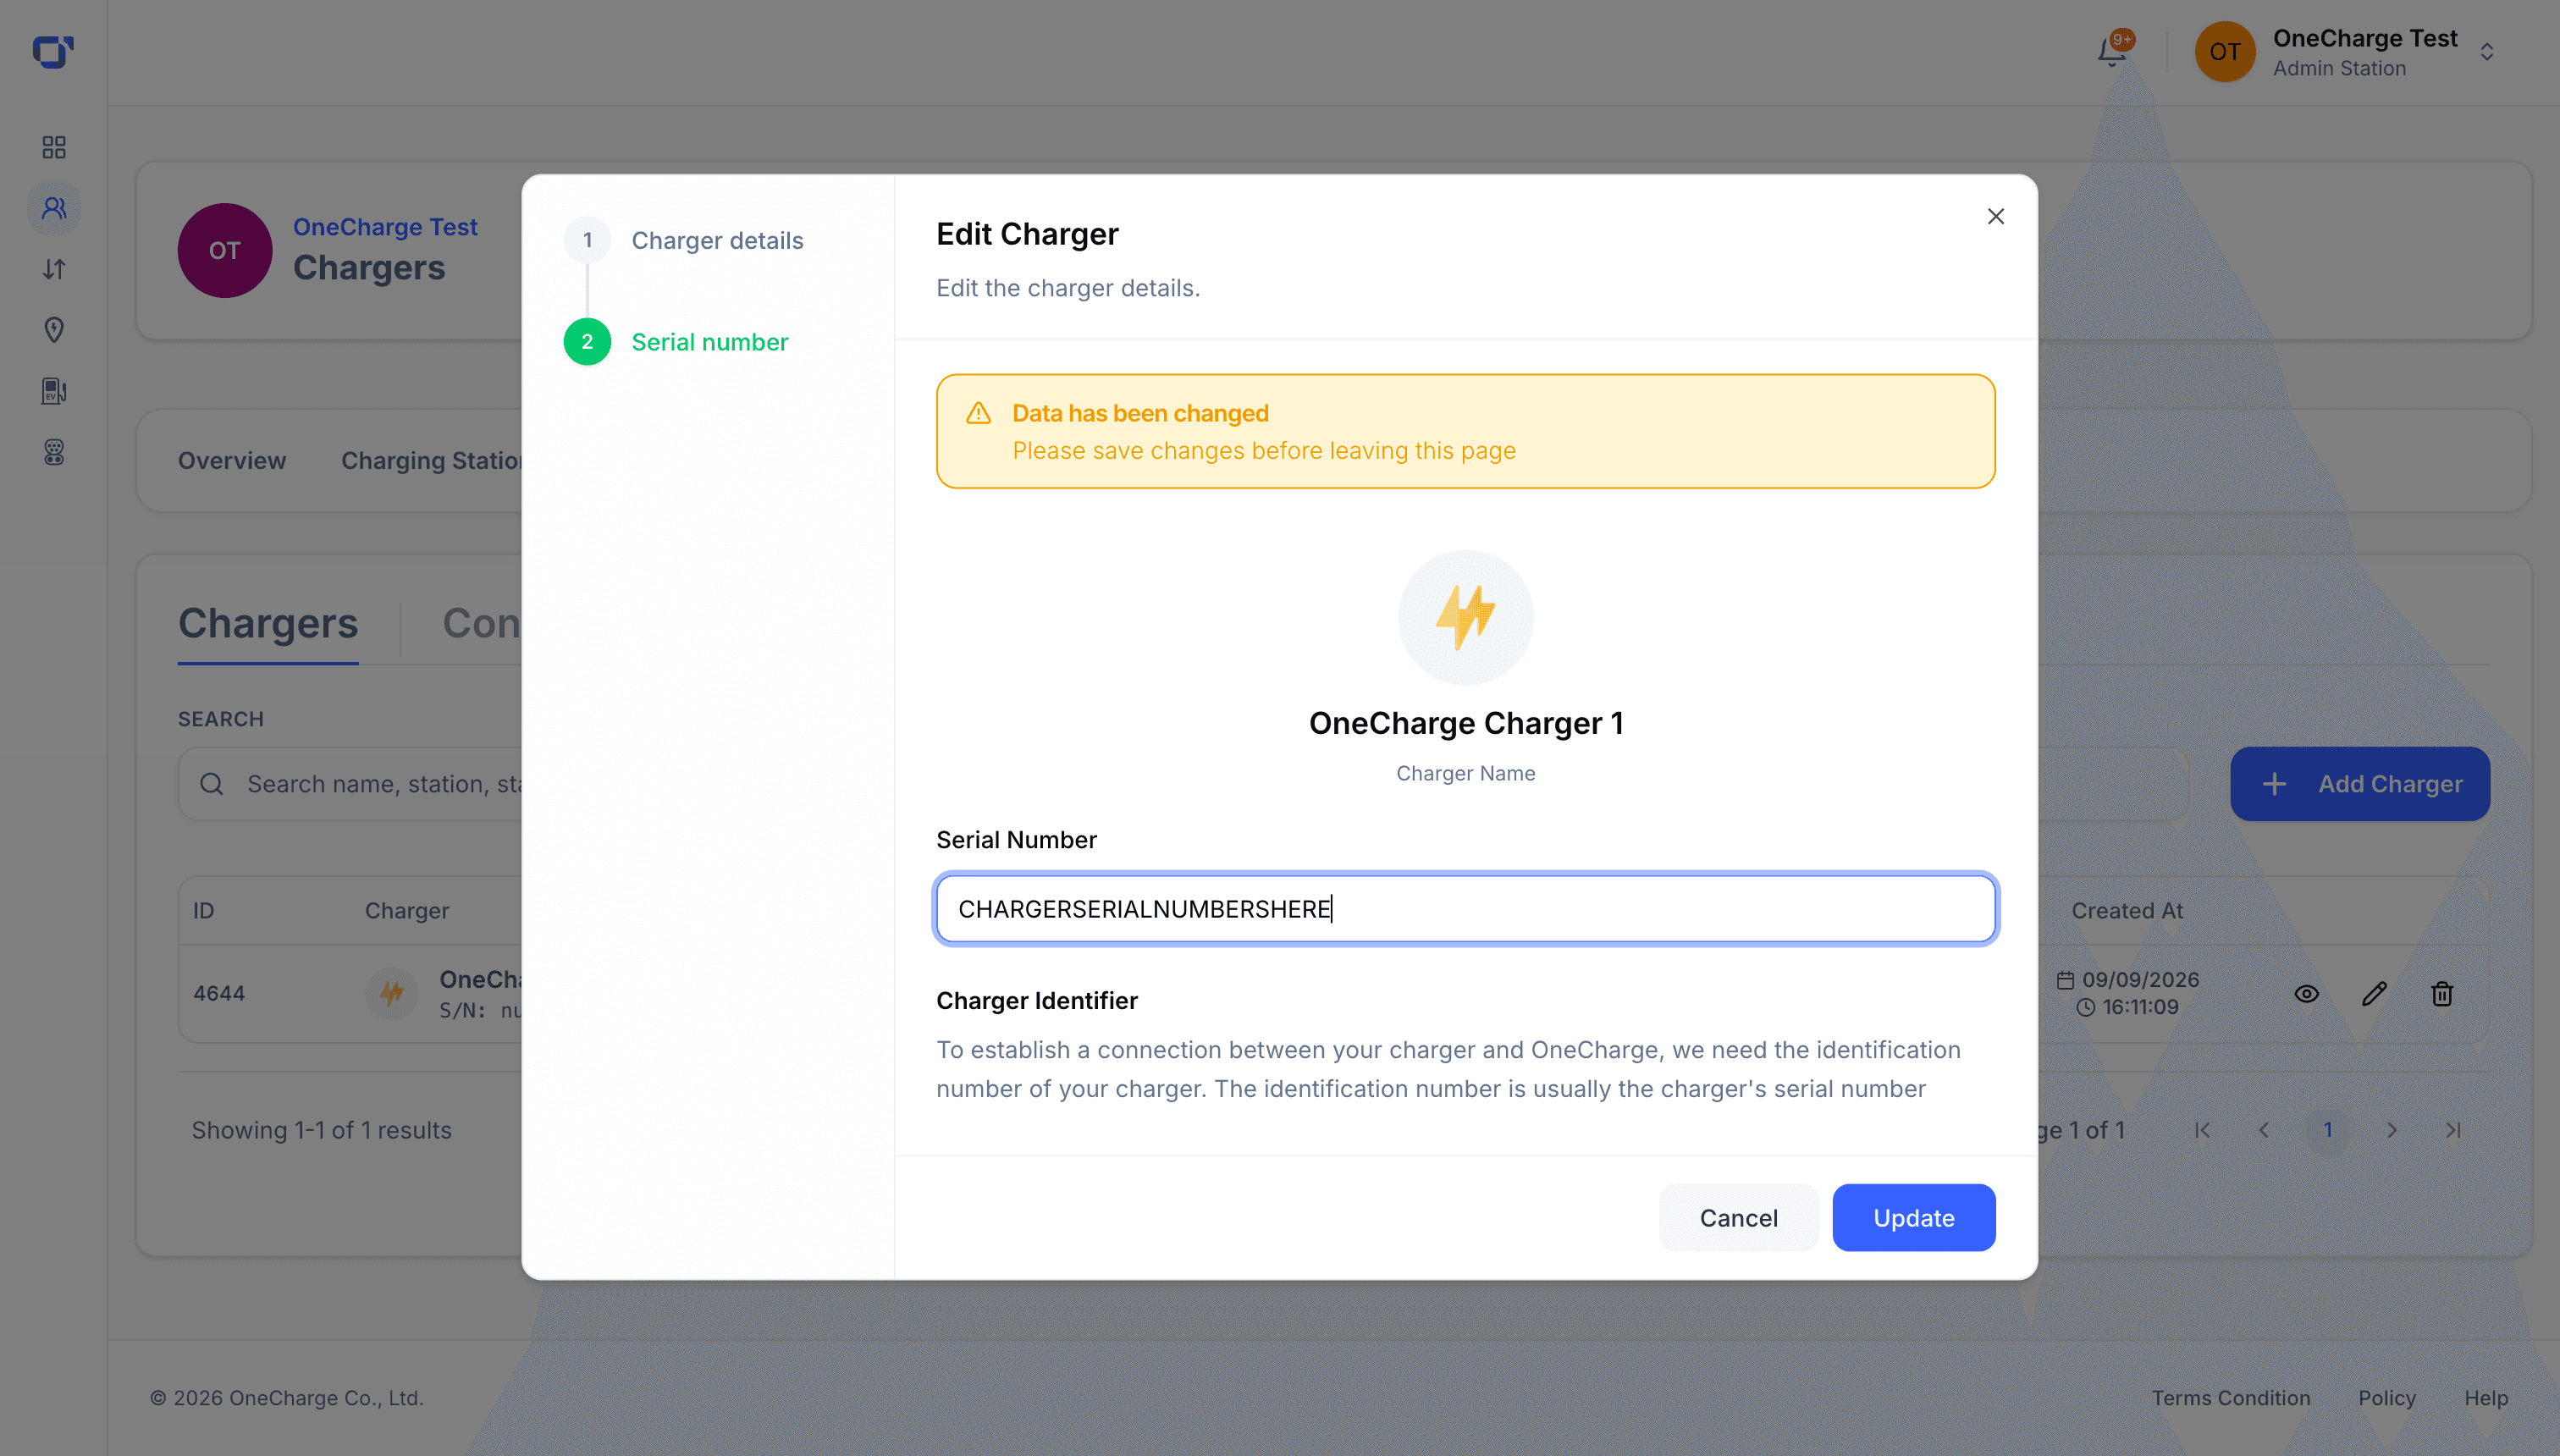
The system warns you to save whenever data changes, before you leave the page.
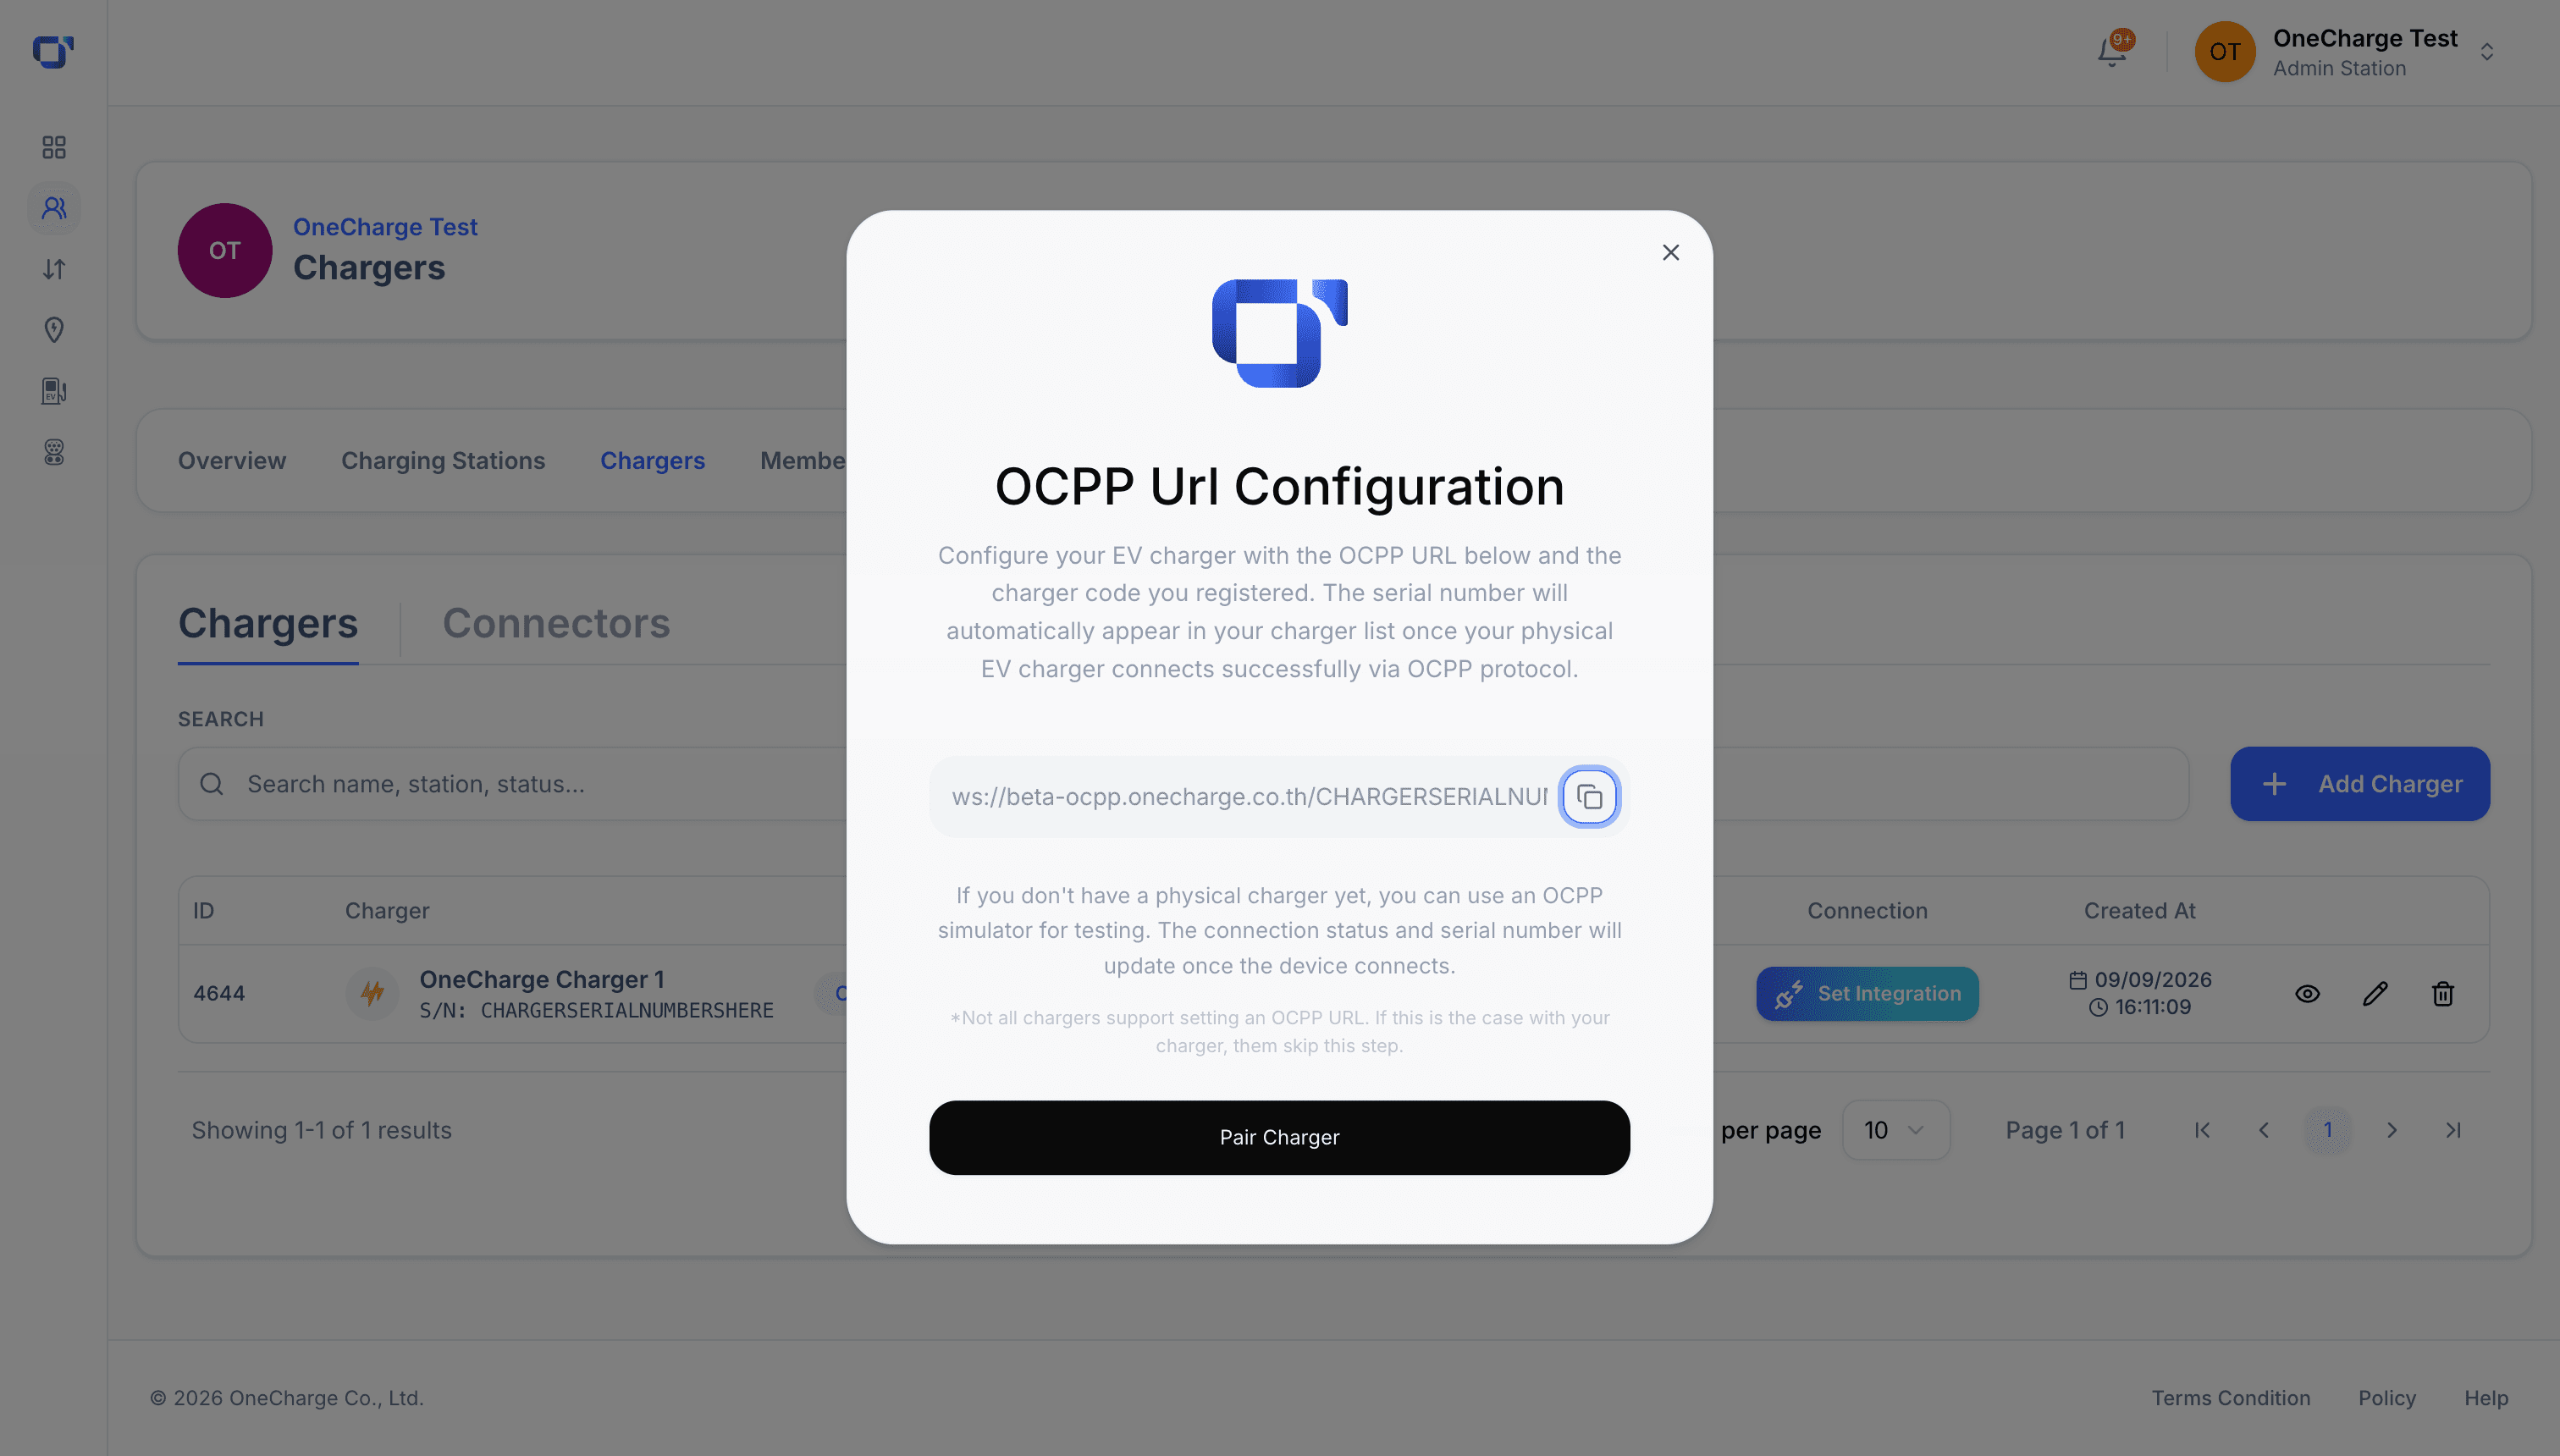
Copy the OCPP URL into your physical charger — once it connects, it appears in your list automatically. No charger yet? Test with the OCPP simulator first.
Add a connector
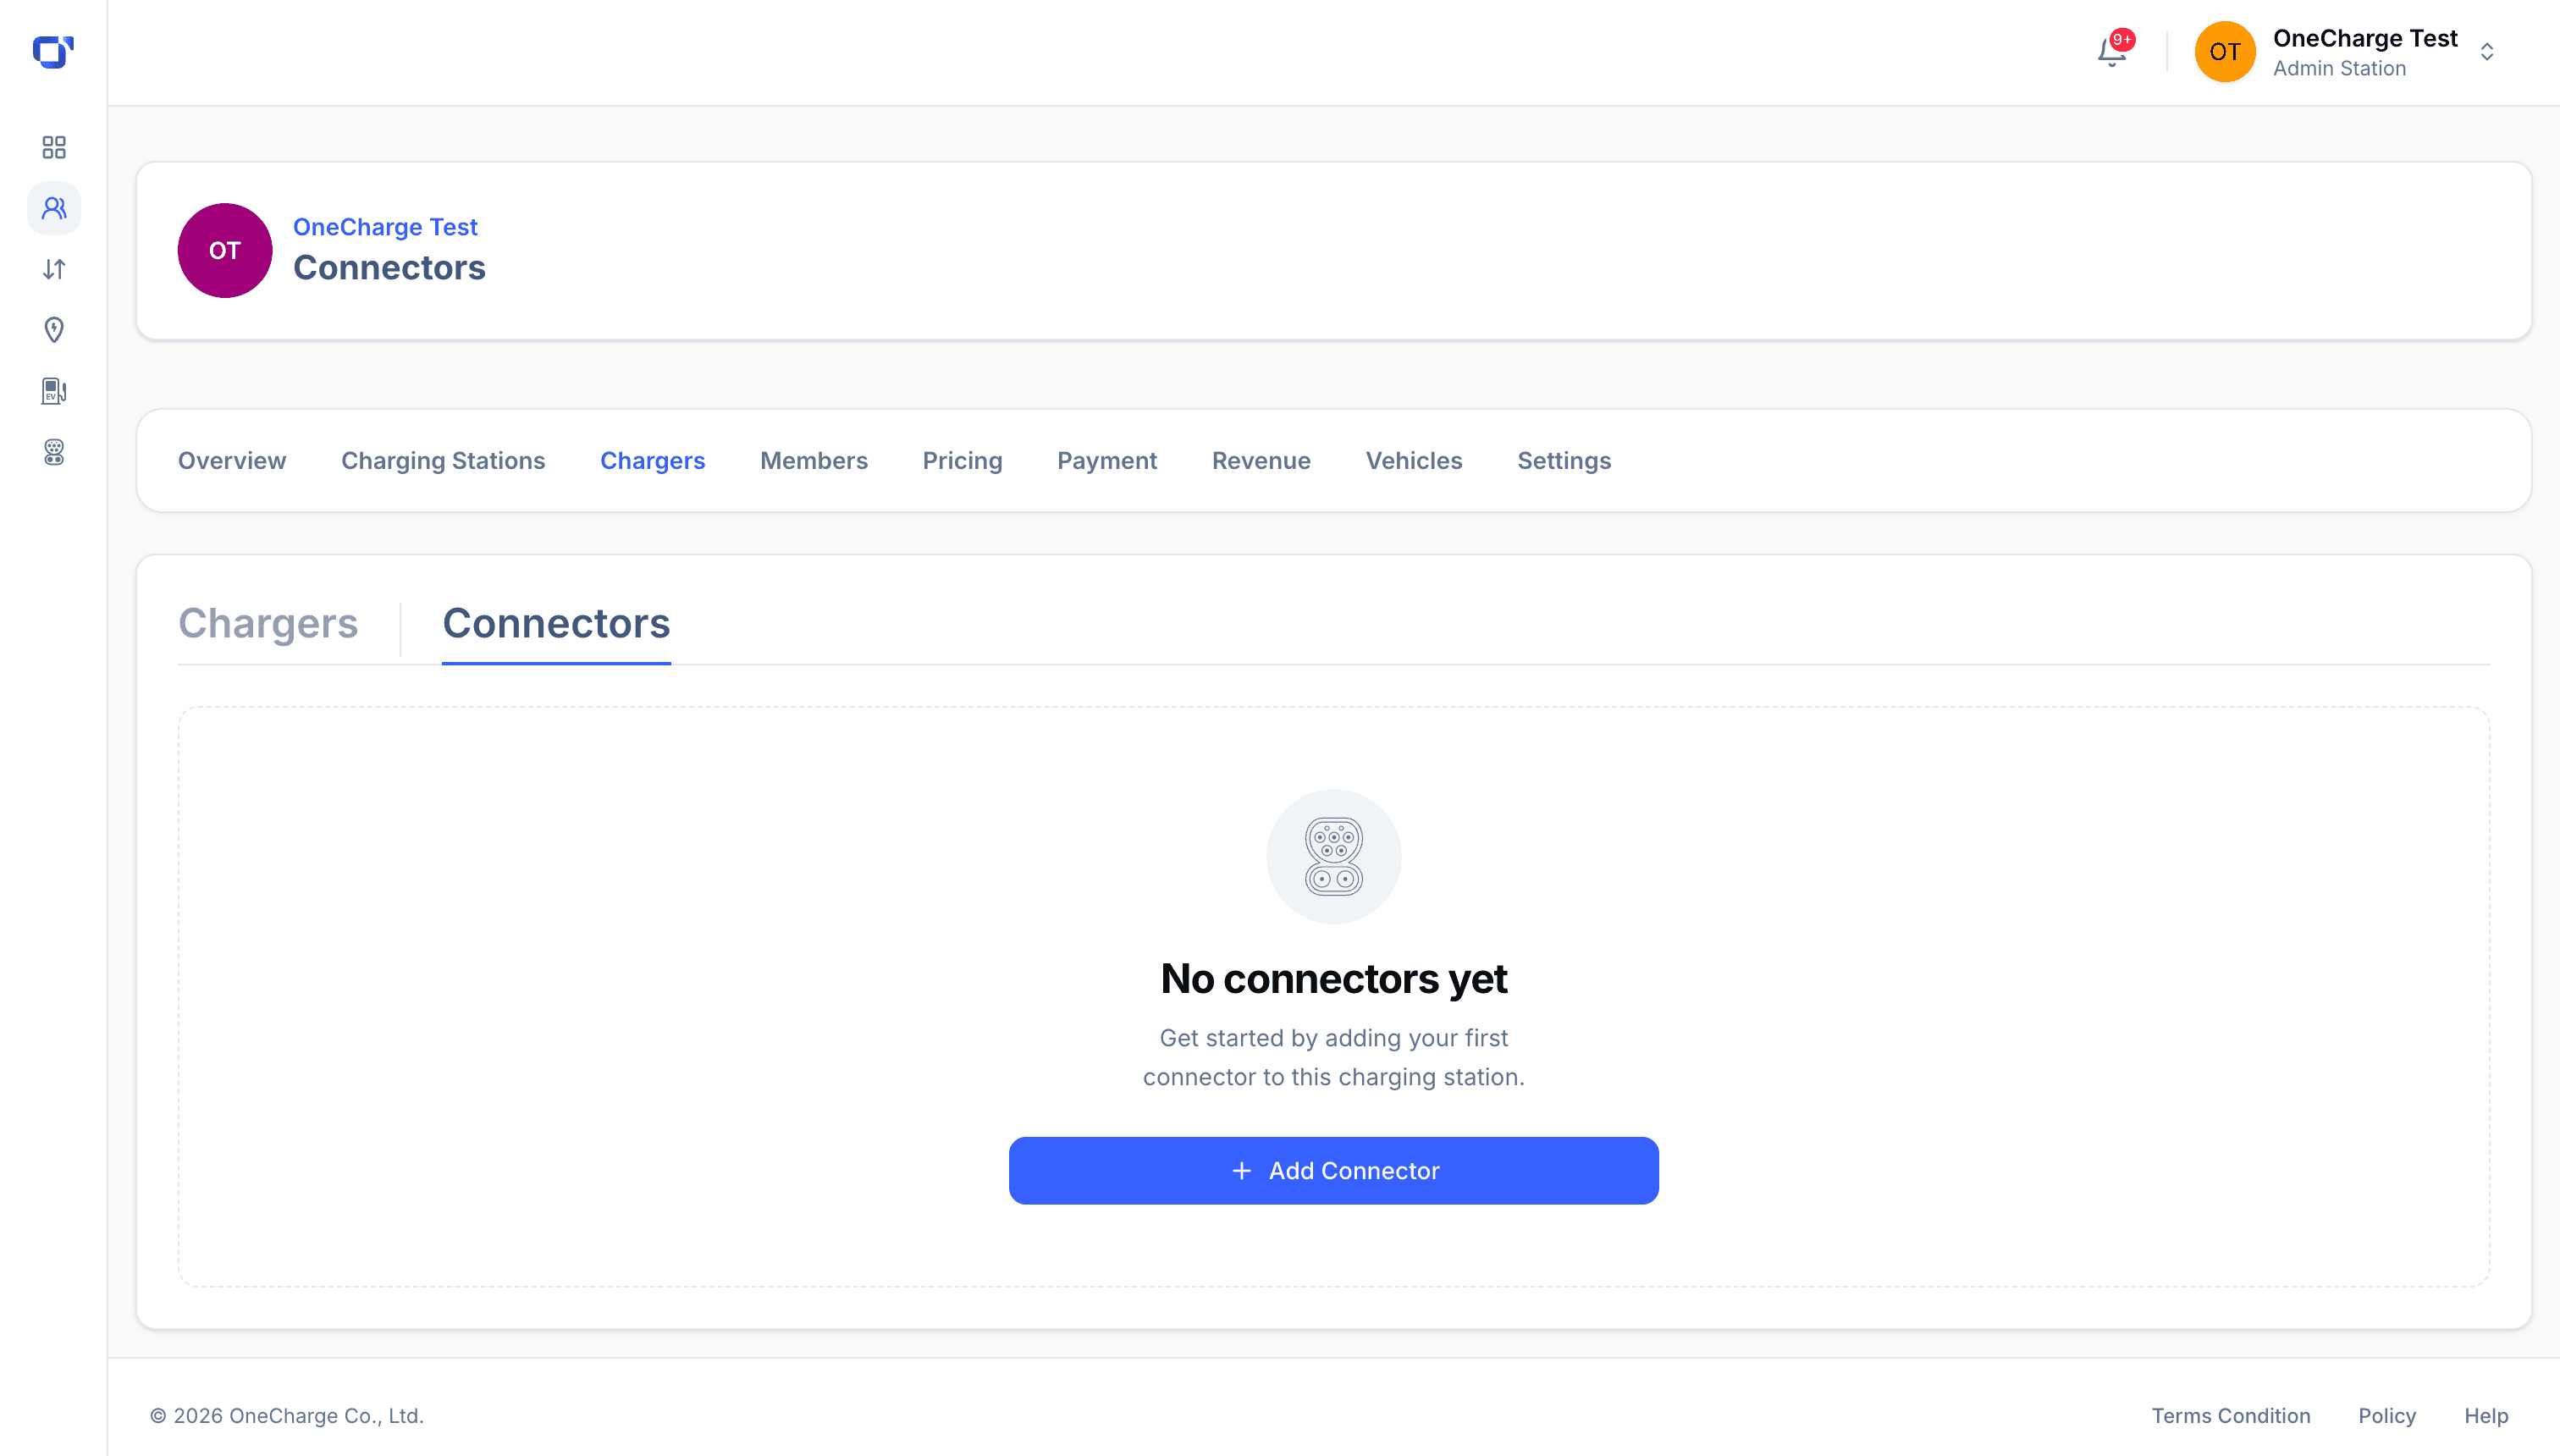
Open the Connectors tab and click "Add Connector" to add a connector to your charger.
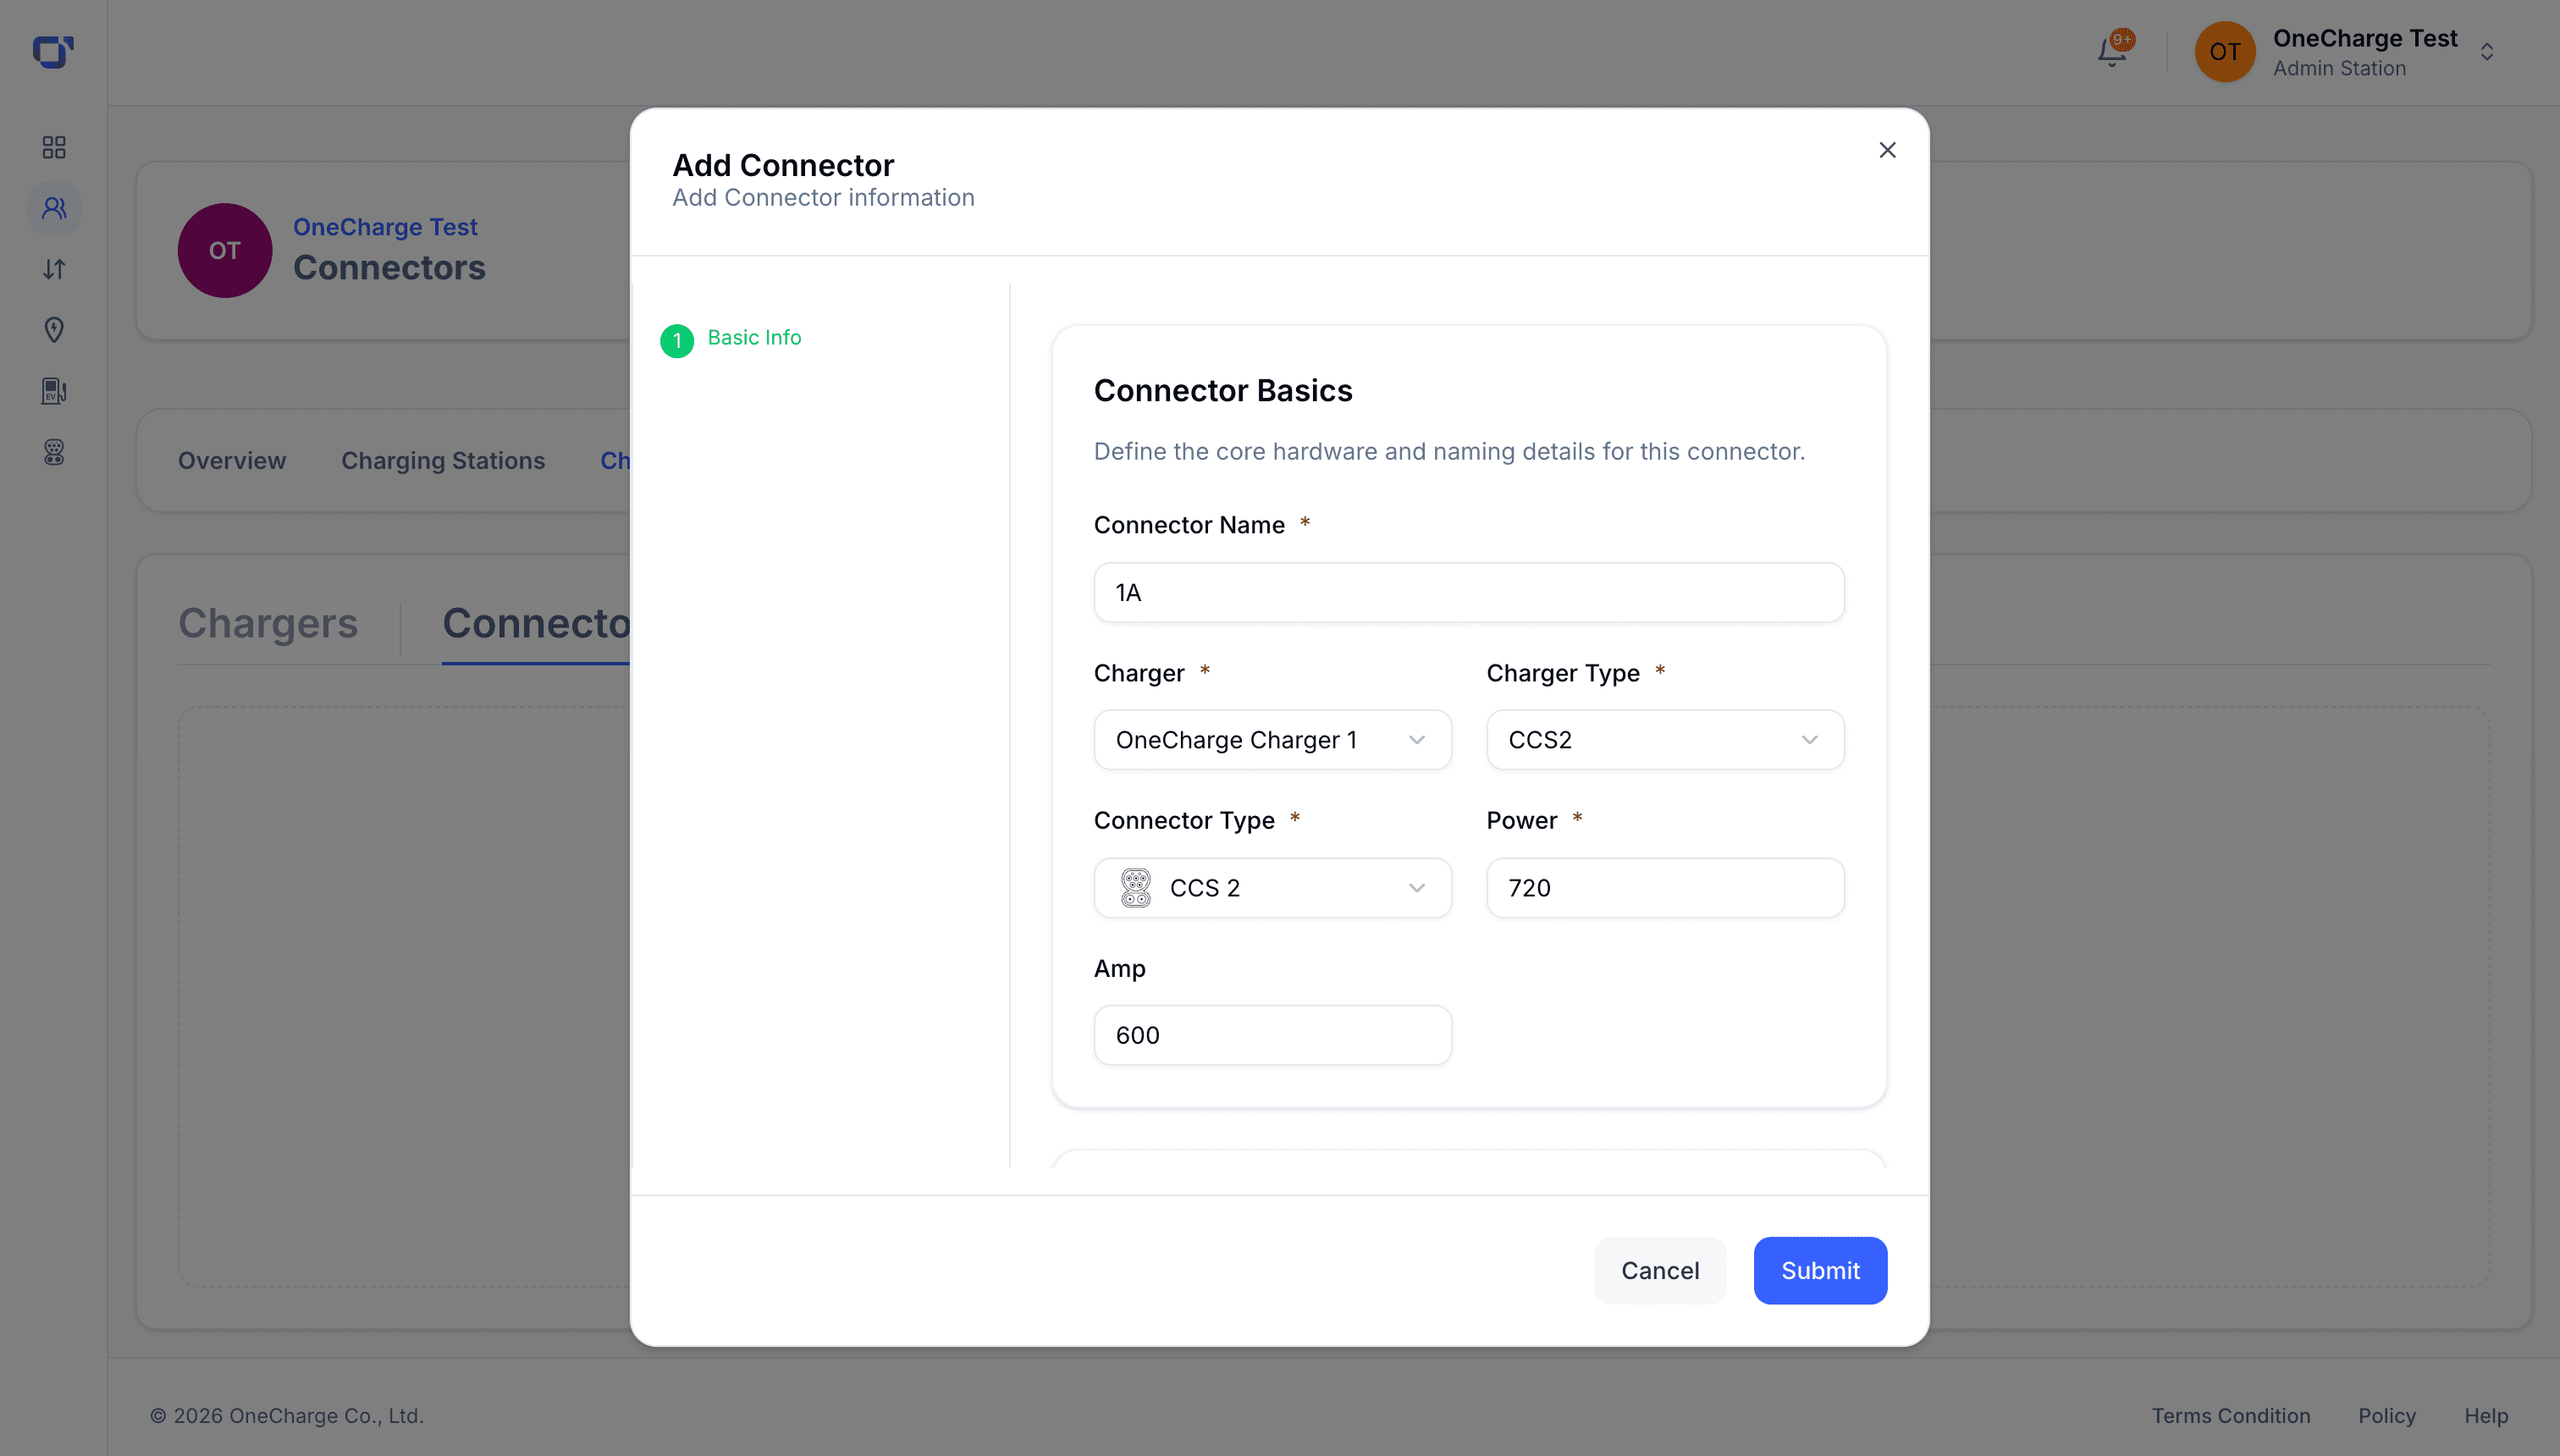
Name the connector, pick which charger it belongs to, its connector type, power, and max amperage.
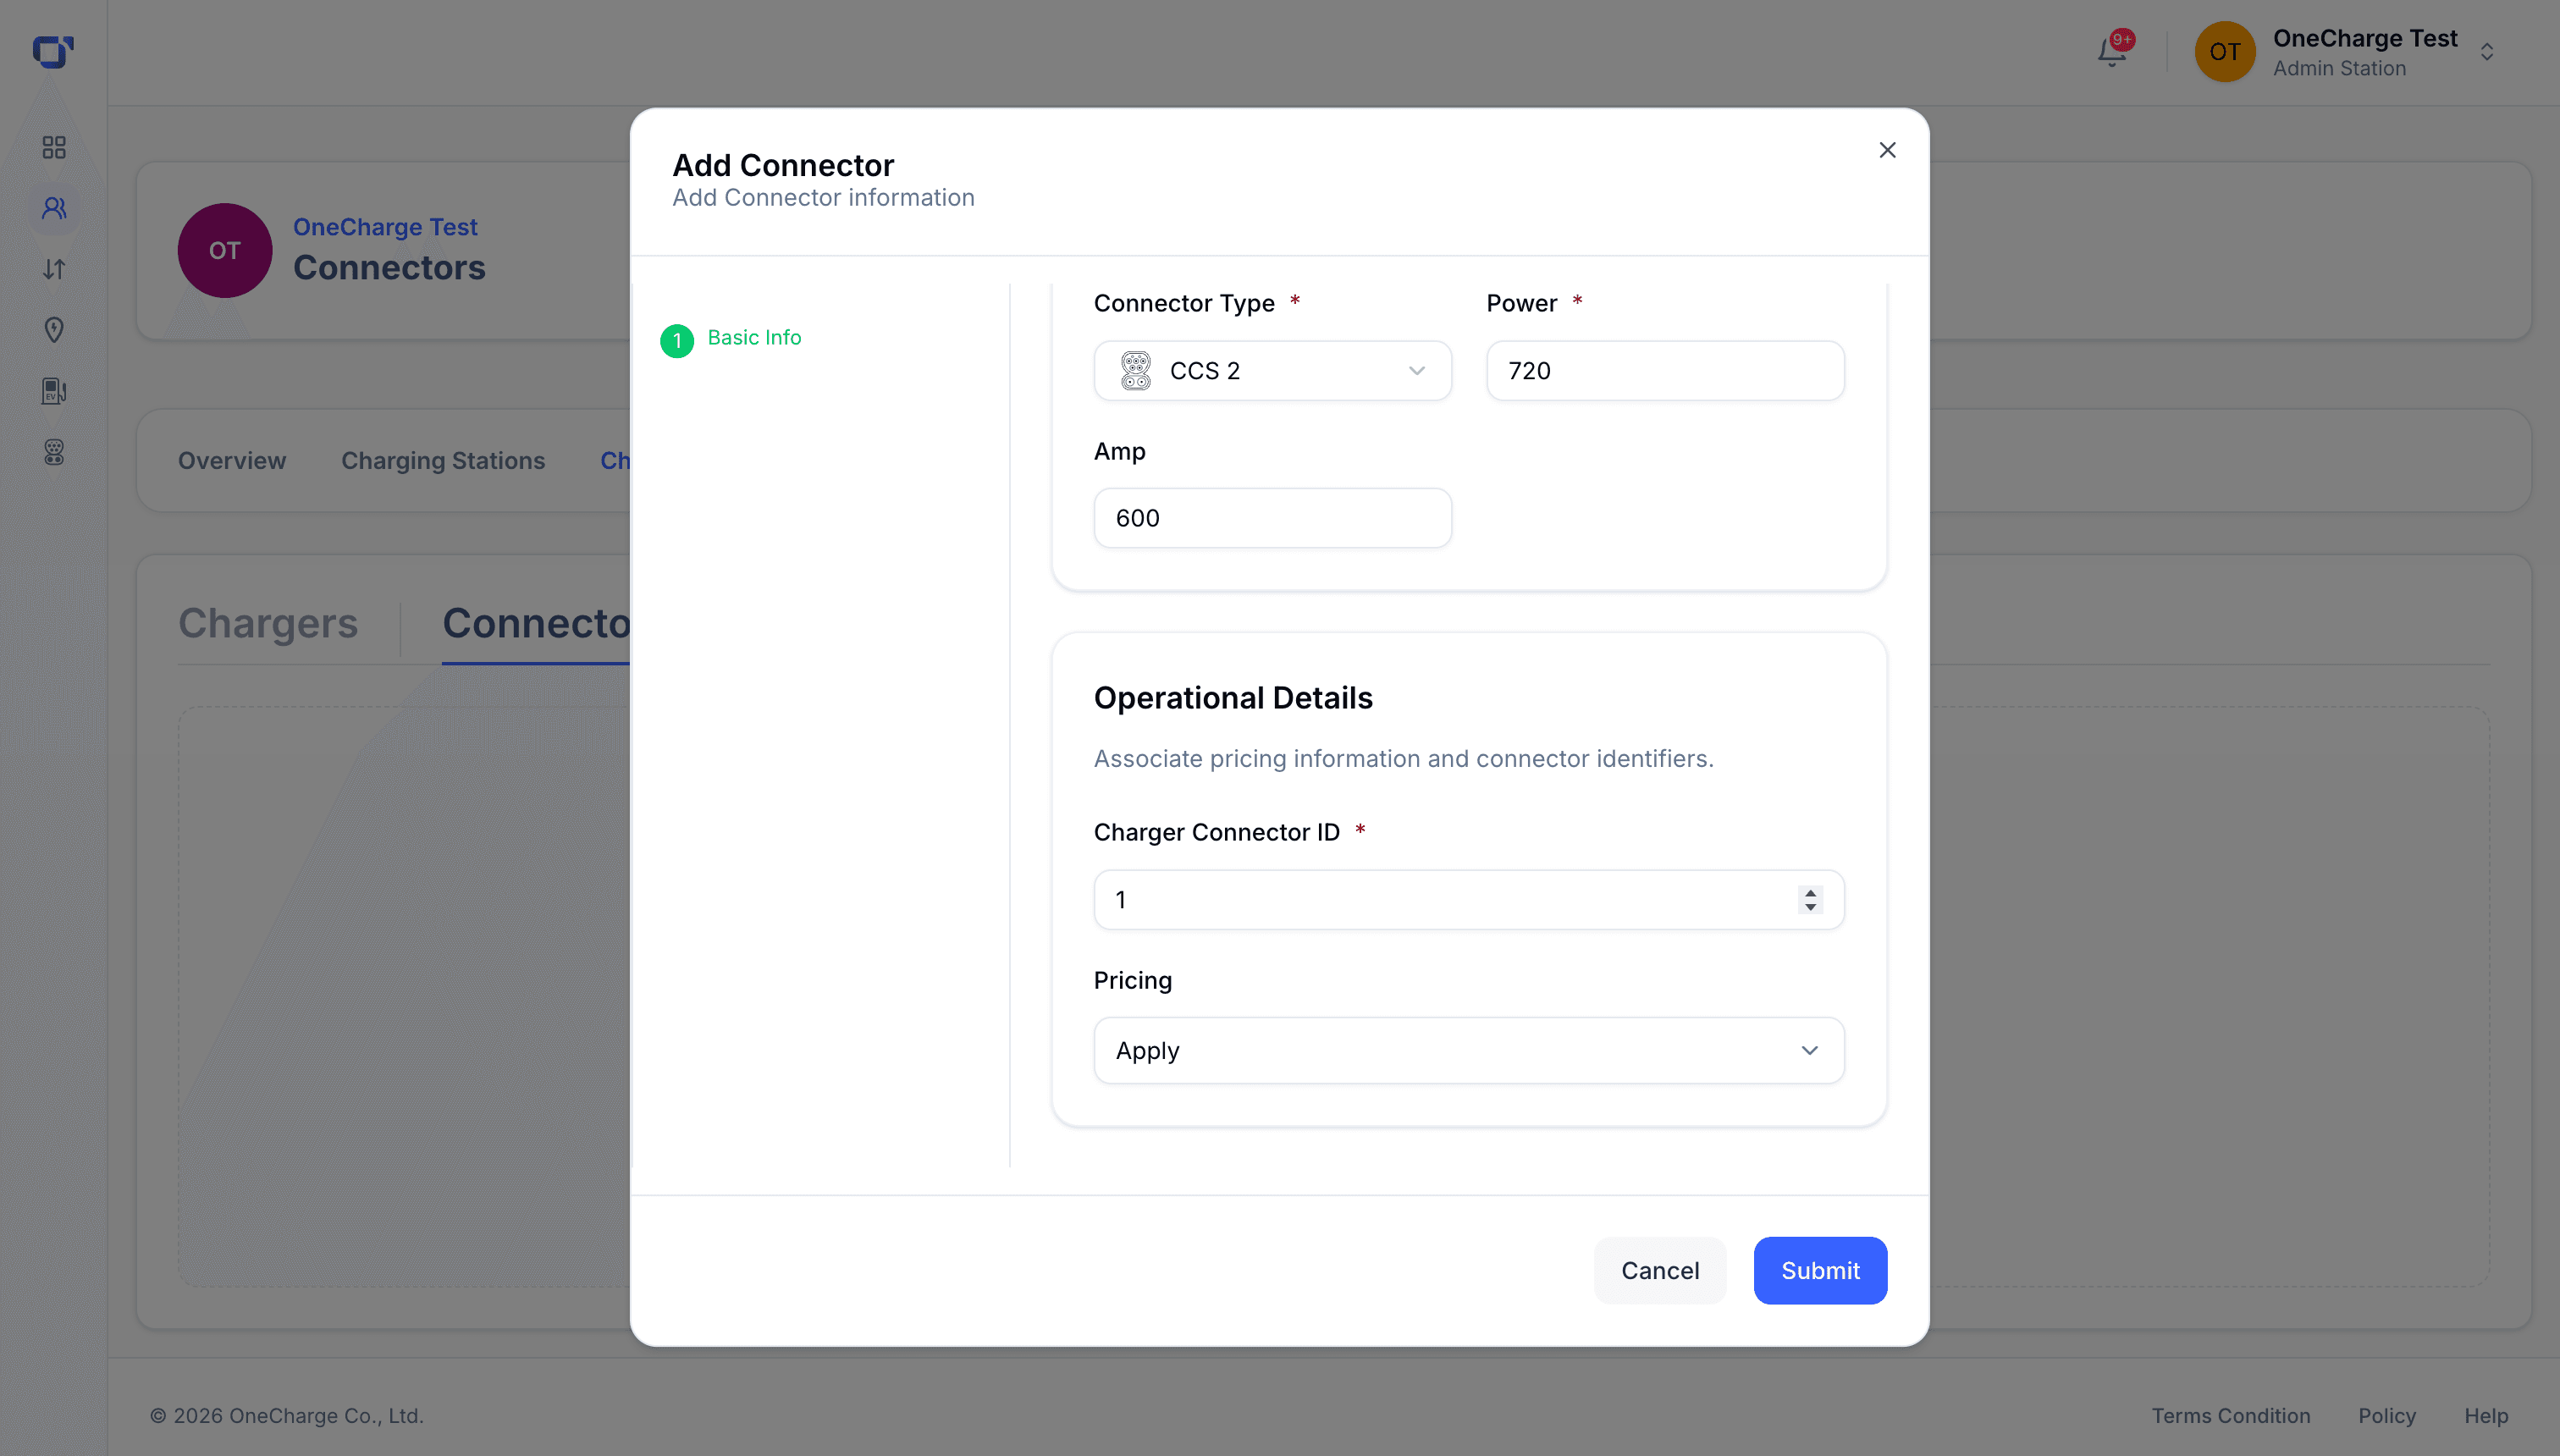
Set the charger's connector ID, then choose which price group applies to this connector.
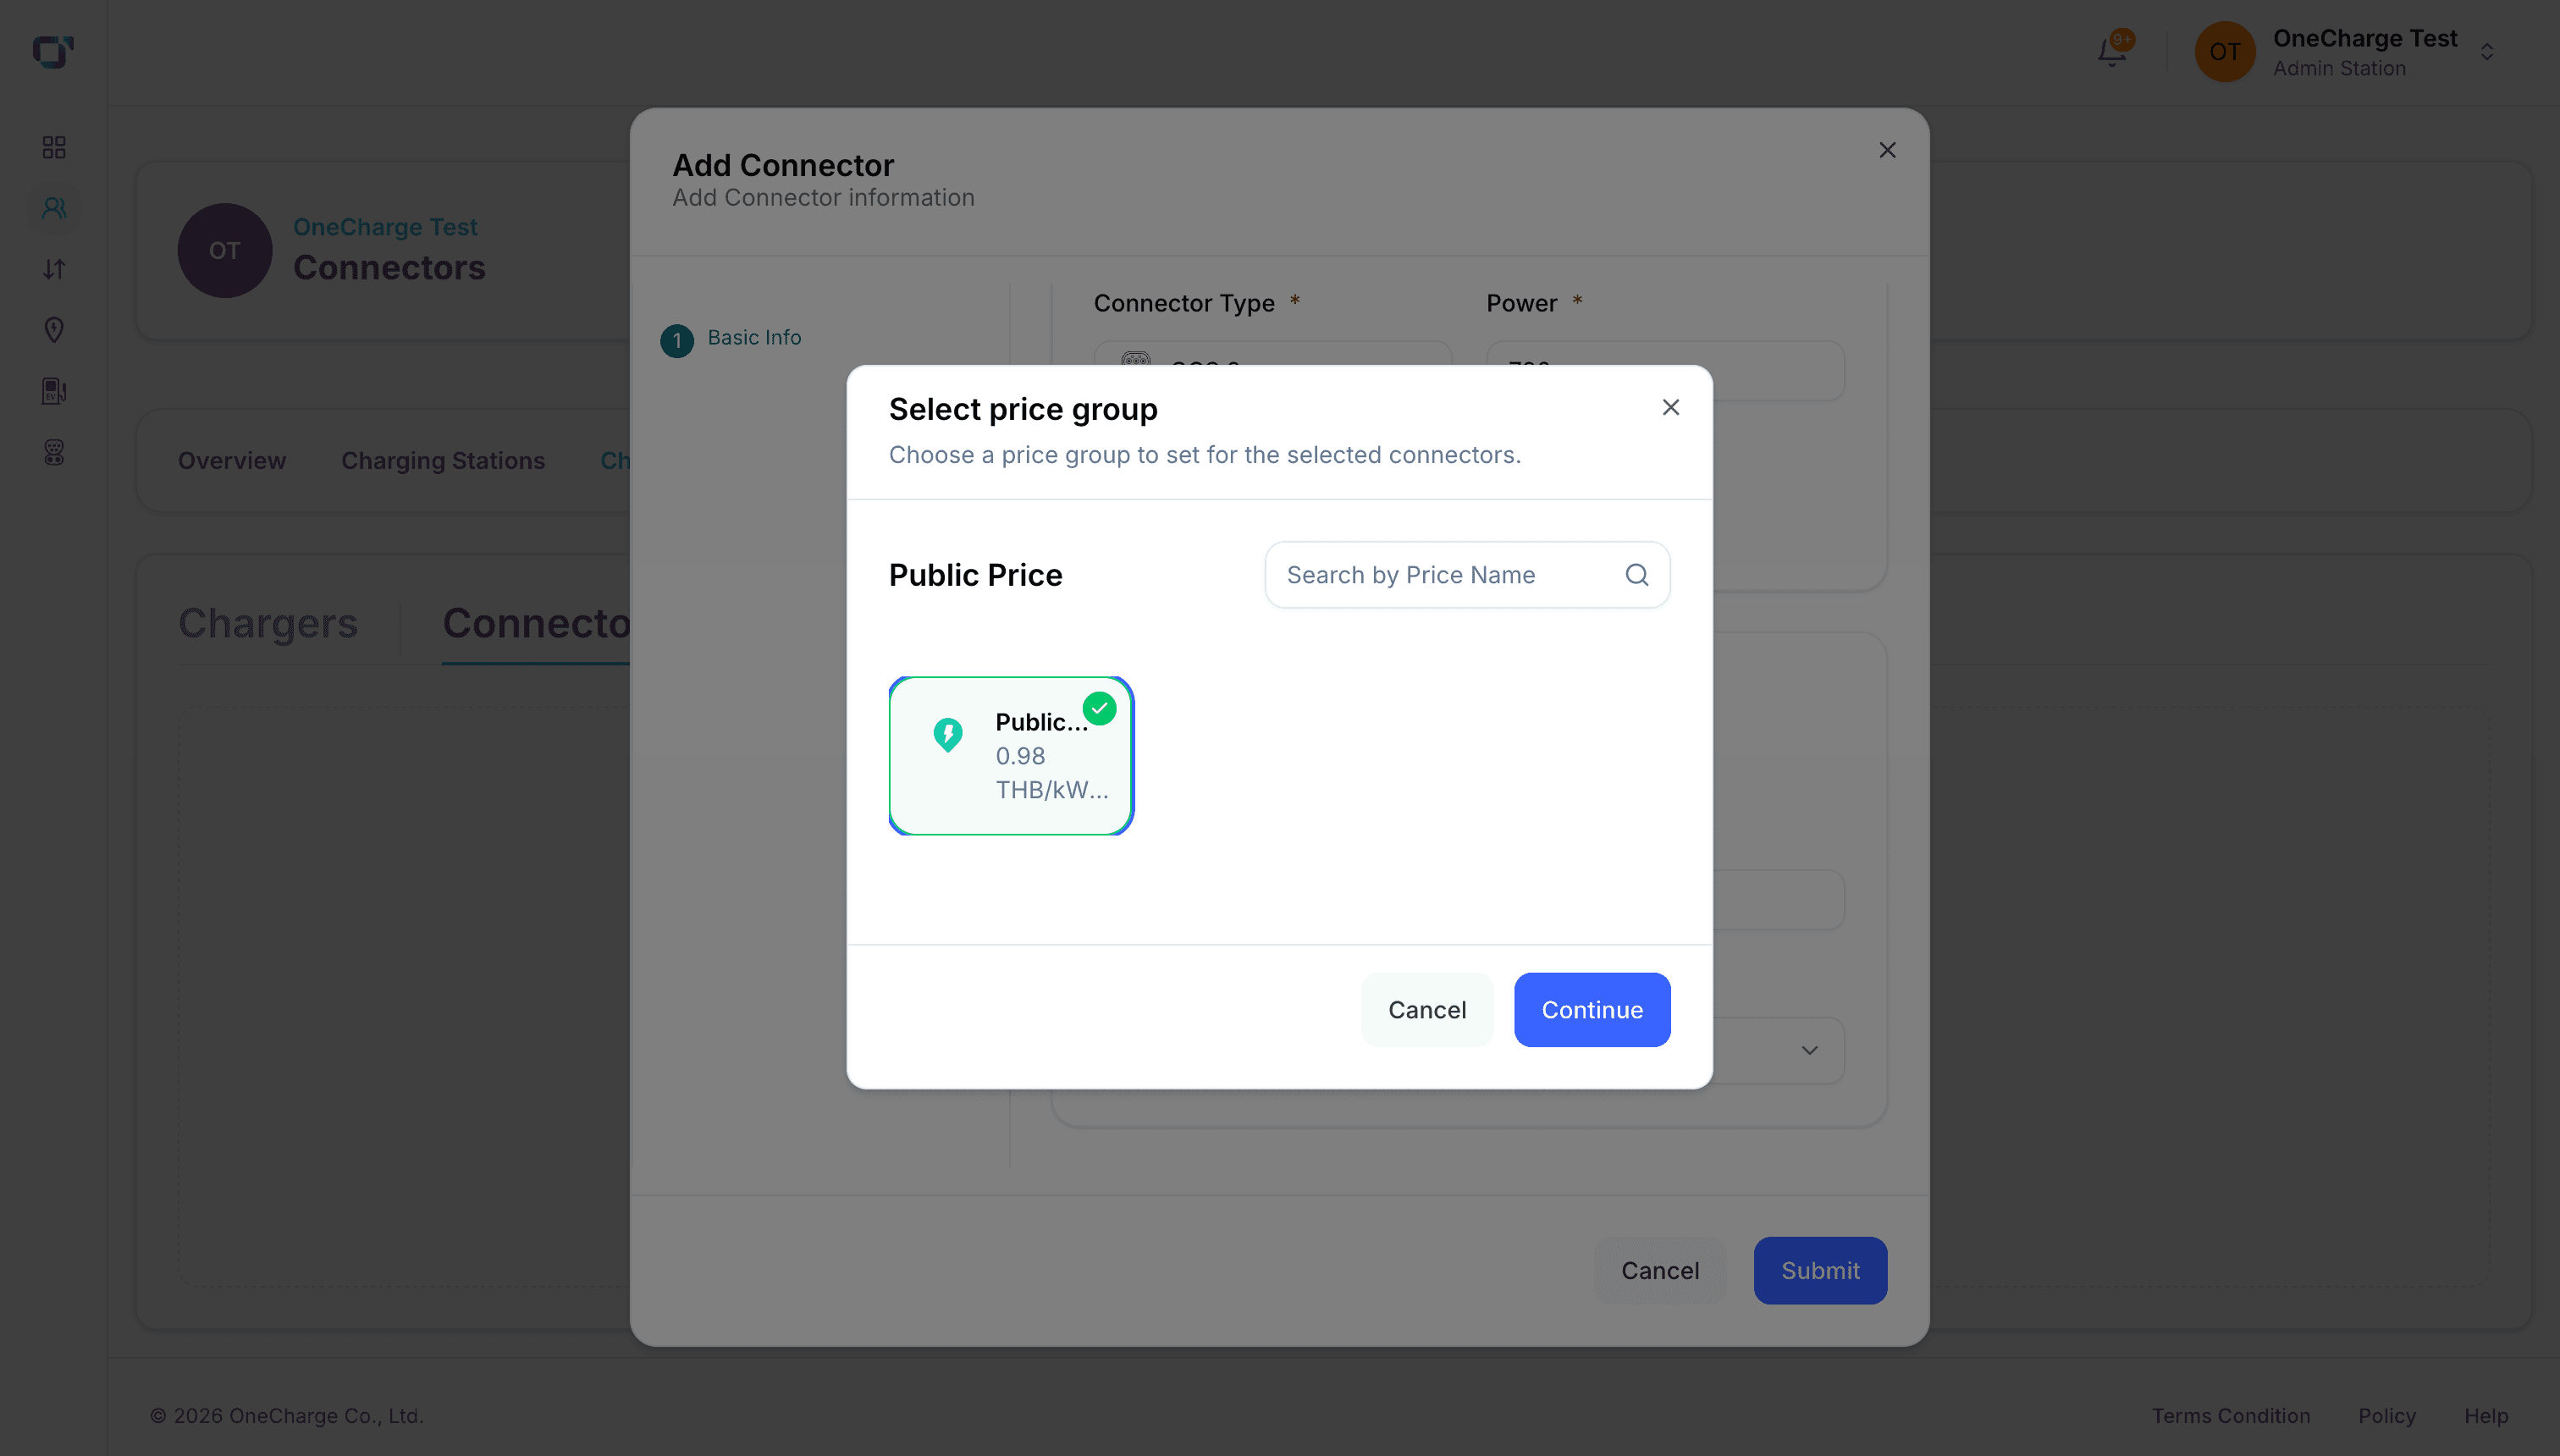
Pick a price group you've already created, like Public Price, and click Continue to attach it to this connector.
Set up pricing
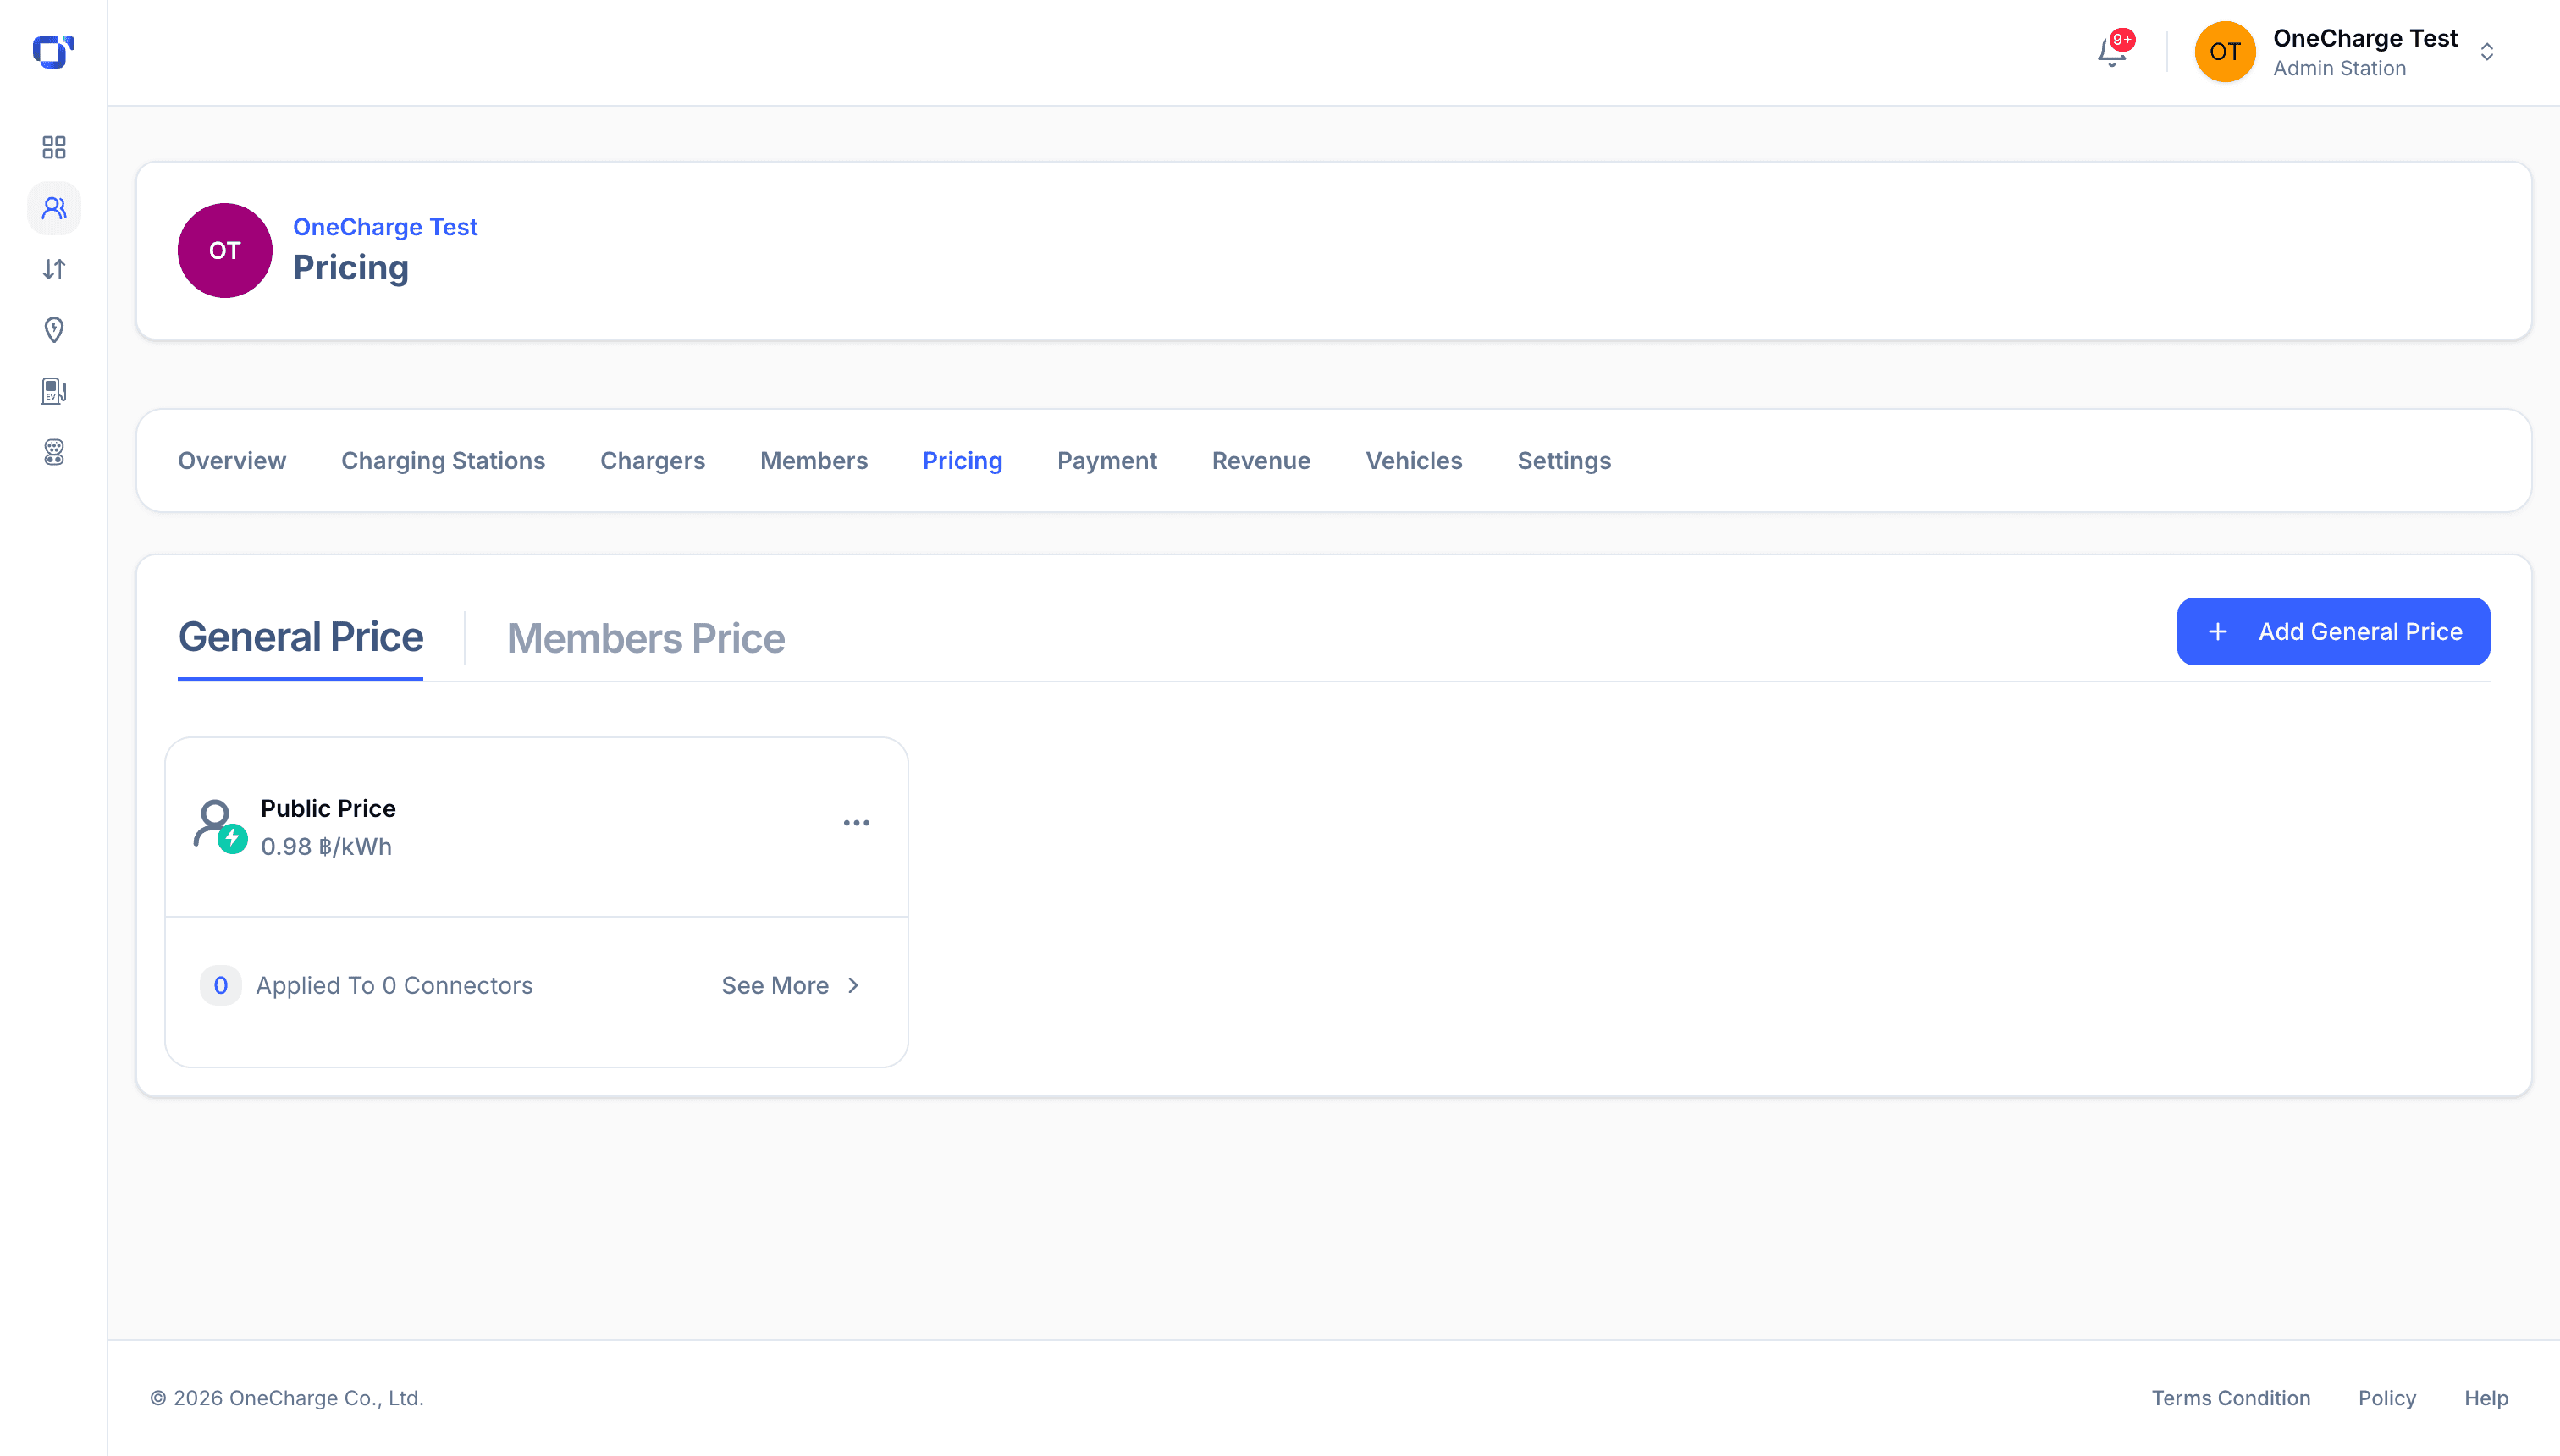
Open the Pricing tab — set two kinds of rates: General Price for everyone, and Members Price for your team.
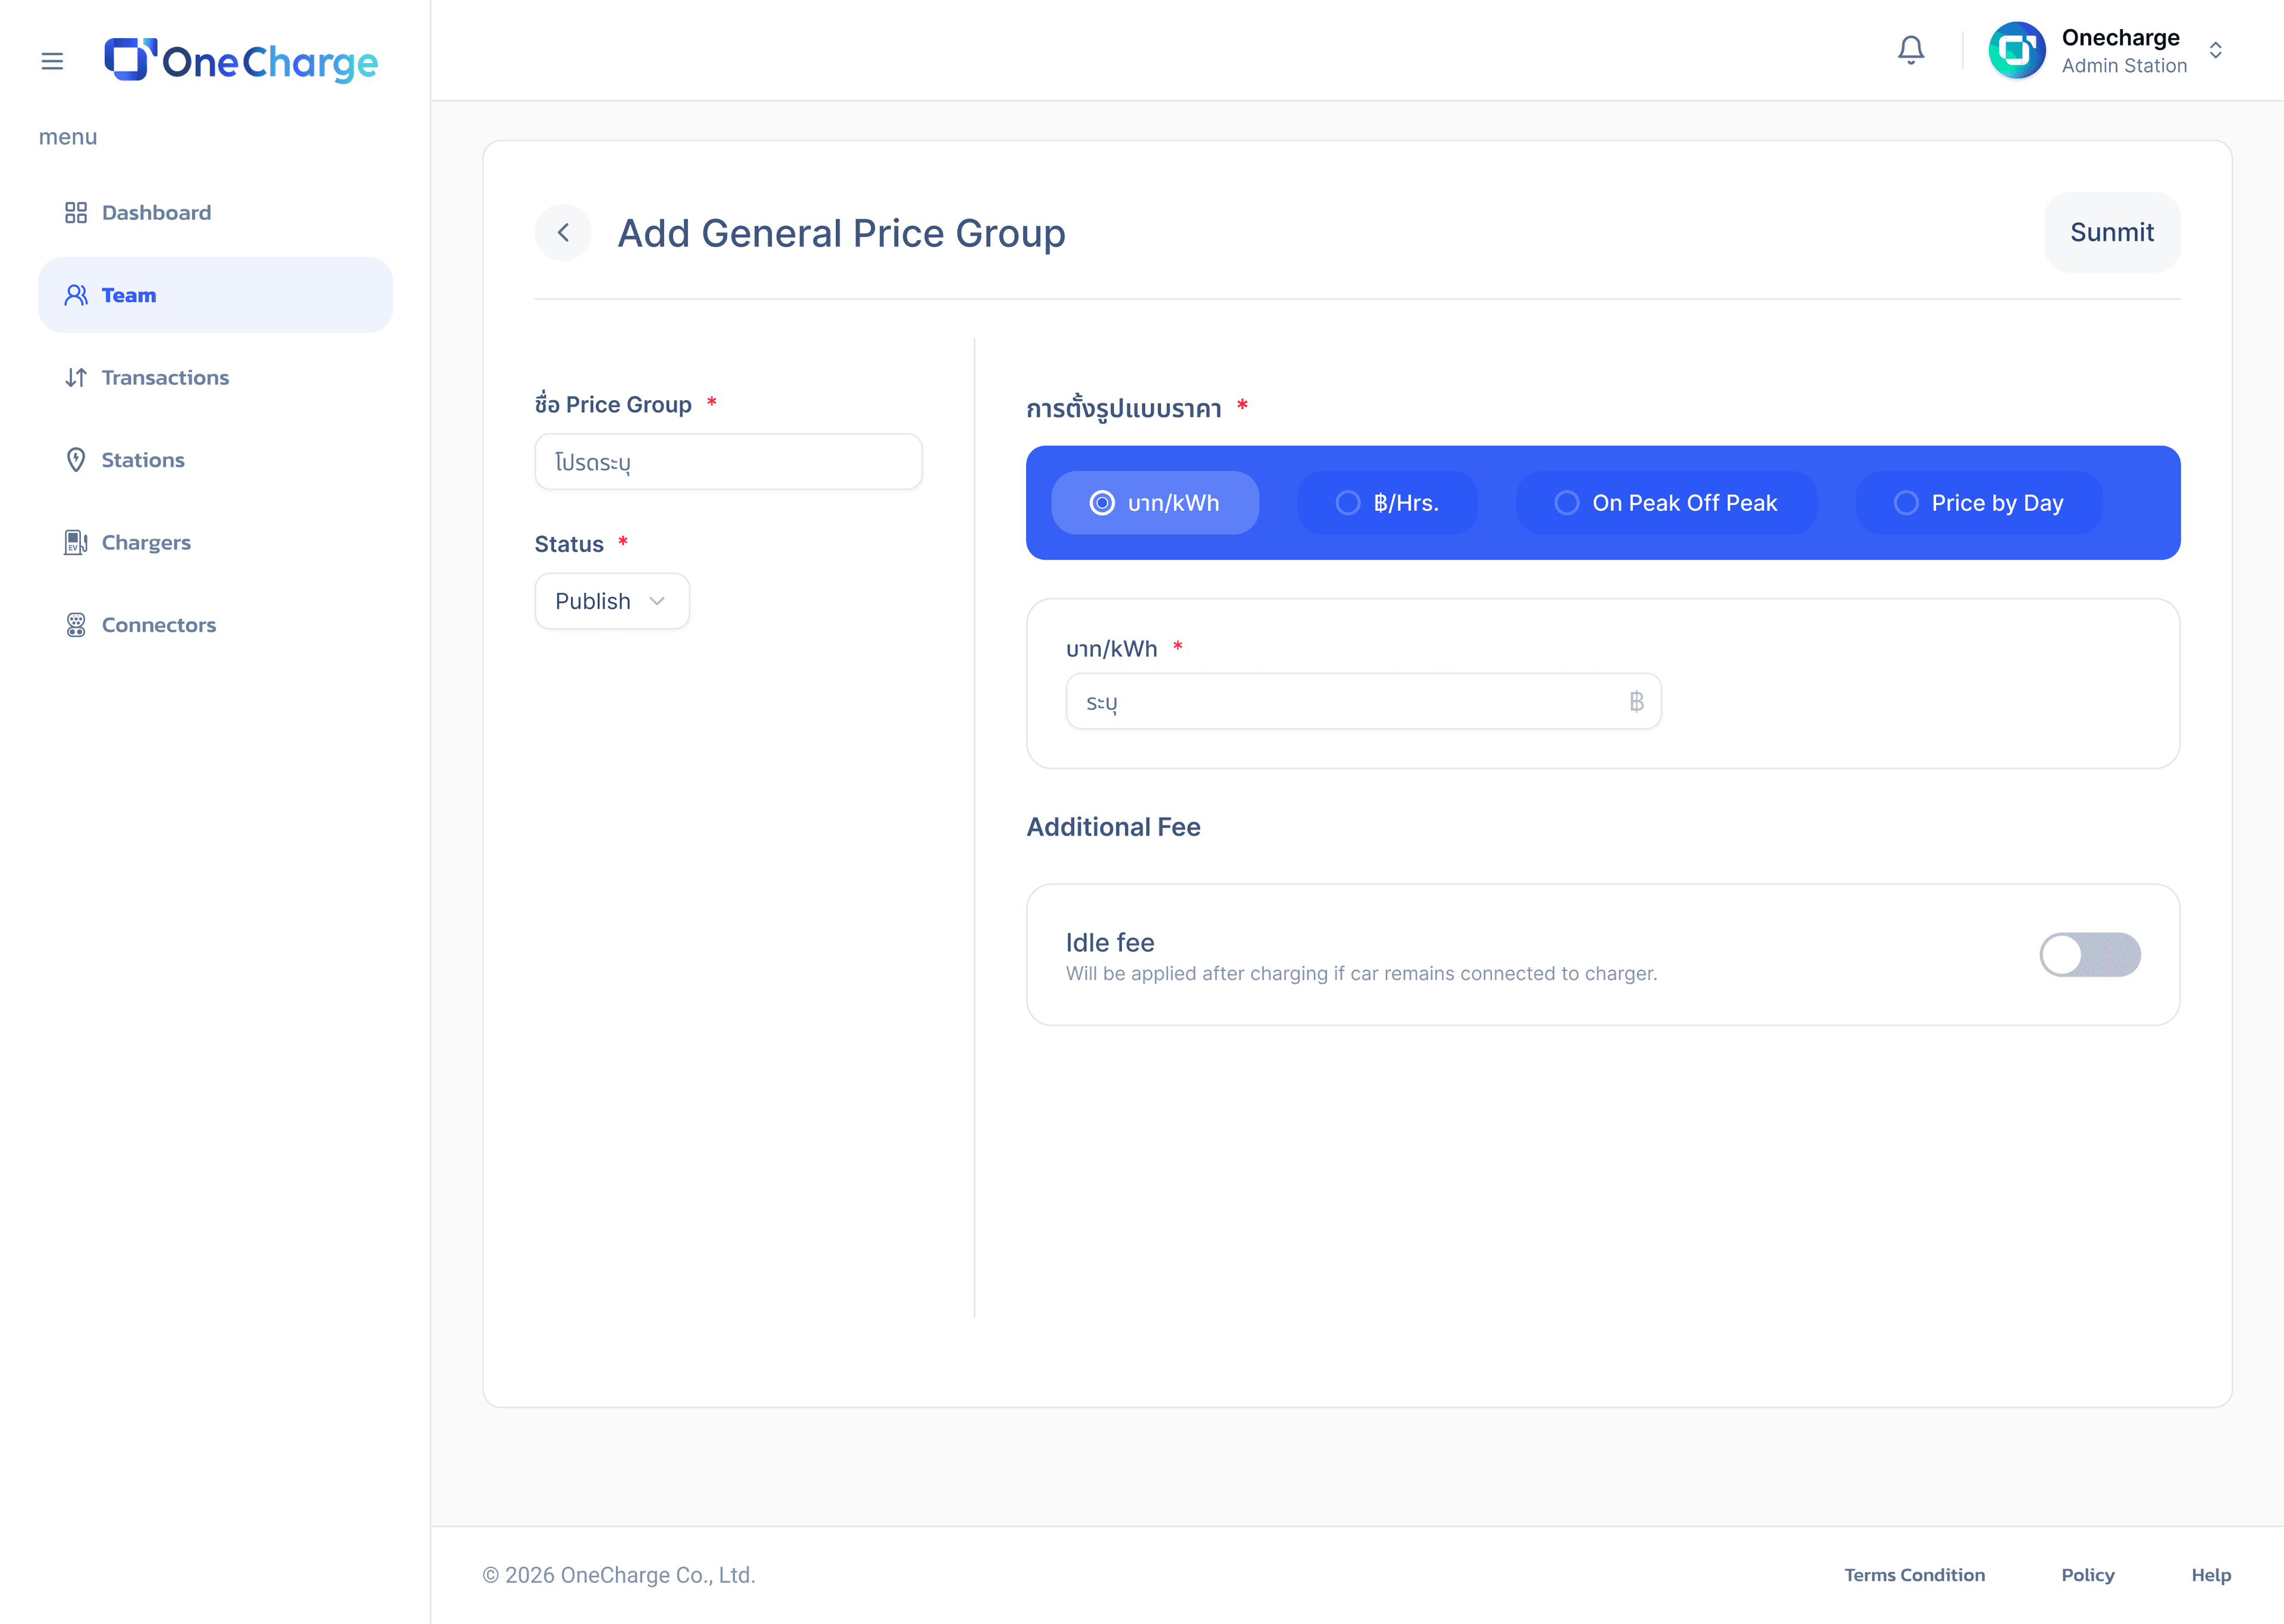
Name the price group, choose a pricing model (THB/kWh, THB/hour, On-Peak/Off-Peak, or price by day), and optionally enable an idle fee for cars left connected after charging finishes.
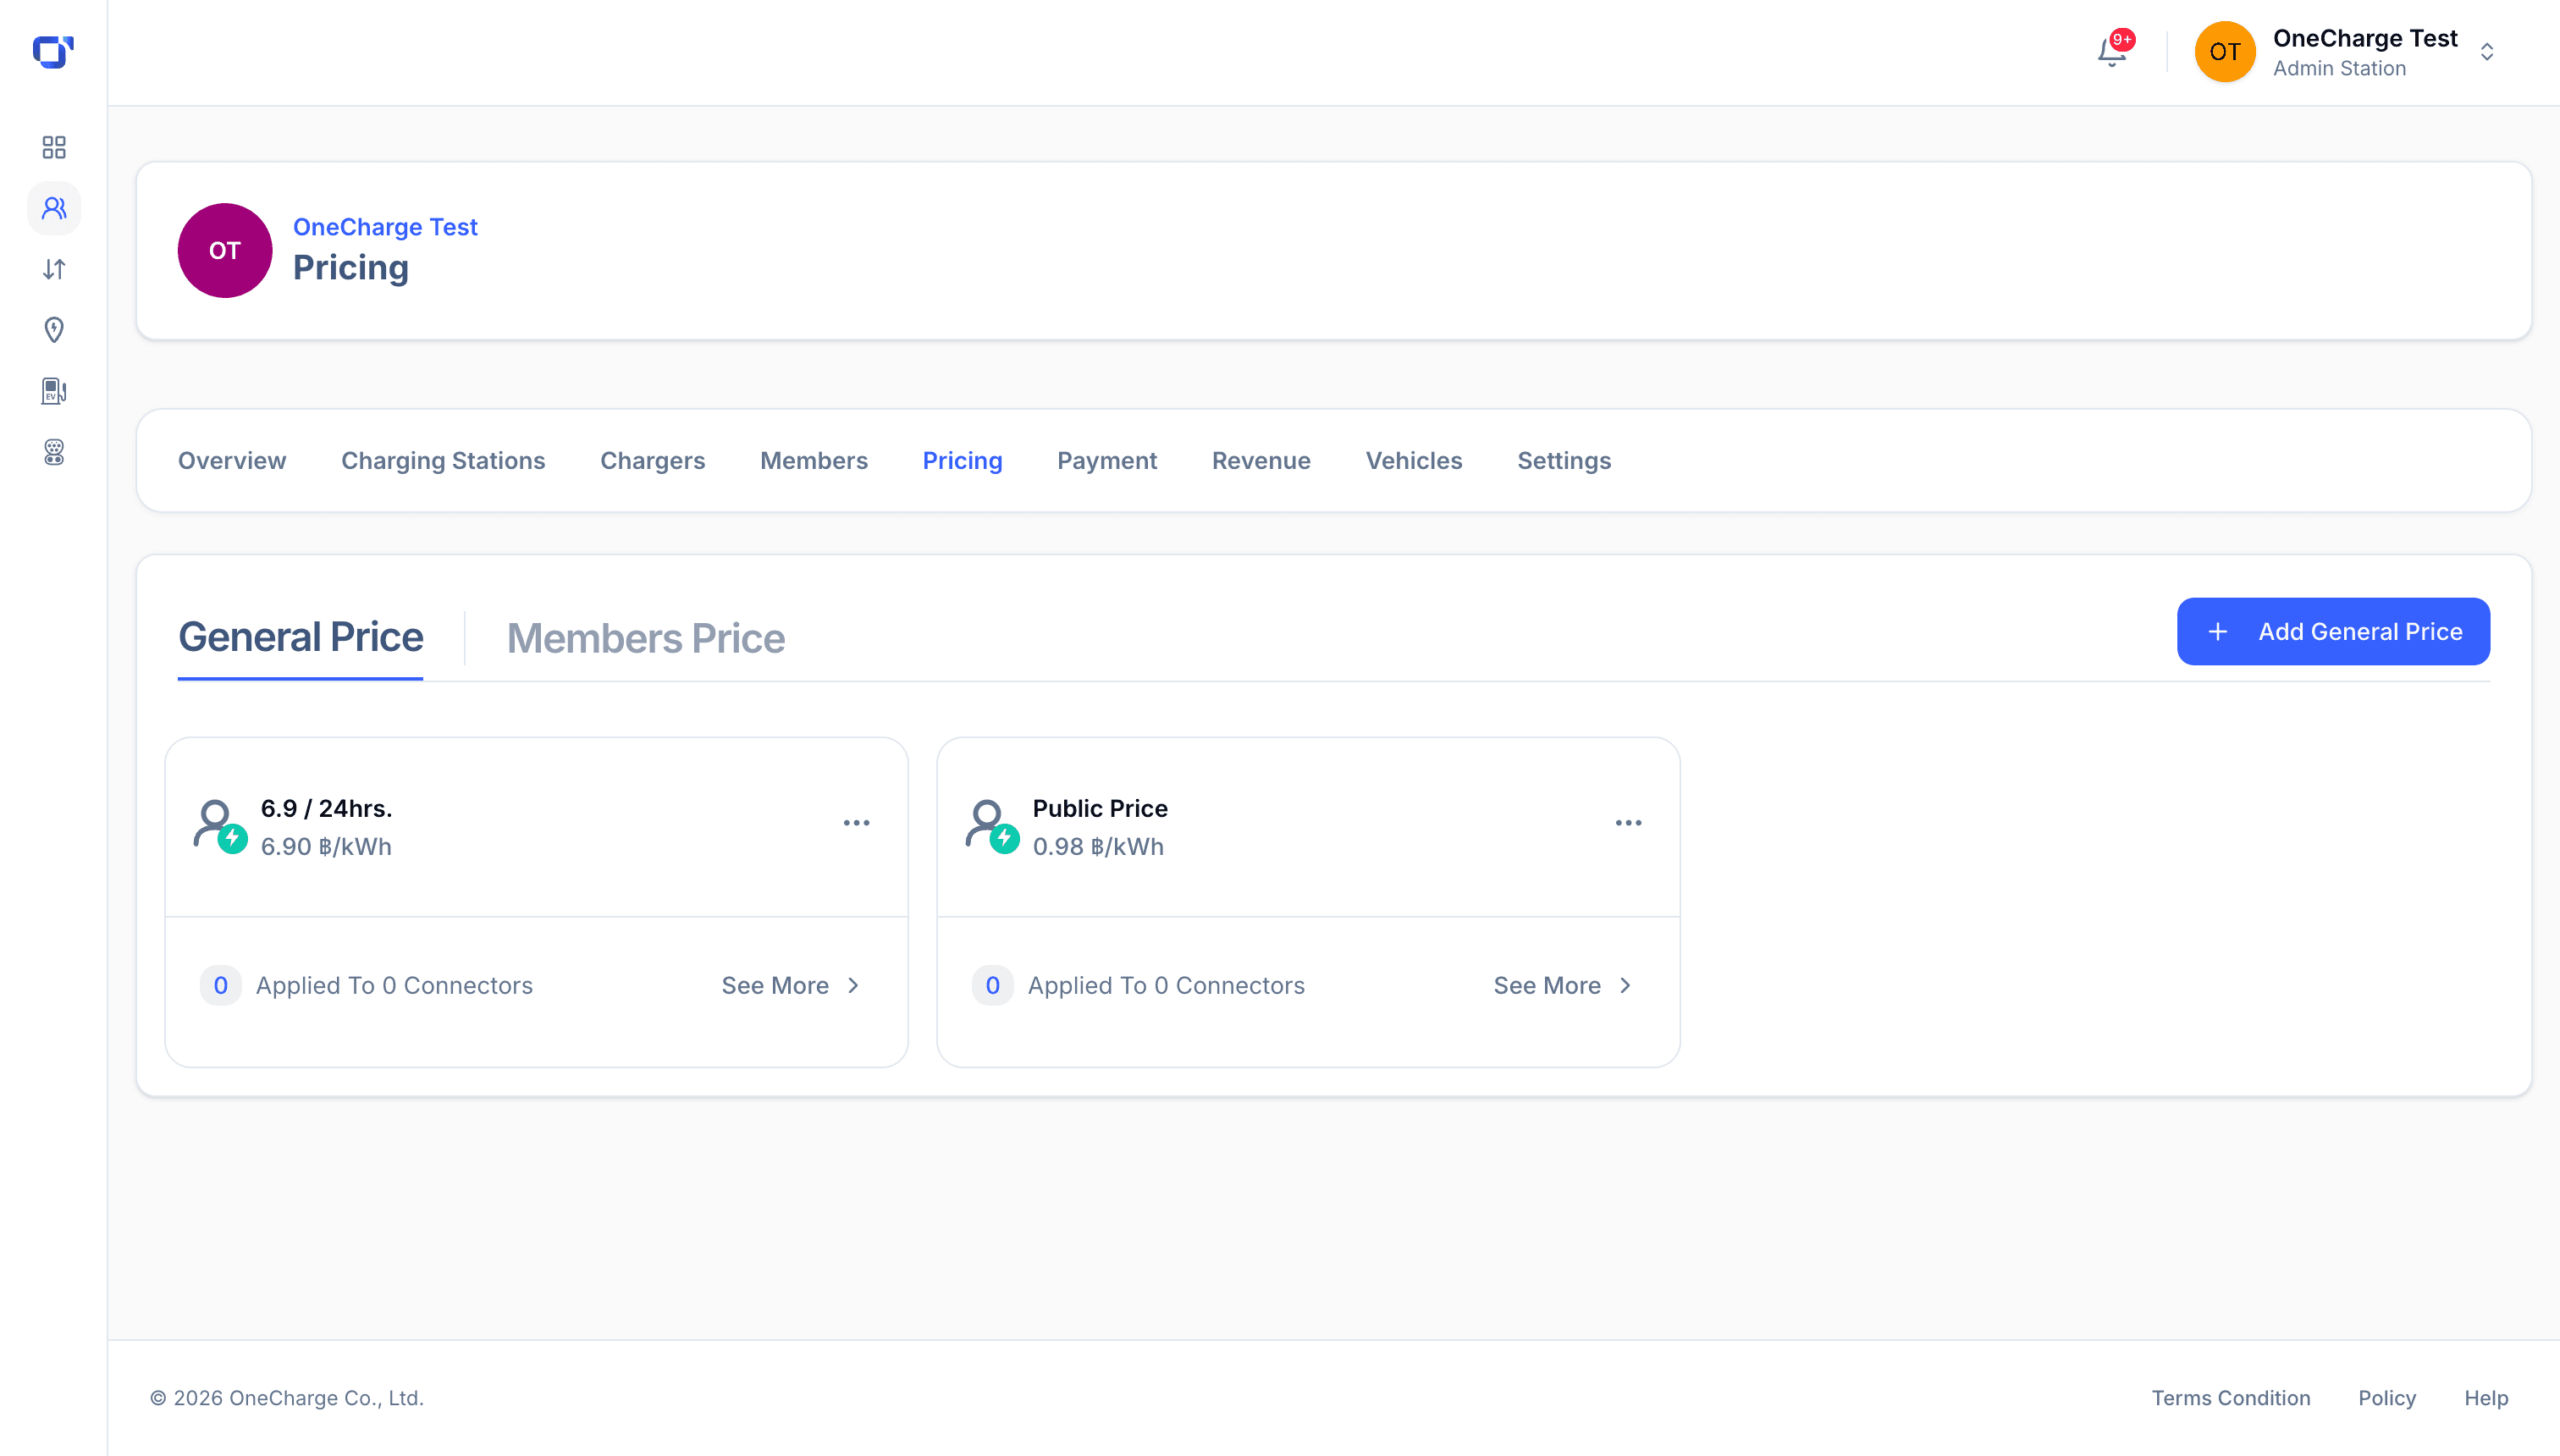
Your new price group appears in the list right away, ready to attach to connectors from the Connectors page.